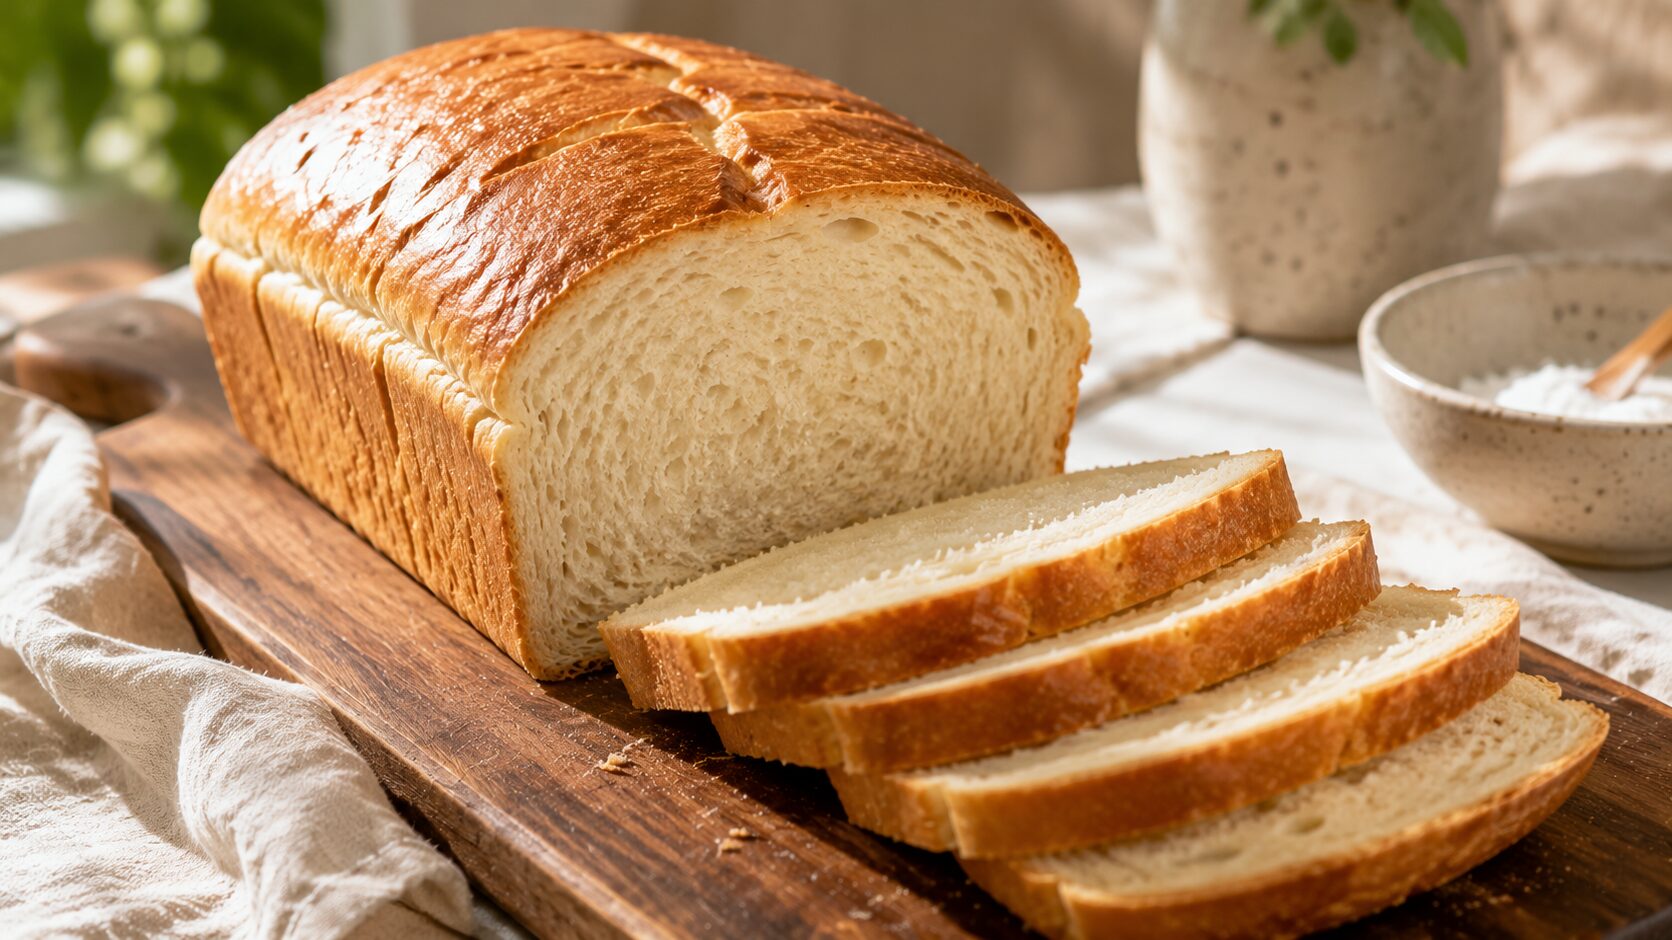
Most “high protein bread” you’ll find online is really just regular bread with a scoop of protein powder dumped in and hoped for the best. The result is usually dense, gummy, or bready in a way that falls apart the second you build a sandwich on it.
Real high protein sandwich bread needs to do two jobs at once: hold together like an actual loaf you can slice thin, and pack in more protein per slice than a standard bakery loaf without turning gummy or dry. That’s a balancing act between flour, protein powder, and moisture — get the ratio wrong in either direction and you’ll taste it immediately.
If you’re looking for an even lighter loaf, you’ll also love this High Protein Egg White Bread, which uses whipped egg whites for an airy texture.
High protein sandwich bread gets its extra protein from a combination of bread flour (which is naturally higher in protein than all-purpose flour), a small amount of unflavored whey protein powder, and eggs, while yeast and a proper knead still do the work of building a soft, sliceable crumb. The key to avoiding a dense or gummy loaf is keeping the protein powder to a small percentage of the total dry ingredients and giving the dough enough hydration to compensate for how much moisture protein powder absorbs. Baked correctly, this loaf slices clean, holds a sandwich without tearing, and delivers noticeably more protein per slice than a standard bakery loaf.
Table of Contents
High Protein Bread vs Traditional Bread at a Glance
| Feature | High Protein Sandwich Bread | Traditional Sandwich Bread |
|---|---|---|
| Protein | Higher per slice | Lower |
| Texture | Soft with a slightly chewier bite | Soft and airy |
| Satiety | More filling | Less filling |
| Best For | Meal prep, fitness, high-protein diets | Everyday sandwiches |
| Structure | Holds heavy fillings well | Can become soggy faster |
Why You’ll Love This Bread
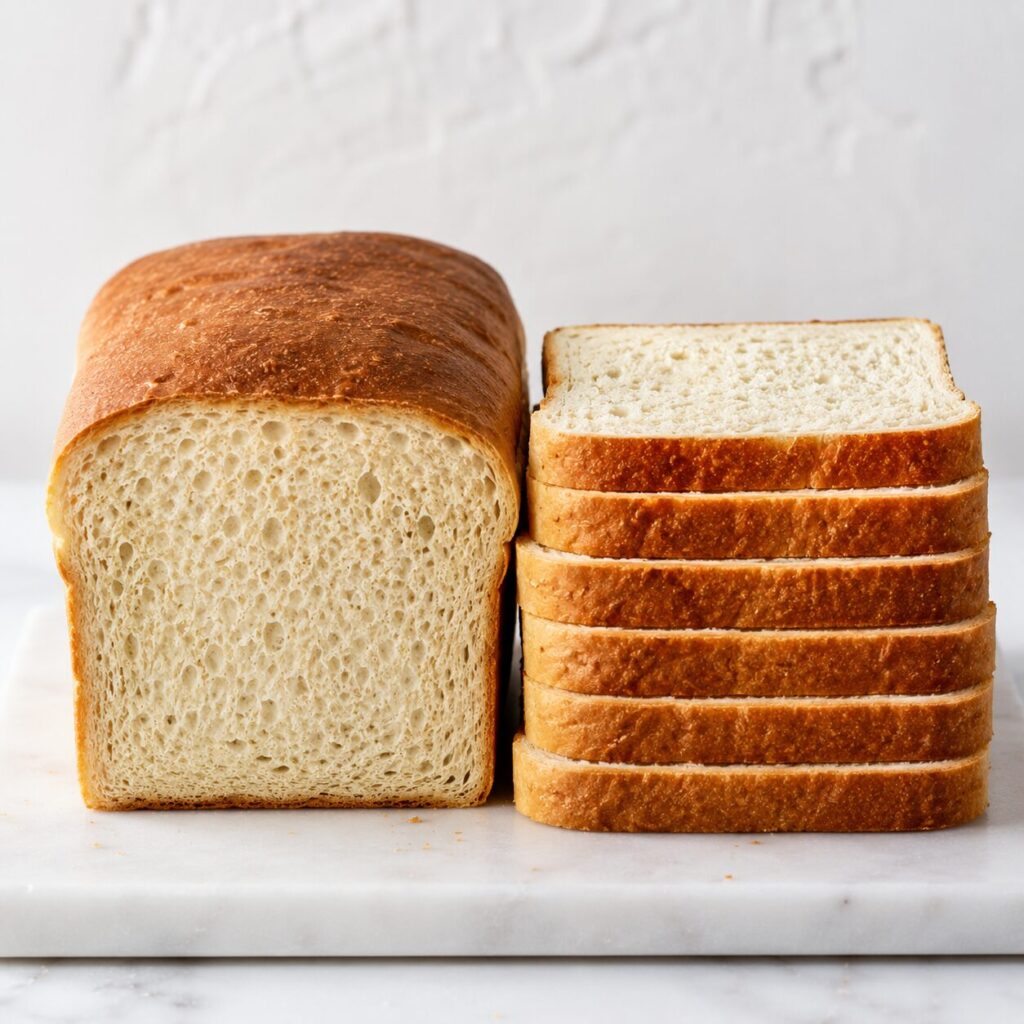
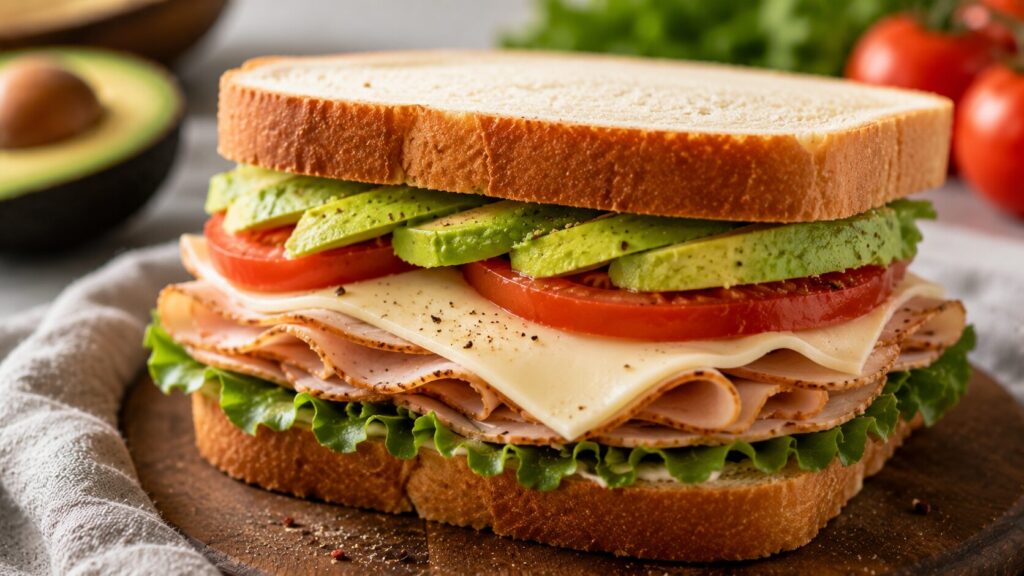
This isn’t a novelty protein-powder loaf that tastes like a shaker bottle. It’s a real sandwich bread — soft, slightly chewy, with a proper crust — that just happens to carry meaningfully more protein per slice because of how it’s built. It slices thin enough for a clean sandwich, toasts properly, and doesn’t fall apart under a stack of turkey and cheese.
It’s also genuinely simple to make. There’s no unusual technique here, just a standard enriched bread dough with a few specific swaps that boost protein without wrecking the texture — which means if you’ve made any yeasted bread before, this will feel familiar from the first knead.
What Makes It High Protein
The primary factor behind this bread’s protein count is layered, not single-source — three separate ingredients are each contributing, rather than relying on one protein powder to do all the work.
Bread flour itself carries more protein than all-purpose flour, simply because of how it’s milled — that difference alone gives this loaf a head start before any protein powder is even added. A modest amount of unflavored whey protein powder adds a further, concentrated boost without overwhelming the dough’s structure, as long as it stays a small fraction of the total flour weight. Eggs contribute both protein and fat, softening the crumb while adding to the total protein count per slice. Stack all three together and you get a loaf with noticeably more protein than a standard sandwich bread, without needing to lean on any single ingredient hard enough to damage the texture.
Is This Recipe Right for You?
Choose this recipe if you:
- ✅ Want more protein without sacrificing texture.
- ✅ Meal prep lunches.
- ✅ Need bread that holds hearty sandwiches.
- ✅ Prefer homemade over store-bought protein bread.
Consider another recipe if you:
- ❌ Need a gluten-free loaf.
- ❌ Follow a strict keto or carnivore diet.
- ❌ Want a quick no-yeast bread.
Ingredients Explained
- 3 cups (360 g) bread flour
- 1/4 cup (30 g) unflavored whey protein isolate
- 2 1/4 tsp (1 packet) instant yeast
- 1 cup (240 ml) warm water (about 110°F/43°C)
- 2 tbsp honey
- 2 tbsp olive oil or melted butter
- 2 large eggs, room temperature
- 1 1/2 tsp fine sea salt
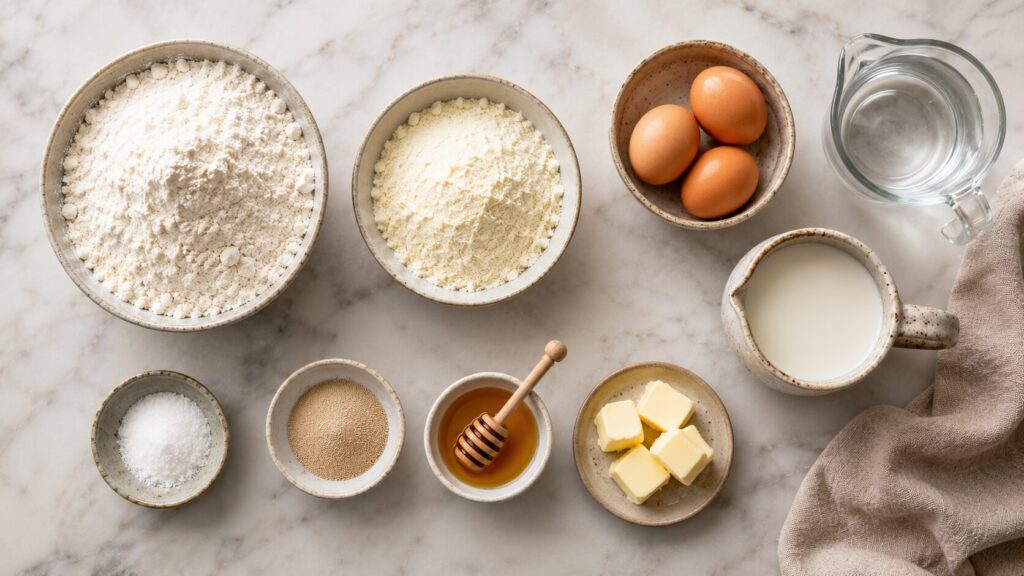
Bread flour is milled from wheat with a higher natural protein content than all-purpose flour, which means it develops a stronger gluten network when kneaded — the stretchy protein structure that gives bread its chew and its ability to trap gas as it rises. That stronger network is part of why this loaf can absorb the extra protein powder without collapsing into a dense brick.
Whey protein isolate adds concentrated protein without much additional bulk, since it’s been filtered to removeost of the fat and lactose that whey concentrate carries. It’s added in a relatively small amount here specifically because protein powder doesn’t develop gluten the way flour does — too much of it dilutes the flour’s structural protein without replacing what it displaces.
The same protein powder also works beautifully in this 2 Ingredient Protein Cheesecake.
Instant yeast is what actually gives this bread its rise, through fermentation that produces carbon dioxide, which gets trapped inside the gluten network built during kneading. Nothing about adding protein powder changes what yeast needs to do its job — it still needs warmth, time, and a dough that isn’t so dense it can’t expand.
Eggs add protein, fat, and moisture, all of which soften the crumb and help the loaf stay tender rather than turning tough as it bakes.
Ingredient Science: How Protein Powder Changes Gluten Development
The real issue with adding protein powder to bread is one that most recipes never explain: protein powder isn’t a wheat protein, and it doesn’t behave like one.
Gluten forms specifically from two proteins found in wheat flour — glutenin and gliadin — which link together into a stretchy, elastic network when the dough is kneaded and hydrated. Whey protein, by contrast, doesn’t form gluten at all; it’s a completely different protein structure that adds nutritional protein content without contributing to that stretchy network. This is exactly why dumping in too much protein powder produces a dense, crumbly loaf — you’re displacing some of the flour that would have built structure, and replacing it with a protein that can’t do that particular job.
Baker’s Tip: Keep protein powder under about 10% of your total flour weight in any yeasted bread. Past that point, you’re trading structure for protein content, and the texture pays for it.
The practical takeaway is that this recipe’s ratio isn’t arbitrary — 1/4 cup of protein powder against 3 cups of bread flour keeps the gluten-forming proteins firmly in the majority, so the dough can still build the elastic network it needs to trap gas and rise properly.
Best Protein Options
Why this happens: not every protein powder behaves the same way once it’s mixed into a dough, and the differences matter more here than they would in a shake.
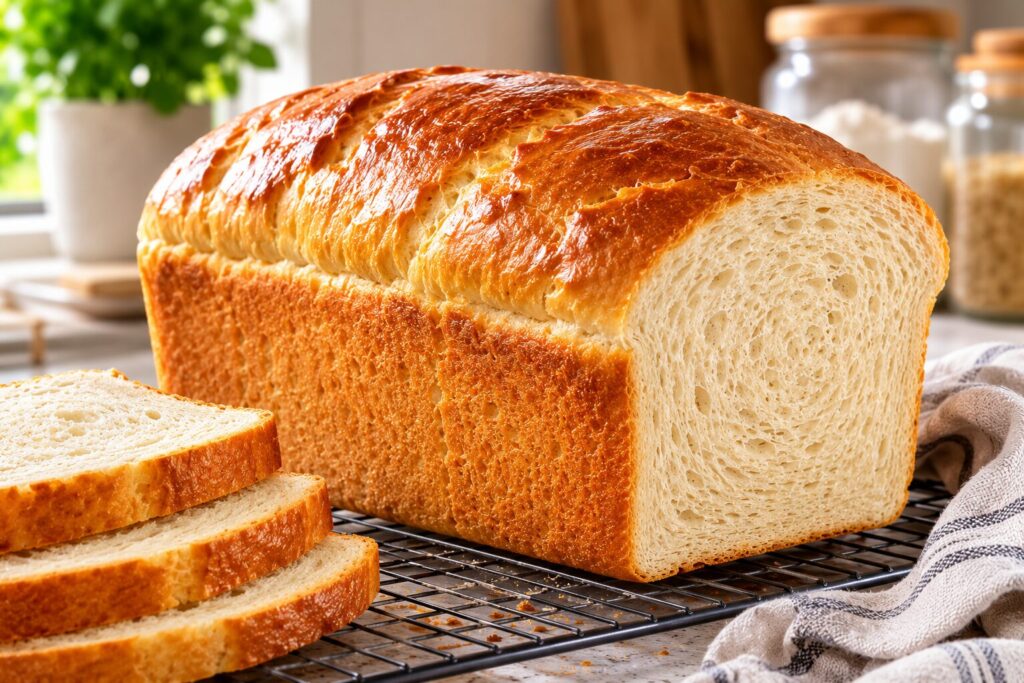
Whey protein — especially isolate — dissolves and blends smoothly into a wet dough, mixing in without leaving a gritty texture behind, which is why it’s the standard choice for baked goods like this. Casein protein, by contrast, absorbs liquid much more slowly and can leave a denser, slightly gummy texture if used in the same quantity, since it doesn’t hydrate at the same rate during a normal knead.
| Whey Protein | Casein Protein | |
|---|---|---|
| Hydration speed | Fast, blends smoothly | Slow, can leave a gummy texture |
| Best use in this recipe | Ideal — dissolves cleanly into the dough | Not recommended at the same ratio |
| Texture effect | Minimal disruption to crumb | Can create dense, slightly gummy pockets |
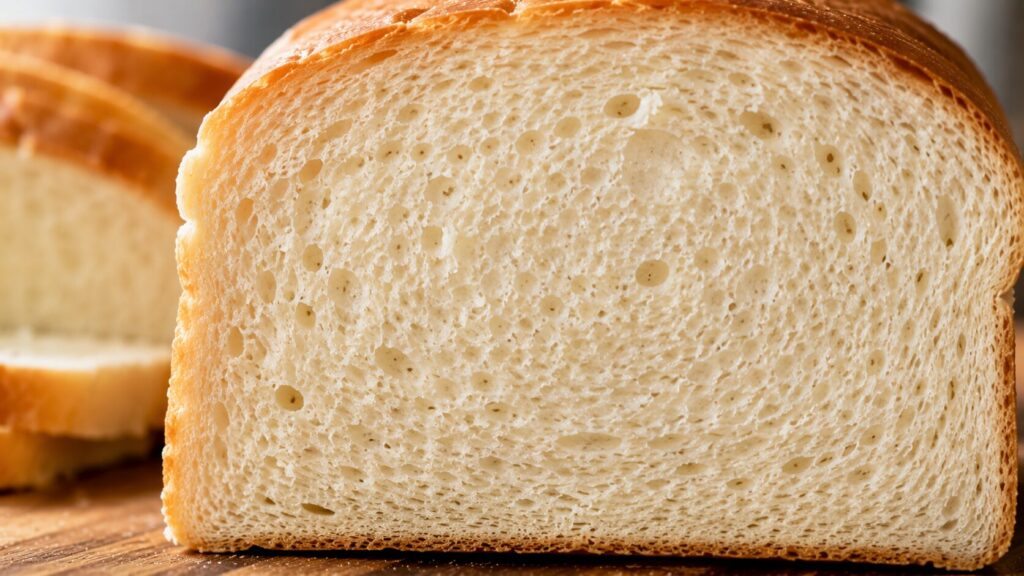
Choose whey protein isolate if you want the cleanest texture with the least disruption to the dough’s structure. Avoid casein at this ratio unless you’re prepared to increase hydration further to compensate for how slowly it absorbs liquid.
Why This Recipe Works
Several small decisions work together to create a loaf that’s both high in protein and pleasant to eat:
- Bread flour builds a strong gluten network.
- Whey protein boosts protein without overpowering the dough.
- Eggs improve tenderness and structure.
- Proper hydration offsets whey protein’s moisture absorption.
- Controlled proofing helps the loaf rise evenly without collapsing.
Quick Recipe Timeline
Mix Ingredients
↓
Knead Dough
↓
First Rise
↓
Shape the Loaf
↓
Second Rise
↓
Bake
↓
Cool Completely
↓
Slice & Enjoy
Step-by-Step Instructions
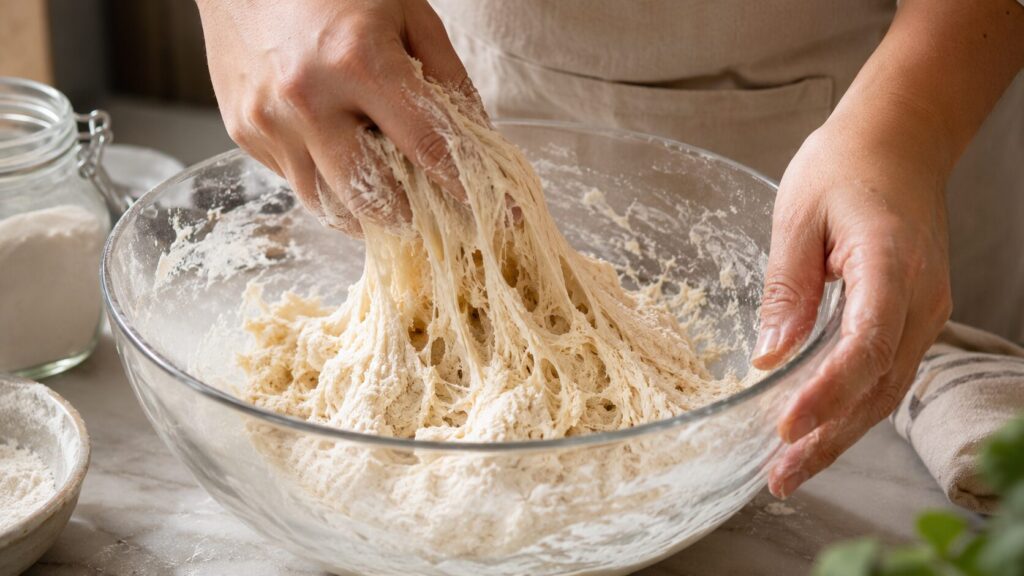
- In a large bowl, whisk the warm water, honey, and yeast together. Let it sit for 5–10 minutes, until foamy on top.
- Add the bread flour, protein powder, salt, eggs, and olive oil to the yeast mixture. Mix until a shaggy dough forms.
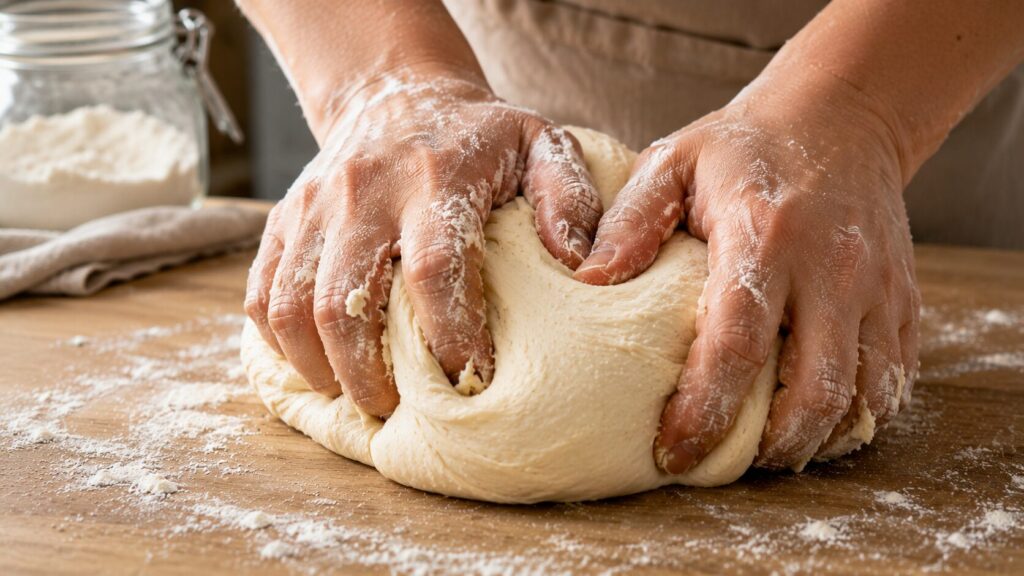
- Knead by hand for 8–10 minutes, or with a stand mixer’s dough hook for 6–7 minutes, until the dough is smooth, elastic, and springs back slowly when poked.
- Place the dough in a lightly oiled bowl, cover, and let it rise in a warm spot for 60–90 minutes, until roughly doubled in size.
- Punch down the dough gently, shape it into a loaf, and place it in a greased 9×5-inch loaf pan.
- Cover and let it rise again for 30–45 minutes, until the dough crests just above the rim of the pan.
- Preheat the oven to 350°F (177°C) while the dough finishes its second rise.
- Bake for 30–35 minutes, until the top is deep golden brown and the loaf sounds hollow when tapped on the bottom.
- Cool in the pan for 10 minutes, then turn out onto a wire rack and cool completely before slicing — at least 1 hour.
Once you’ve mastered this loaf, try making our High Protein Bagels using many of the same baking principles.
How to Tell It’s Perfectly Baked
Your loaf is ready when:
- The crust is deep golden brown.
- The loaf sounds hollow when tapped.
- The sides begin pulling slightly away from the pan.
- The bottom is evenly browned.
- An instant-read thermometer reaches 190°F (88°C) in the center.
Visual Texture Cues
Texture Check: After kneading, press the dough with two fingers. It should spring back slowly, leaving a faint indent rather than snapping back instantly or staying permanently dented. Instant snap-back means it needs more kneading; a dent that doesn’t recover at all means the dough is over-kneaded or too dry.
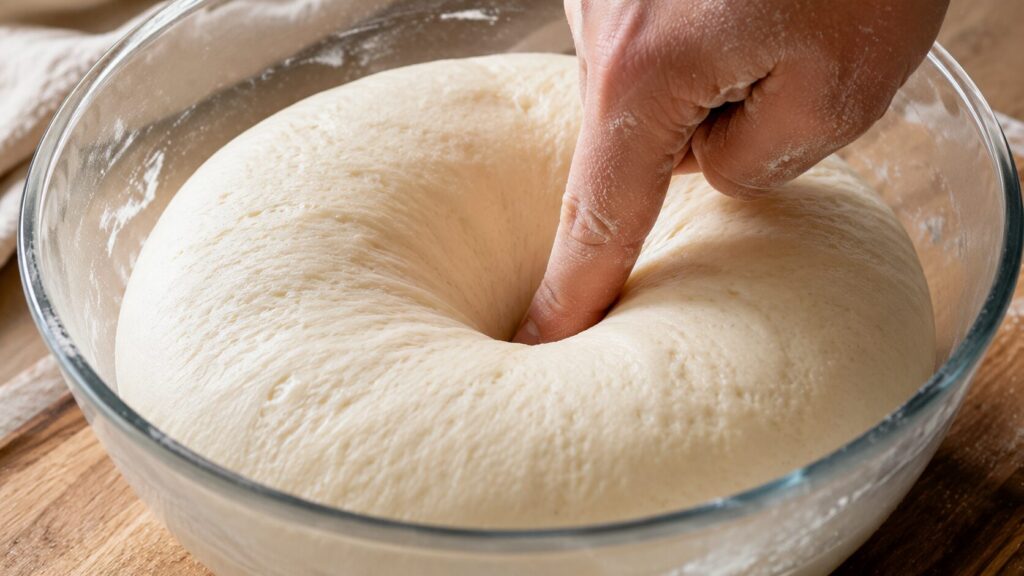
Texture Check: During the first rise, the dough is ready when a finger poked into it leaves an indentation that slowly fills back in about halfway. If it fills back in completely and quickly, it needs more time. If it doesn’t fill in at all, it’s over-proofed.
Kitchen Observations
Kitchen Observation: In my early batches, I kept getting a loaf that rose beautifully in the pan and then sank slightly in the center right after baking. I assumed I was underbaking it, so I kept adding extra time — which only dried out the crust without fixing the sink. It turned out the real issue was my second rise running too long while I got distracted with something else in the kitchen; the dough had over-proofed just enough that it couldn’t hold its structure once the oven’s heat hit it. Once I started timing the second rise more carefully and watching the dough instead of the clock, the sinking stopped completely.
Pro Baker Tip: Weigh your flour and protein powder with a digital kitchen scale whenever possible. Even small measurement differences can noticeably change hydration and loaf texture.
Common Mistakes
Common Mistake: Adding all the protein powder at once without adjusting hydration. Protein powder absorbs some of the dough’s moisture, so if you increase the amount beyond what this recipe calls for, add a tablespoon or two of extra water to compensate — otherwise the dough tightens up and the crumb turns dry.
Common Mistake: Skipping the “foamy” check on the yeast mixture. If your yeast doesn’t foam after 5–10 minutes in warm water, it’s likely dead or the water was too hot, and no amount of kneading afterward will fix a rise that never gets started.
Common Mistake: Slicing the loaf while it’s still warm. Bread continues to set its internal structure as it cools; slicing too early can make it seem gummy even when it’s fully baked.
Troubleshooting Guide
| Problem | Cause | Fix |
|---|---|---|
| Dense, heavy loaf | Too much protein powder relative to flour, or under-kneaded dough | Keep protein powder under 10% of flour weight; knead until smooth and elastic |
| Gummy interior | Sliced too early, or underbaked | Cool completely before slicing; check internal temperature reaches 190°F (88°C) |
| Loaf didn’t rise | Dead yeast, or water too hot when mixed | Confirm yeast foams before adding to the flour; use water around 110°F (43°C) |
| Sunken top | Dough over-proofed during the second rise | Watch the dough’s crest rather than the clock; bake once it just crests the pan rim |
| Dry, crumbly texture | Too little hydration for the amount of protein powder used | Add 1–2 extra tablespoons of water when increasing protein powder |
| Overly tight crumb | Over-kneaded dough | Stop kneading once the dough passes the slow springback test |
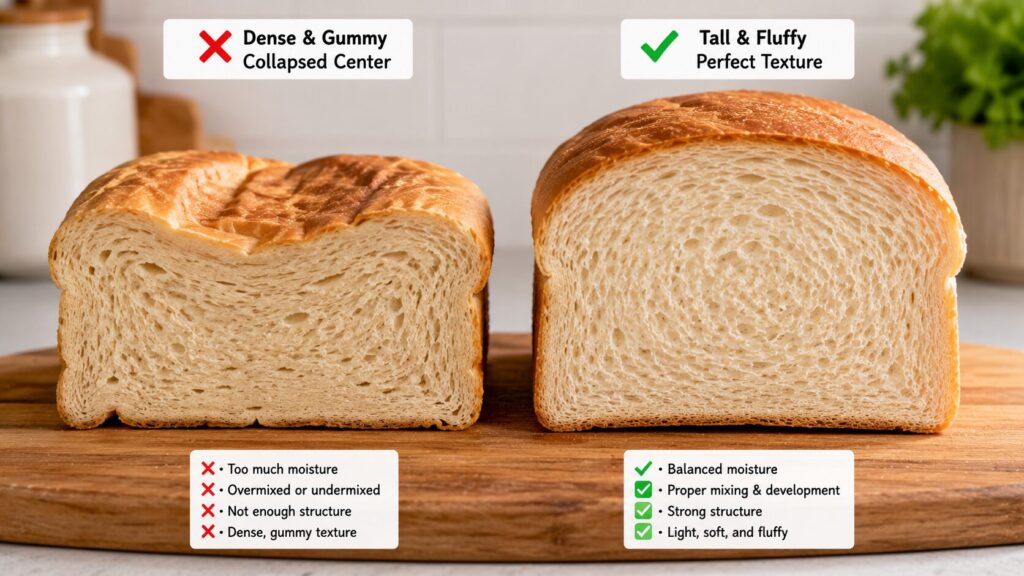
Texture Comparison
| Protein Bread (This Recipe) | Traditional Sandwich Bread | |
|---|---|---|
| Protein per slice | Noticeably higher | Standard |
| Crumb density | Slightly denser, still soft | Light and airy |
| Chew | A bit more substantial | Softer, less chew |
| Best for | High-protein diets, meal prep sandwiches | General everyday use |
Nutrition Comparison
| Per Slice | High Protein Sandwich Bread | Traditional White Bread |
|---|---|---|
| Calories | 145 | 140 |
| Protein | 8 g | 3 g |
| Carbohydrates | 22 g | 26 g |
| Fat | 3 g | 2 g |
| Satiety | Higher | Moderate |
Protein Per Serving
| Serving | Approximate Protein |
|---|---|
| 1 Slice | 8 g |
| 2 Slices | 16 g |
| 3 Slices | 24 g |
| 4 Slices | 32 g |
Protein values may vary slightly depending on the brand of bread flour and whey protein isolate used.
Bread Flour vs. All-Purpose Flour
| Bread Flour | All-Purpose Flour | |
|---|---|---|
| Protein content | Higher (typically 12–14%) | Lower (typically 9–11%) |
| Gluten development | Stronger, more elastic | Softer, less structured |
| Best for this recipe | Recommended — supports the added protein powder | Usable, but produces a slightly softer, less structured loaf |
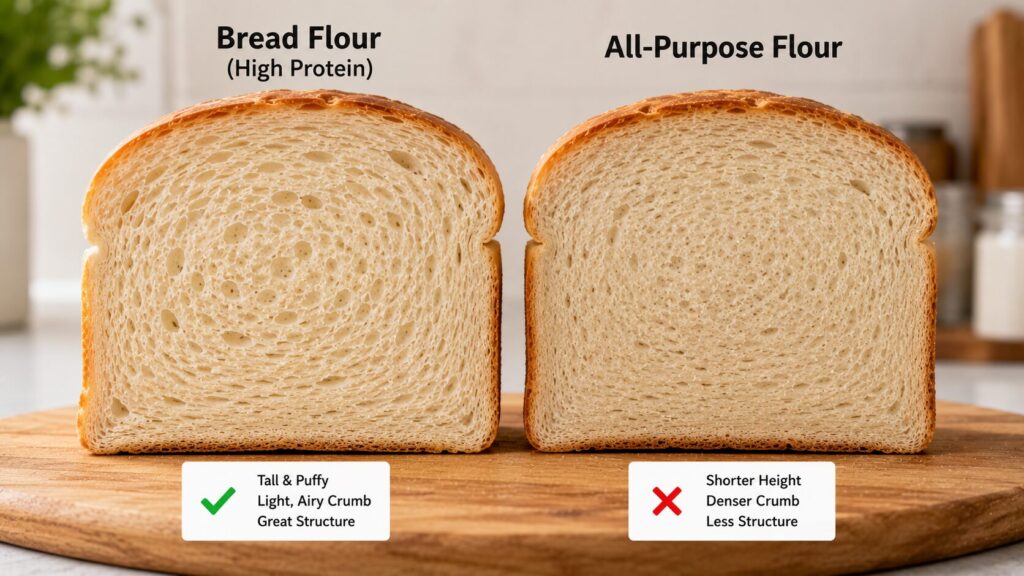
Choose bread flour if you want maximum structure to support the added protein powder. All-purpose flour works if it’s what you have on hand, but expect a slightly softer crumb with less chew.
Bread flour contains more protein than all-purpose flour, which helps develop a stronger gluten network. This extra strength allows the dough to better support added whey protein, resulting in a taller loaf with a softer, more sliceable crumb. For a deeper explanation of how flour protein affects bread structure, see the flour guide from King Arthur Baking
How to Slice
Baker’s Tip: Wait until the loaf is fully cool — at least an hour, ideally longer — before slicing. Use a serrated bread knife with a gentle sawing motion rather than pressing straight down, which compresses the crumb and makes slices look denser than they actually are. For uniformly thin sandwich slices, cut the loaf in half crosswise first, then slice each half from the cut side inward — it’s easier to keep your knife level over a shorter distance.
Best Sandwich Fillings
This bread’s slightly firmer, more substantial crumb holds up well to hearty fillings that would turn a softer bread soggy — think grilled chicken with avocado, a loaded turkey club, or a fried egg sandwich with melted cheese. It also toasts well, so it holds its own under wetter fillings like tuna salad or a tomato-heavy sandwich, especially if you toast it first to create a light moisture barrier.
More Ways to Enjoy This Bread
| Meal | Serving Idea |
|---|---|
| Breakfast | Eggs, turkey, and cheddar |
| Lunch | Grilled chicken and avocado |
| Snack | Cottage cheese with cucumber |
| Meal Prep | Turkey, spinach, and Swiss cheese |
Meal Prep
Meal Prep Tip: Slice the entire loaf right after it’s fully cooled, even if you’re not eating it all that week. Pre-sliced bread is far more convenient for grabbing exactly what you need, and it freezes just as well sliced as it does whole — you just skip the step of slicing a frozen loaf later.
Storage
Storage Tip: Store the cooled loaf in an airtight bag or container at room temperature for up to 4 days. Because this bread has a slightly higher protein and lower sugar content than many enriched breads, it can dry out a bit faster than a standard sandwich loaf, so a truly airtight seal matters more here than it would with a typical bakery bread.
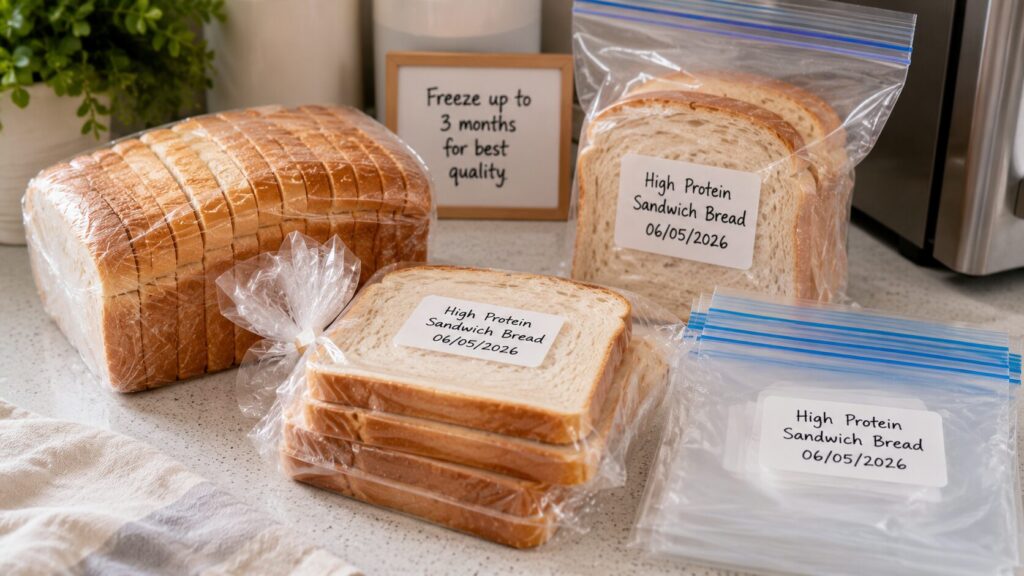
Freezing
Freezer Tip: Freeze sliced bread flat in a single layer on a tray for about an hour before transferring the slices to a freezer bag — this keeps them from fusing into a solid block, so you can pull out exactly the number of slices you need.
Fresh vs. Frozen Bread
| Fresh | Frozen | |
|---|---|---|
| Texture | Softest, best straight from cooling | Slightly firmer once thawed, still good toasted |
| Best use | Eating within the first few days | Meal prep, longer storage |
| How to thaw | Not applicable | Toast directly from frozen, or thaw at room temperature for 20–30 minutes |
Reheating
For a slice pulled from the fridge or freezer, a few minutes in the toaster is the most reliable way to bring back a fresh-baked texture. If you’re reheating a larger piece, wrap it loosely in foil and warm it in a 300°F (149°C) oven for about 8–10 minutes — this warms it through without drying out the crust the way a microwave tends to.
Variations
- Whole wheat version: Substitute up to half the bread flour with whole wheat flour, adding an extra 2 tablespoons of water to compensate for whole wheat’s higher absorption.
- Seeded crust: Brush the shaped loaf with egg wash before the second rise and press on a mix of sesame and poppy seeds for a bakery-style finish.
- Herb version: Add 1 tablespoon of dried Italian herbs to the dry ingredients for a savory loaf that pairs well with sandwich meats.
- Extra-protein version: Increase the whey protein isolate to 1/3 cup, adding an additional tablespoon of water to maintain proper hydration.
Greek Yogurt vs. Cottage Cheese (As an Add-In Variation)
If you want to boost moisture and protein further without adding more whey powder, both Greek yogurt and cottage cheese are common enriched-bread add-ins, though they behave differently.
| Greek Yogurt | Cottage Cheese | |
|---|---|---|
| Texture in dough | Blends smoothly, adds tang | Adds moisture but leaves small curds unless blended first |
| Effect on crumb | Softer, slightly tangy | Softer, milder flavor if blended smooth |
| Best use | Stir directly into the wet ingredients | Blend smooth before adding, to avoid a lumpy crumb |
High Protein Sandwich Bread (Soft, Sliceable & Easy Homemade Recipe)
- Prep Time: 20 minutes
- Cook Time: 35 minutes
- Total Time: 55 minutes
- Yield: 12 slices (1 loaf) 1x
- Category: Bread
- Method: Baking
- Cuisine: American
- Diet: Vegetarian
Description
This High Protein Sandwich Bread is soft, fluffy, and perfectly sliceable with a tender crumb and a golden crust. Made with bread flour, whey protein isolate, eggs, and simple pantry ingredients, it’s an easy homemade loaf that’s ideal for healthy sandwiches, meal prep, and everyday lunches without the dense or gummy texture common in many protein breads.
Ingredients
- 3 1/2 cups (420 g) bread flour
- 1/2 cup (50 g) unflavored whey protein isolate
- 2 1/4 teaspoons (7 g) instant yeast
- 1 tablespoon honey
- 1 teaspoon fine sea salt
- 2 large eggs, room temperature
- 1 cup (240 ml) warm milk (100-110°F / 38-43°C)
- 2 tablespoons unsalted butter, softened
Instructions
- In a large bowl, combine the bread flour, whey protein isolate, yeast, and salt.
- Whisk together the warm milk, eggs, honey, and softened butter.
- Add the wet ingredients to the dry ingredients and mix until a shaggy dough forms.
- Knead for 8–10 minutes until the dough becomes smooth and elastic.
- Cover and let rise for 60–90 minutes or until doubled.
- Gently deflate the dough and shape it into a loaf.
- Place into a greased 9×5-inch loaf pan.
- Cover and proof for 35–45 minutes until the dough rises just above the rim.
- Bake at 350°F (175°C) for 30–35 minutes, or until the loaf is golden brown and the internal temperature reaches 190°F (88°C).
- Cool in the pan for 10 minutes, then transfer to a wire rack to cool completely before slicing.
Notes
- Use bread flour for the softest texture and strongest gluten structure.
- Measure ingredients with a kitchen scale whenever possible.
- Avoid adding extra flour during kneading unless the dough is excessively sticky.
- Let the loaf cool completely before slicing for the cleanest slices.
- Store at room temperature for up to 3 days or freeze slices for up to 3 months.
Course
- Bread
Skill Level
- Beginner
Equipment
- Mixing Bowl
- Stand Mixer (Optional)
- Loaf Pan (9×5-inch)
- Wire Cooling Rack
- Kitchen Scale (Recommended)
Recipe Badge
- High Protein
- Meal Prep
- Homemade
- Freezer Friendly
Nutrition
- Serving Size: 1 slice
- Calories: 145 kcal
- Sugar: 2 g
- Sodium: 220 mg
- Fat: 3 g
- Saturated Fat: 1 g
- Unsaturated Fat: 2 g
- Trans Fat: 0g
- Carbohydrates: 22 g
- Fiber: 1 g
- Protein: 8 g
- Cholesterol: 35 mg
FAQ
Why is my high protein bread so dense compared to regular bread?
This almost always comes down to too much protein powder relative to flour. Since protein powder doesn’t build gluten the way wheat flour does, going much past the ratio in this recipe displaces structural protein without replacing what it does — keep it under about 10% of your total flour weight.
Can I use a different protein powder flavor besides unflavored?
Yes, a mild vanilla protein powder works fine and adds a subtle sweetness, though unflavored keeps the bread more versatile for savory sandwiches.
How do I know it’s fully baked without cutting into it?
The most reliable check is an instant-read thermometer — the center should read about 190°F (88°C). Short of that, a hollow sound when you tap the bottom of the loaf and a deep golden crust are good secondary signs.
Why did my bread turn out gummy in the middle?
Gumminess usually means either the loaf was underbaked or it was sliced before fully cooling. Confirm the internal temperature before pulling it, and let it cool completely — at least an hour — before cutting in.
Can I make this bread without eggs?
Yes, though expect a slightly less tender crumb. Replace each egg with 1/4 cup of unsweetened applesauce or an additional 2 tablespoons of water plus 1 tablespoon of oil.
What’s the best pan size for this recipe?
A standard 9×5-inch loaf pan is the right size for this quantity of dough. A smaller pan will force the loaf to rise higher and can leave the center underbaked relative to the crust; a much larger pan will produce a shorter, wider loaf with less classic sandwich-slice shape.
How do I keep the bread soft for several days?
Store it in a fully airtight container or bag at room temperature, and avoid refrigerating it, since refrigeration actually speeds up staling in bread through a process called starch retrogradation. If you need longer storage, freezing preserves texture far better than the fridge does.
Can I make this bread in a bread machine?
Yes. Add the ingredients according to your bread machine manufacturer’s instructions and select the basic sandwich bread cycle. Keep the same ingredient ratios for the best texture.
Can I double the recipe?
Yes. Simply double every ingredient and divide the dough between two standard 9×5-inch loaf pans. Avoid baking one oversized loaf, as the center may bake unevenly.
Final Thoughts
This bread comes down to one central idea: protein powder adds nutrition, but flour still has to do the structural work. Keep that ratio respected, knead until the dough passes the springback test, and let both rises run their full course rather than rushing them, and you’ll get a loaf that slices clean, holds a real sandwich, and actually tastes like bread — not like a protein shake with a crust.