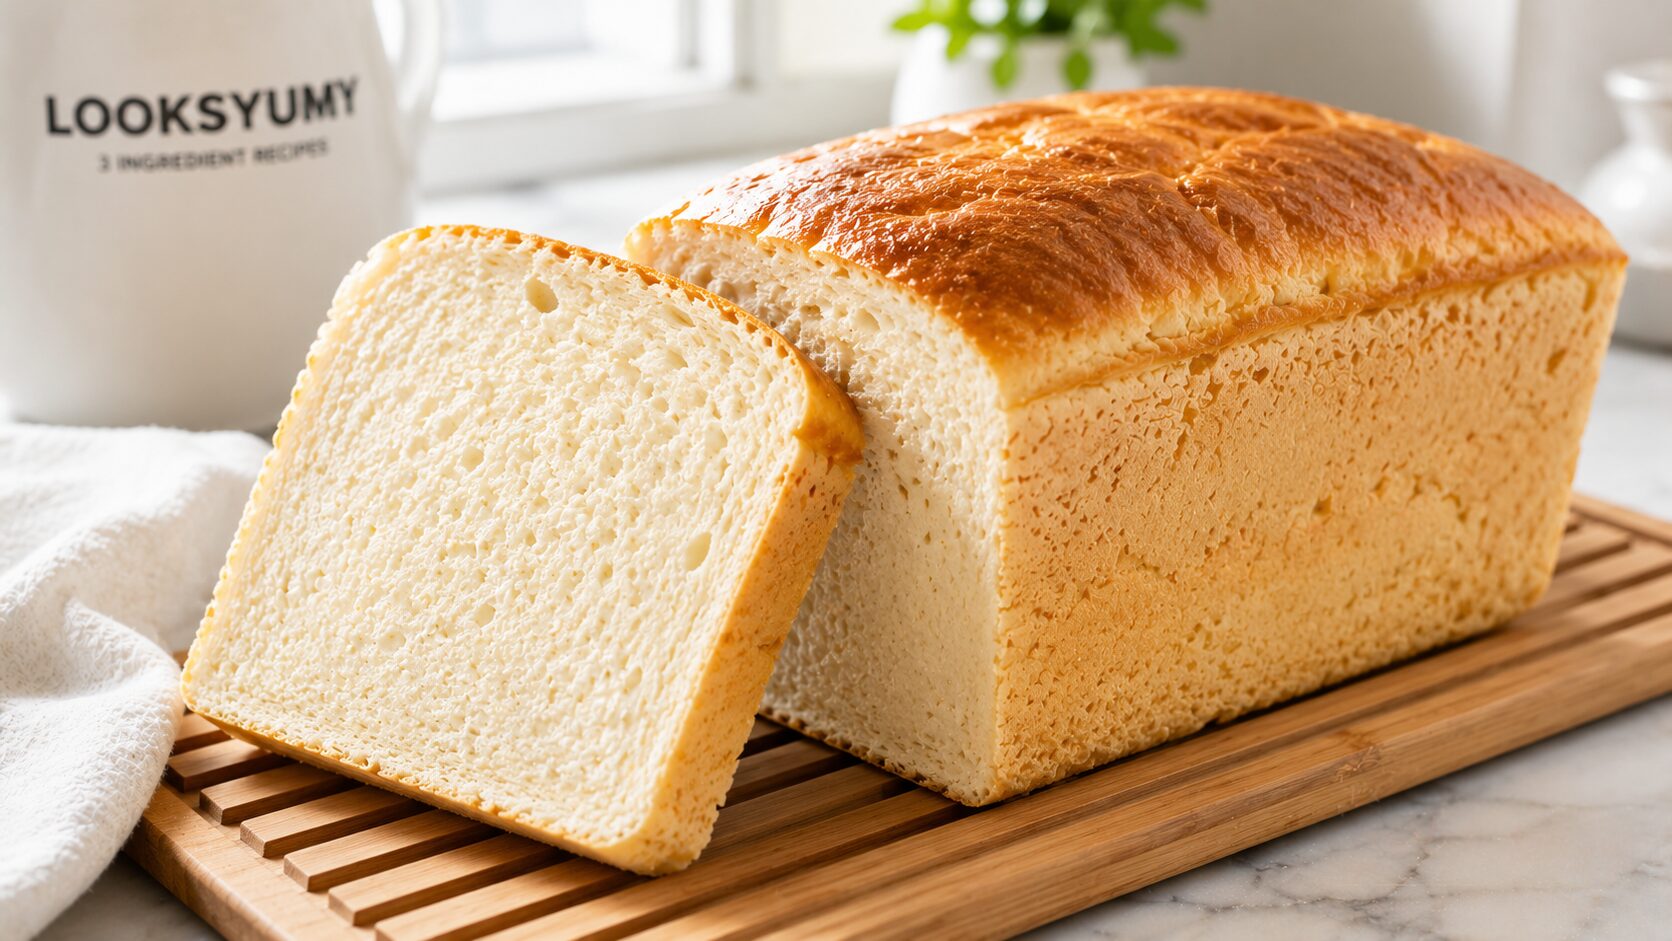
Three ingredients, one loaf, no sponge-like texture.
Most egg white bread fails in one of two ways — it looks tall and beautiful coming out of the oven, then sinks into a dense, rubbery slab as it cools, or it comes out damp and gummy in the middle no matter how long it bakes. Both problems trace back to the same source: an egg white foam that wasn’t stable enough to survive the bake, or a baking process that wasn’t adapted to a structure built entirely on protein instead of flour.
High protein egg white bread stays light and sliceable when the egg whites are whipped to a fully stable stiff peak before anything else is added, the dry ingredients are folded in gently rather than stirred, and the loaf is baked at a moderate temperature and cooled completely before slicing. Skip any one of those steps and the loaf either collapses, turns rubbery, or stays wet in the center. This guide breaks down exactly why each step matters, how to make decisions that affect the outcome, and what to do when a loaf doesn’t turn out right.
If you enjoy simple high-protein baking, you’ll also love this 2 Ingredient Protein Cheesecake. It’s another easy recipe that delivers plenty of protein with minimal ingredients.
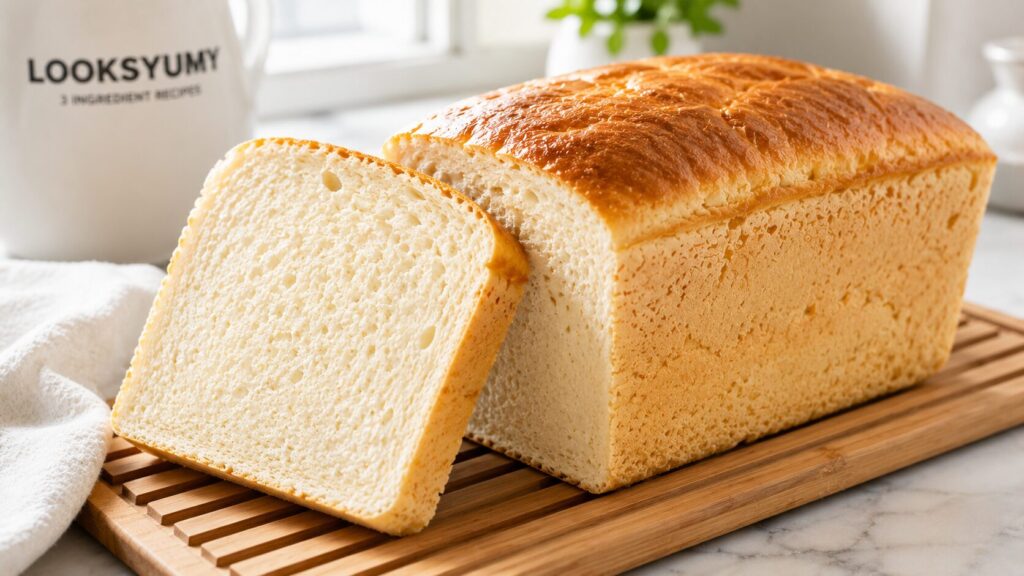
Table of Contents
At a Glance
The primary reason people want this information up front is simple: this bread behaves differently from anything made with flour, so the usual baking assumptions don’t apply. Here’s the full snapshot.
| Metric | Full Loaf (10 Slices) | Per Slice |
|---|---|---|
| Prep Time | 10 minutes | — |
| Bake Time | 30–35 minutes | — |
| Cooling Time | Minimum 1 hour, fully to room temperature | — |
| Calories | 620 kcal | 62 kcal |
| Protein | 96 g | 9.6 g |
| Fat | 4 g | 0.4 g |
| Carbs | 12 g | 1.2 g |
Macros are estimated from standard values for egg whites and whey protein isolate; exact numbers shift slightly by brand.
The Three Ingredients (And What Each One Is Actually Doing)
If you’re looking for a completely zero-carb alternative, our Carnivore Bread Recipe uses a different protein-based structure while delivering another satisfying homemade loaf.
Here’s what most people miss with a bread this simple: every ingredient is load-bearing. There’s no flour to fall back on if one of these underperforms.
- 8 large egg whites, room temperature
- 1 cup (about 100 g) unflavored or vanilla whey protein isolate
- 1/2 tsp cream of tartar
- A pinch of salt (doesn’t count against the three core ingredients, but worth including)
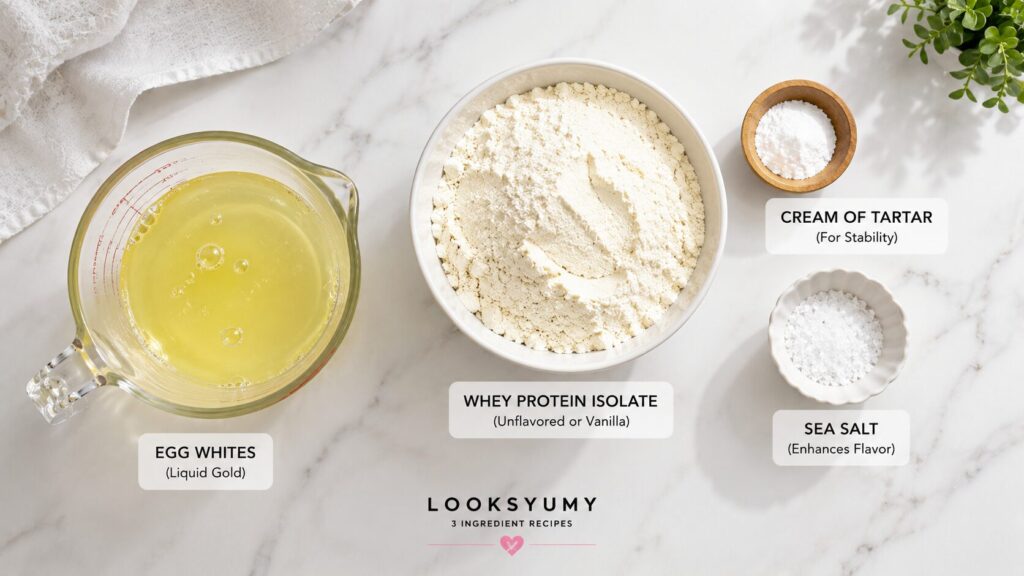
Egg whites, also called albumen, are the entire structure of this bread. There’s no flour, no gluten, and no yeast doing any of the usual structural work — the protein inside egg whites is doing all of it. Whipped mechanically, those proteins unfold from their natural coiled shape and trap air inside a thin film around each bubble. That trapped air is the only source of rise in this loaf, which is a fundamentally different situation from a wheat bread, where trapped gas from yeast pushes against a stretchy gluten network instead.
Whey protein isolate thickens the whipped foam once it’s folded in, giving the batter enough body to hold its shape in a loaf pan instead of spreading or deflating immediately. It also boosts the total protein content significantly, which is the entire point of this bread for most people baking it.
Cream of tartar is a mild acid that helps stabilize the egg white foam as you whip it. Egg white proteins are naturally a little unpredictable on their own — they can overwhip and turn dry and clumpy faster than most people expect. A small amount of acid slows that process down and gives you a wider window to reach a properly stable peak without tipping into an overwhipped, brittle foam.
| Egg White Bread | Traditional Bread |
|---|---|
| Egg white foam | Gluten network |
| No yeast | Yeast fermentation |
| Very high protein | Moderate protein |
| Low carb | Higher carb |
| Light airy crumb | Chewy crumb |
How to Make It
- Preheat the oven to 325°F (163°C) and line a standard loaf pan with parchment paper, leaving overhang on the long sides for easy removal.
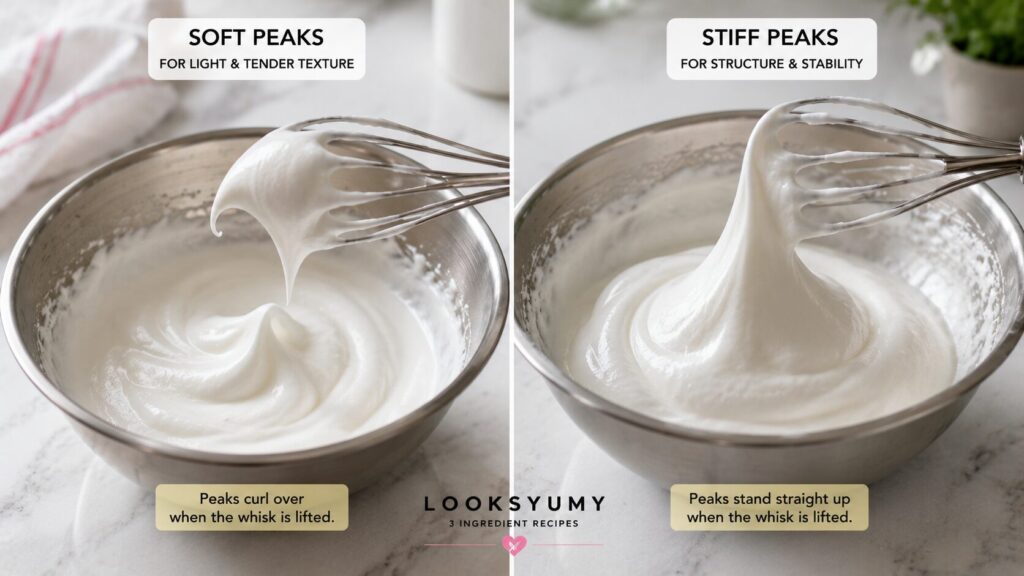
- In a completely grease-free bowl, whip the egg whites and cream of tartar until they hold a stiff, glossy peak that stands fully upright when the beater is lifted.
- Sprinkle the protein powder and salt over the whipped whites in two additions, folding gently with a spatula after each addition until no dry streaks remain.
- Transfer the batter to the prepared loaf pan and smooth the top gently — don’t press down, since that deflates the foam you just built.
- Bake for 30–35 minutes, until the top is golden and springs back when pressed lightly.
- Turn off the oven and let the loaf sit inside with the door cracked for 10 minutes.
- Move the loaf, still in its pan, to a wire rack and let it cool completely — a minimum of 1 hour — before removing it from the pan.
- Slice only once the loaf has reached full room temperature.
| What You See | Meaning | Action |
|---|---|---|
| Glossy stiff peaks | Perfect | Bake immediately |
| Soft peaks that fold over | Underwhipped | Continue whipping |
| Dry clumps | Overwhipped | Start again |
| Batter losing volume while folding | Foam collapsing | Fold more gently |
| Smooth airy batter | Ready | Transfer to the pan |
Soft Peaks vs. Stiff Peaks: Which Do You Actually Need?
The biggest mistake at this stage is stopping too early because the foam already looks impressive.
Soft peaks curl over gently when the beater is lifted — they look done to an untrained eye, but they don’t hold nearly enough structure to support this bread once protein powder is folded in. Stiff peaks stand fully upright and hold their shape without drooping, and that’s the minimum standard this recipe needs, since folding in the protein powder will inevitably knock some air out no matter how careful you are. Always whip past soft peaks and confirm you’ve reached a true stiff peak before moving on — it’s a step where “close enough” isn’t actually close enough.
Fresh Egg Whites vs. Carton Egg Whites: Does the Source Matter?
Here’s what most people miss: this isn’t just a convenience question, it’s a foam-stability question.
Fresh egg whites, separated straight from the shell, whip to a more stable and higher-volume foam because they haven’t been pasteurized or processed in a way that can subtly weaken their protein structure. Carton egg whites are pasteurized for safety and convenience, and while they still whip, they typically need a little more beating time to reach the same stiff peak, and the resulting foam is sometimes slightly less stable over the following folding and baking steps. Fresh whites are the more reliable choice if you’re troubleshooting a collapsing loaf; carton whites are a fine, more convenient option once you’ve got the technique down.
Metal Bowl vs. Plastic Bowl: A Detail Most Recipes Skip
The real issue with a plastic bowl isn’t the material itself — it’s what tends to live on its surface.
Plastic bowls develop microscopic surface scratches over repeated use, and those scratches hold onto trace amounts of oil from previous use even after washing. Egg whites are extremely sensitive to any fat contamination — even a trace amount can prevent them from whipping past a loose, soft foam. A metal or glass bowl, wiped down with a splash of vinegar or lemon juice before you start, gives you a genuinely grease-free surface and a far more reliable whip. If your foam never seems to reach a proper stiff peak despite whipping long enough, switch bowls before you change anything else.
Hand Mixer vs. Stand Mixer: Which Gets You a Better Loaf?
The primary reason this matters is consistency, not final quality — both tools can get you to a stiff peak.
A stand mixer whips more evenly and frees up your hands to check the foam’s texture as it develops, which makes it easier to catch a stiff peak right as it happens rather than a minute or two late. A hand mixer works just as well but demands more attention, since it’s easier to either underwhip from impatience or overwhip because you stepped away. If you’re new to this recipe, a stand mixer removes one variable while you’re still learning to judge the peak by eye.
| Protein Powder | Texture | Recommended |
|---|---|---|
| Whey Isolate | ⭐⭐⭐⭐⭐ | Best |
| Egg White Protein | ⭐⭐⭐⭐ | Very Good |
| Whey Concentrate | ⭐⭐⭐⭐ | Good |
| Plant Protein | ⭐⭐ | Not Ideal |
Low Temperature vs. High Temperature: Why the Oven Setting Changes Everything
Why this happens: egg white protein sets through heat in a fairly narrow window, and this bread has almost no fat or moisture buffer to protect it if that window is exceeded.
A moderate 325°F (163°C) oven gives the loaf time to rise and set gradually, letting the center firm up close to the same pace as the exterior. A hotter oven pushes the outside of the loaf to set and dry out well before the center has finished expanding, which is a common reason for a domed, cracked top with a denser layer just underneath it. If you’re used to baking wheat bread at a higher temperature, resist that instinct here — this bread rewards patience over speed.
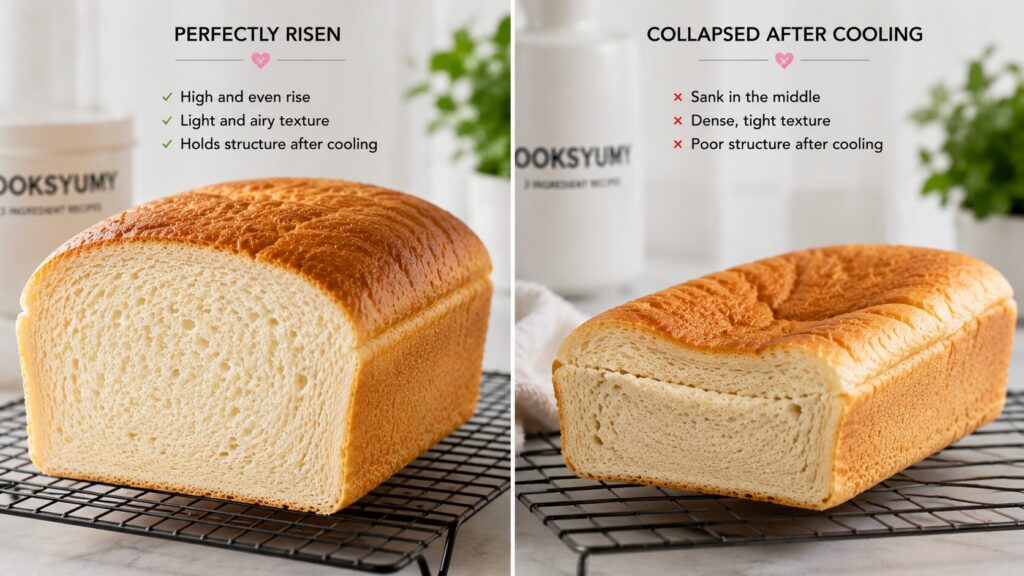
Why Egg White Bread Actually Collapses
The real issue behind almost every collapsed loaf isn’t the oven — it’s what was happening in the mixing bowl several minutes before the batter ever went in.
As egg whites are whipped, their proteins denature — unfolding from a tightly coiled natural shape — and then link together around each trapped air bubble, forming a thin, stretchy film. That film is what’s known as foam stability, and it’s the entire reason the whipped volume can survive folding, pouring, and baking without deflating on its own. A foam that hasn’t been whipped far enough has proteins that are only partially unfolded, so the film around each air bubble is too weak to hold its shape once the batter is disturbed by folding or by the weight of protein powder settling in.
“A stable foam creates the bread before the oven ever does.”
Heat is what locks that structure in place permanently, through a separate reaction called protein coagulation, where the same proteins that trapped the air now firm up into a fixed network around it. This is well documented in food science research on egg white protein behavior, including a university food science thesis on how egg white proteins unfold and reorganize during whipping to trap air — the same mechanism this bread depends on entirely, since there’s no gluten or yeast to fall back on if that foam structure isn’t solid to begin with.
“The oven expands the air you trap — it doesn’t create it.”
Overwhipping is a less obvious cause of collapse, but a real one. Whipped past a stiff peak, egg white proteins can bond too tightly to each other before they’ve even been folded into the batter, creating a dry, slightly clumpy foam that fractures instead of stretching smoothly when it’s folded or when the batter expands in the oven. Underwhipping causes the opposite problem — not enough trapped air to begin with, which shows up as reduced volume no matter how well the rest of the bake goes.
“Most collapsed egg white breads fail long before they start baking.”
Cooling is the final piece, and it’s the step most people rush. Pulling a loaf from the oven and slicing into it right away exposes a structure that’s still held together mostly by residual heat rather than a fully set protein network. Carryover cooking — the continued cooking that happens from a loaf’s own trapped heat after it leaves the oven — is still firming up the crumb for a while after baking ends, and cutting in before that process finishes is one of the most common reasons a loaf that looked perfect in the oven ends up looking collapsed on the cutting board.
Ingredient → Function
| Ingredient | Function in the Loaf |
|---|---|
| Egg whites | Provide the entire structural foam that gives the bread its rise |
| Whey protein isolate | Thickens the batter and adds concentrated protein content |
| Cream of tartar | Stabilizes the egg white foam during whipping |
Whipping Stage Guide
| Stage | What It Looks Like | Ready to Use? |
|---|---|---|
| Foamy | Large, uneven bubbles, no shape held | No — keep whipping |
| Soft peaks | Peaks curl over when the beater is lifted | No — not stable enough for this recipe |
| Stiff peaks | Peaks stand fully upright, glossy surface | Yes — this is the target |
| Overwhipped | Dry, clumpy, slightly grainy appearance | No — foam has lost elasticity |
Problem → Cause → Fix
| Problem | Root Cause | Fix |
|---|---|---|
| Loaf collapses after baking | Egg whites underwhipped, or sliced before fully cooled | Whip to a true stiff peak; cool completely before slicing |
| Rubbery texture | Overbaked, or protein powder folded in too roughly | Check for doneness earlier; fold gently in two additions |
| Wet or gummy center | Baked at too high a temperature, setting the outside before the center finished | Bake at 325°F (163°C) and check with a toothpick before pulling |
| Dense, low-rise loaf | Egg whites overwhipped and lost elasticity before folding | Stop whipping right at a stiff peak, not past it |
| Cracked, domed top | Oven temperature too high | Lower the oven temperature and bake slightly longer |
| Bland flavor | Unflavored protein powder used without extra seasoning | Add a pinch more salt, or use a vanilla or savory-flavored protein powder |
Cooling Guide
| Stage | Time | What’s Happening |
|---|---|---|
| Oven rest (door cracked) | 10 minutes | Slows the temperature drop, reducing collapse risk |
| In-pan cooling on a rack | 30 minutes | Loaf firms up enough to handle without tearing |
| Out-of-pan cooling | 30+ minutes, to full room temperature | Carryover cooking finishes setting the crumb structure |
| What You See | What It Means |
|---|---|
| Tall loaf with rounded top | Perfect bake |
| Slight shrinkage | Normal cooling |
| Large collapse | Foam wasn’t stable |
| Wet center | Needs longer baking |
| Dry crumb | Slightly overbaked |
Fresh vs. Frozen Bread: Which Should You Plan For?
Looking for more make-ahead recipes? This 2 Ingredient Protein Cheesecake is another high-protein favorite that stores and freezes beautifully.
Here’s what most people miss: this bread actually freezes better than most flour-based bread, since there’s no starch structure to go stale the way wheat bread does.
Fresh bread, eaten within a day or two, has the lightest texture and the cleanest slice. Frozen bread holds its structure well for meal prep, since the high protein, low-starch composition resists the texture breakdown that usually comes from ice crystals disrupting a starch network. Slice the loaf before freezing so you can pull individual pieces as needed, and thaw slices at room temperature or toast them directly from frozen. If you’re storing baked goods for more than a couple of days, general food safety guidance on frozen foods confirms that items kept at a steady 0°F (-18°C) remain safe to eat indefinitely, with quality — not safety — being the actual limiting factor on how long you’d want to keep a loaf frozen.
Storage Guide
| Method | How Long It Stays Good | Notes |
|---|---|---|
| Room temperature, airtight container | 1–2 days | Best for texture; egg white bread dries out faster than flour bread at room temp |
| Refrigerated, airtight container | 4–5 days | Slightly firms the texture; bring to room temp or toast before eating |
| Frozen, sliced | 2–3 months for best quality | Thaw individual slices or toast directly from frozen |
Where This Fits in the High Protein Baking Hub
This same foam-and-protein logic that builds this loaf shows up throughout our High Protein Baking and desserts content, just applied to different structures and different goals.
The 2 Ingredient Protein Cheesecake leans on a completely different setting mechanism — casein coagulation in cottage cheese rather than a whipped egg foam — which is why that recipe is baked low and slow to a jiggle instead of whipped to a peak; the two doughs fail in almost opposite ways if you mix up their techniques. Our Carnivore Cheesecake guide covers the fuller egg-and-fat version of protein coagulation, where cream cheese and egg yolks buffer the proteins the way nothing buffers them in this egg-white-only loaf, which is part of why cheesecake is more forgiving of a slightly-too-hot oven than this bread is. Carnivore Custard pushes that same egg-based coagulation even further toward delicate, with almost no structural buffer at all — closer in spirit to this bread than to a full cheesecake, even though the final texture looks nothing alike.
Common Questions
Can I use liquid egg whites from a carton instead of separating fresh eggs?
Yes — carton egg whites work, though they typically take longer to whip to a stable stiff peak and can be a little less forgiving during folding. If you’re troubleshooting a collapsing loaf, switching to fresh, hand-separated whites is one of the first things worth testing.
Can I freeze this bread?
Yes, and it freezes especially well since there’s no starch to go stale. Slice it first, freeze in an airtight container or bag, and toast individual slices directly from frozen.
Why did my bread collapse after it looked perfectly risen in the oven?
This almost always comes down to either an underwhipped foam that couldn’t hold its structure once baking finished, or slicing the loaf before it fully cooled. Give it the full cooling time before you decide whether the bake actually failed.
Can I toast it?
Yes — this bread toasts well once it’s fully cooled and sliced, and toasting actually helps firm up the texture if a loaf turned out slightly softer than expected.
Why is my bread rubbery instead of light?
Rubbery almost always points to overbaking, since egg white protein tightens and squeezes out moisture the longer it’s exposed to heat past the point it first sets. Pull the loaf as soon as it springs back to a light touch rather than waiting for a fully firm top.
Why is the inside of my loaf wet even though the outside looks done?
This usually means the oven ran hot enough to set the crust before the center finished baking. Drop the temperature slightly and extend the bake time rather than baking hotter to try to finish it faster.
Can I make this dairy-free?
Yes, as written — egg whites and most whey protein isolates contain no meaningful dairy sugars in their isolated form, though whey itself is milk-derived, so if you need a fully dairy-free version, an egg white protein powder is a straightforward swap in place of whey isolate.
This bread rewards attention at exactly two moments: the whip, and the cool-down. Get the foam to a genuine stiff peak, handle it gently once the protein powder goes in, and give it the full time it needs to finish setting after the oven turns off. Once those two habits are automatic, this becomes one of the most reliable high-protein breads you can put in regular rotation.