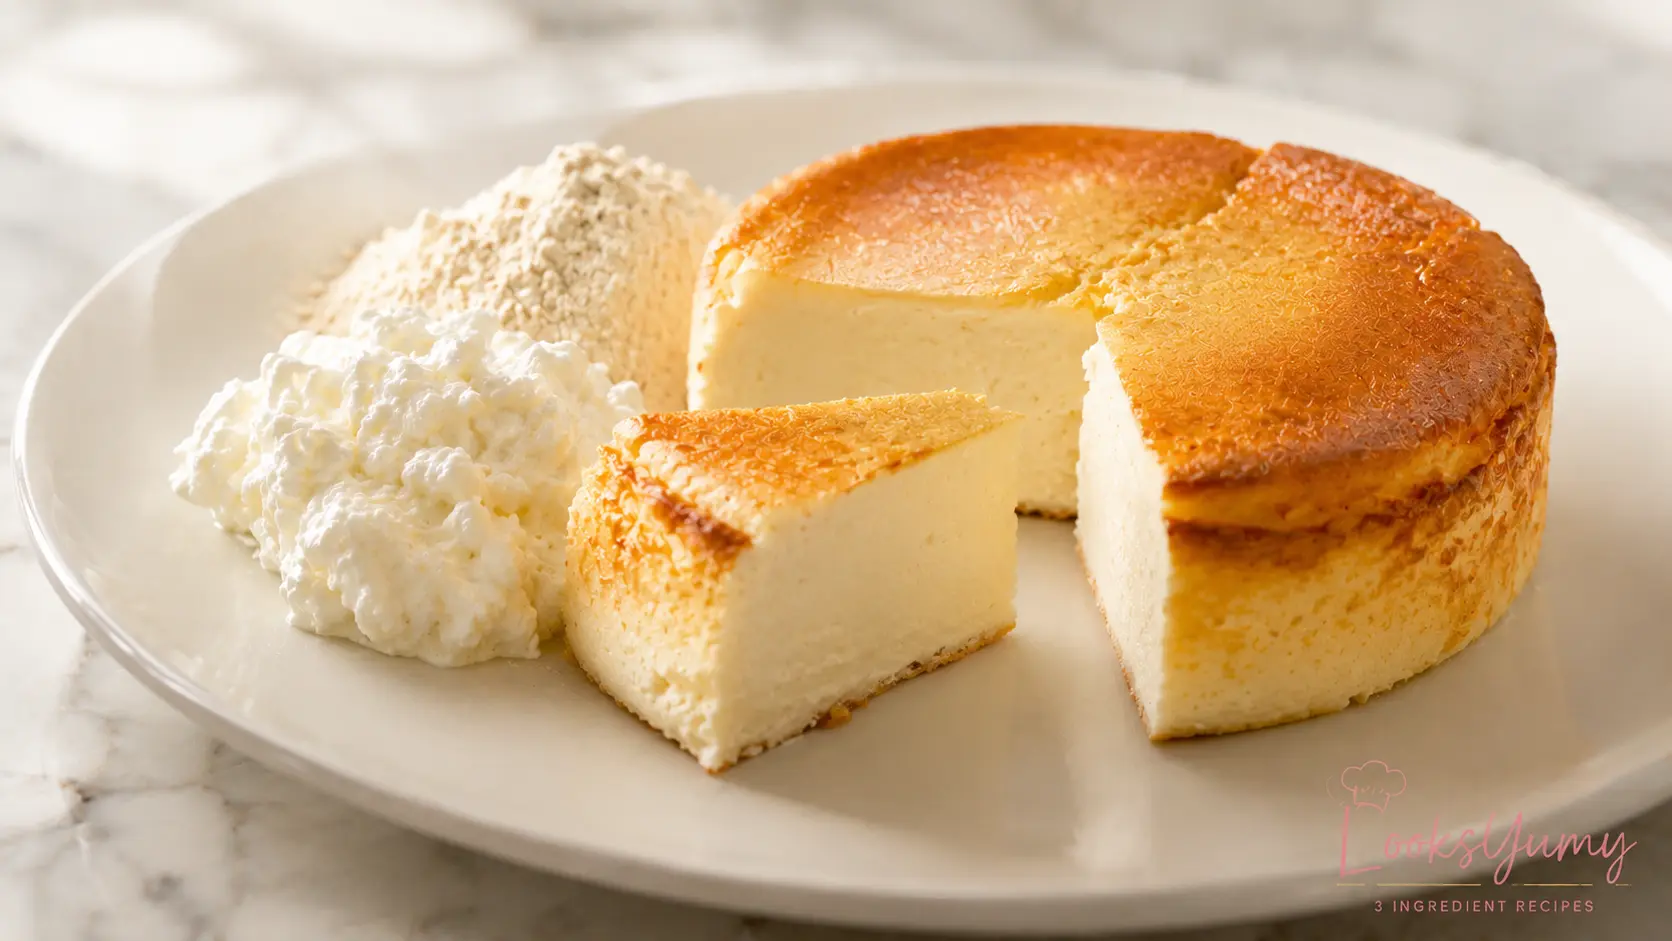
Two ingredients, one bowl, no dry protein-cake texture.
Most two-ingredient protein cheesecakes go wrong in one of two directions — either they turn out dense and rubbery like a baked protein bar, or they never fully set and stay loose and watery no matter how long they chill. Both problems come from the same root cause: too much protein powder relative to moisture, or too much heat for too long.
A two-ingredient protein cheesecake turns out creamy and sliceable when you blend full-fat cottage cheese and protein powder completely smooth, bake it low and slow until the center barely jiggles, then let it cool and chill fully before cutting. Rush the bake or skip the chill and the texture suffers either way. The rest of this guide breaks down exactly why the ratio matters, how to adjust it for different textures, and what to do when a batch doesn’t set the way it should.
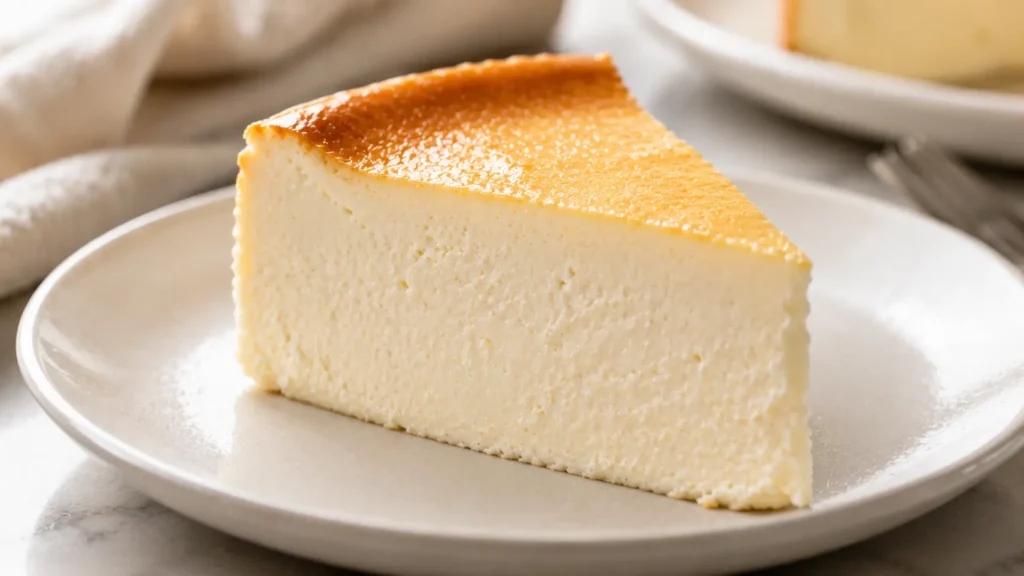
Table of Contents
At a Glance
The primary factor people want to know before starting is simple: how much time this actually takes, and what it delivers nutritionally for the effort. Here’s the full picture.
| Metric | Full Cheesecake (8 Slices) | Per Slice |
|---|---|---|
| Prep Time | 5 minutes | — |
| Bake Time | 35–40 minutes | — |
| Chill Time | Minimum 3 hours (overnight preferred) | — |
| Calories | 920 kcal | 115 kcal |
| Protein | 104 g | 13 g |
| Fat | 32 g | 4 g |
| Carbs | 20 g | 2.5 g |
Macros are estimated from standard values for full-fat cottage cheese and vanilla whey protein powder; your exact numbers will shift depending on the brands you use.
| If your goal is… | Choose… |
|---|---|
| Highest protein | Whey isolate |
| Creamiest texture | Whey concentrate |
| Lowest carbs | Unflavored isolate |
| Best first attempt | Vanilla whey concentrate |
| Strongest cheesecake flavor | Vanilla protein powder |
The Two Ingredients (And What Each One Is Doing)
Here’s what most people miss: with only two ingredients, there’s nowhere to hide a mistake. Each one is doing real structural work, not just adding flavor.
- 2 cups (about 450 g) full-fat cottage cheese, blended completely smooth
- 1 cup (about 100 g) vanilla whey protein powder
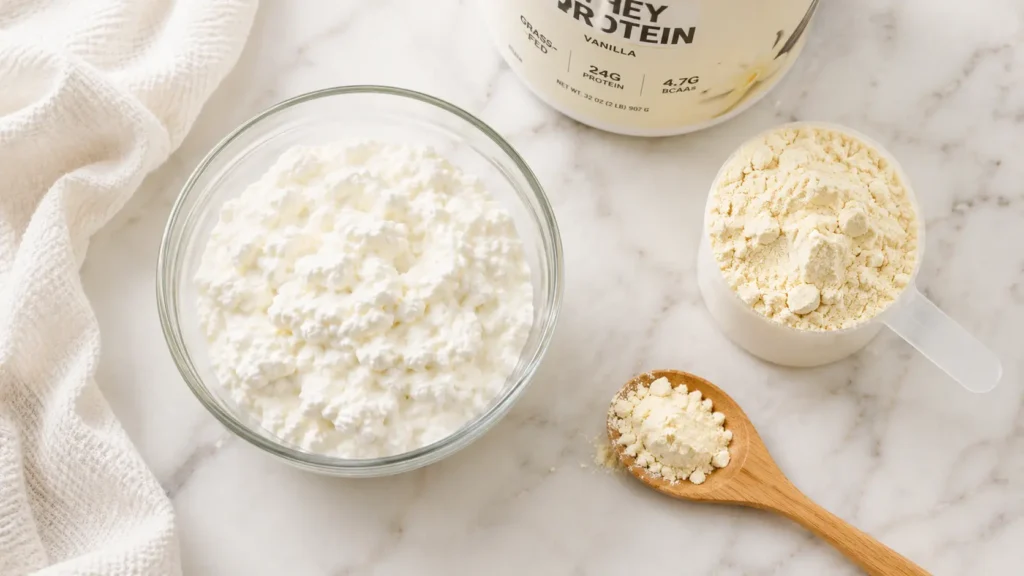
Cottage cheese is the moisture and structure base of this cheesecake. Once blended, its natural dairy proteins — mainly casein — behave a lot like the proteins in eggs when heated: they unfold and link together into a firm network. That’s the entire reason this recipe can set without eggs or cream cheese at all. Skipping the blending step and leaving the cottage cheese lumpy is one of the fastest ways to end up with a grainy final texture, since those curds never fully integrate into the batter.
Protein powder thickens the mixture and adds the concentrated protein content this dessert is built around. It also absorbs some of the moisture cottage cheese naturally carries, which is part of what helps the batter set into something sliceable instead of staying loose. Add too much, though, and you tip the ratio too far toward protein and too far away from moisture — that’s the single most common reason these cheesecakes turn out dry or rubbery.
Unlike a traditional cream-cheese-based cheesecake, which relies on eggs for its setting structure, this version sets almost entirely on the casein in the cottage cheese itself, gently coaxed into a firm network by low, steady heat. That’s a meaningfully different mechanism, and it’s why this recipe behaves differently in the oven than an egg-based one — it’s more sensitive to being overbaked, since there’s no egg fat to buffer the proteins the way yolks do in a classic cheesecake.
| Traditional Cheesecake | Protein Cheesecake |
|---|---|
| Cream cheese | Cottage cheese |
| Eggs provide most of the structure | Protein powder and dairy proteins create the structure |
| Rich and dense | Light and protein-packed |
| Higher fat | Higher protein |
| More ingredients | Only two ingredients |
How to Make It
- Preheat the oven to 325°F (163°C) and line a small springform pan or loaf pan with parchment paper.
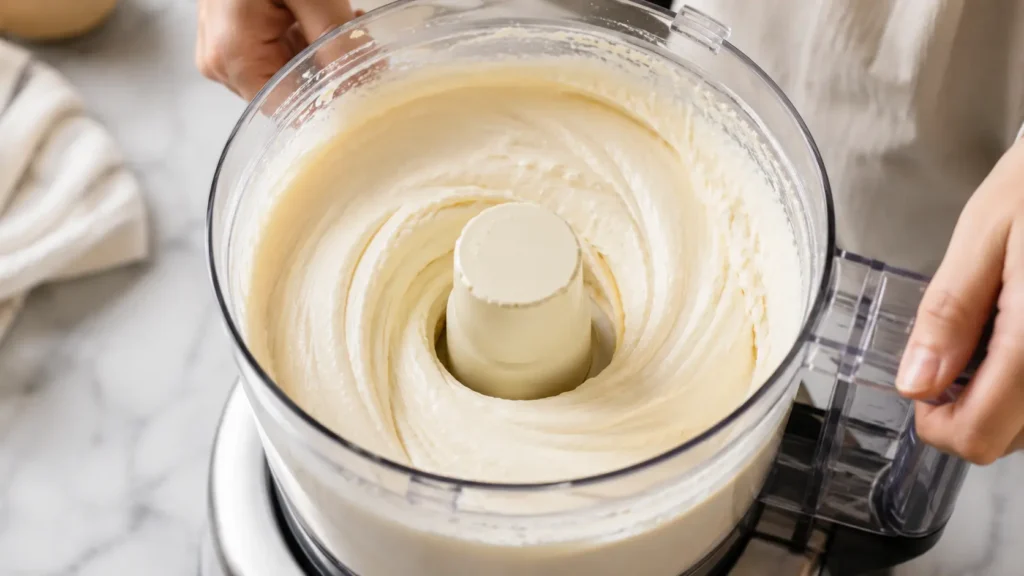
- Add the cottage cheese and protein powder to a blender or food processor and blend until completely smooth, scraping down the sides once halfway through.
- Pour the batter into the prepared pan and smooth the top with a spatula.
- Bake for 35–40 minutes, until the edges are set and the center still has a slight jiggle when the pan is nudged.
- Turn off the oven and let the cheesecake sit inside with the door cracked for 20 minutes.
- Move to the counter to finish cooling, then refrigerate for at least 3 hours, ideally overnight, before slicing.
| What You See | What It Means | What to Do |
|---|---|---|
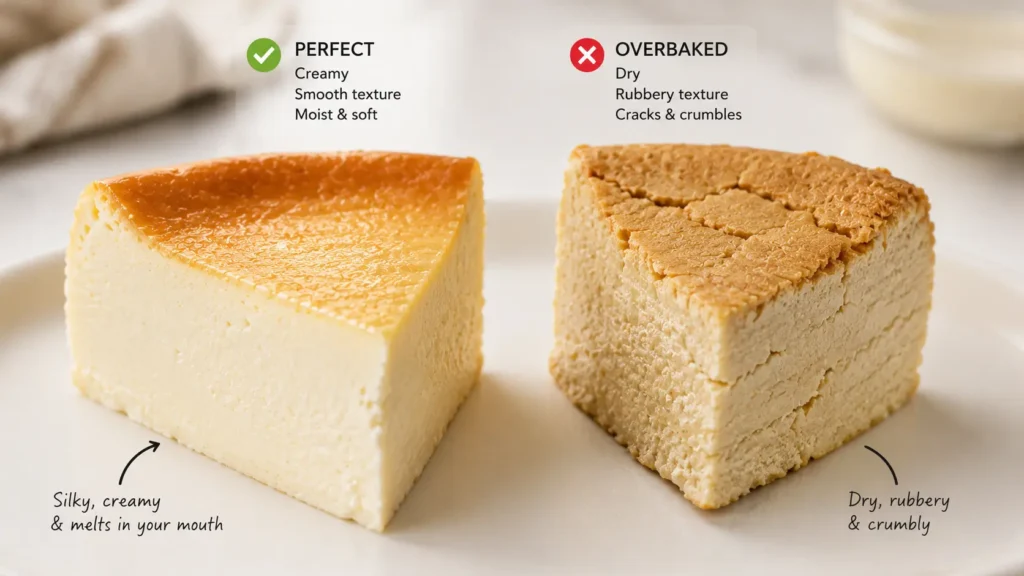
| Center jiggles slightly when nudged | Perfectly baked | Remove from the oven |
| Center looks completely firm | Slightly overbaked | Shorten the bake next time |
| Batter still looks wet | Underbaked | Bake for another 3–5 minutes |
| Tiny surface crack | Slight overmixing | Blend just until smooth next time |
| Large deep cracks | Too much heat | Lower the oven temperature or bake for less time |
Cottage Cheese vs. Greek Yogurt: Which Should You Use?
The real issue when choosing between these two isn’t flavor — it’s how each one behaves once heat hits its protein.
Cottage cheese carries a looser, curd-based protein structure that blends into a smooth, thick base and sets firmly once baked, which is why it’s the more reliable choice for a sliceable result. Greek yogurt is smoother going in, but its proteins are more delicate and prone to weeping — releasing liquid — under sustained oven heat, which can leave you with a slightly wetter, less clean-cutting slice. If you do use Greek yogurt, choose a full-fat, thick variety and expect a softer, more spoonable texture rather than a firm slice.
Vanilla Protein vs. Unflavored Protein: Does It Matter?
The primary factor here is sweetness and flavor balance, not texture — both blend and set the same way.
Vanilla protein powder gives you a cheesecake that tastes finished on its own, with no extra flavoring needed. Unflavored protein powder gives you a neutral base that lets the tang of the cottage cheese come through more, which some people prefer, but it usually needs a splash of vanilla extract or a pinch of sweetener stirred in separately to taste like dessert rather than a savory dairy bake.
Baked vs. No-Bake: Which Actually Sets Better?
Here’s what most people miss about the no-bake version: without heat, cottage cheese’s proteins never coagulate, so a no-bake batch relies entirely on chilling and gelatin or a similar setting agent to hold its shape — which pushes the recipe past two ingredients.
The baked version sets through actual protein coagulation, giving you a genuinely sliceable result with only the two core ingredients. A true no-bake version, kept to just cottage cheese and protein powder, will stay soft and spreadable rather than sliceable — closer to a thick dip than a cheesecake. If sliceability matters to you, bake it. If you’re fine with a softer, spoonable texture, skipping the oven is a legitimate option.
Cold vs. Room Temperature: Why It Changes the Blend
The real issue with blending cold cottage cheese straight from the fridge is texture, not safety.
Cold cottage cheese blends more slowly and can leave tiny unbroken curds behind even after a full minute in the blender, which shows up later as graininess. Letting it sit out for about 15 minutes before blending softens those curds just enough to break down completely, giving you a smoother batter with less blending time and less risk of over-processing, which can itself introduce excess air into the mix.
Fresh vs. Overnight: Why Patience Pays Off
Why this happens: a cheesecake that’s still warm or only lightly chilled hasn’t finished firming up, no matter how set it looked coming out of the oven.
Slicing a batch the same day it’s baked, after only a short chill, will almost always give you a softer, less clean-cutting result than the same batch eaten the next day. The proteins continue tightening slightly as the cheesecake cools fully and rests in the refrigerator, and that extra firming is what gives you clean slices instead of a wedge that collapses on the plate. If you’re serving this for a specific occasion, bake it the day before.
Whey Isolate vs. Whey Concentrate: The Texture Difference
The primary factor between these two protein powders is how much fat and lactose rides along with the protein, and that changes how the batter sets.
Whey isolate is more heavily filtered, carrying less fat and lactose alongside its protein, which tends to produce a slightly firmer, drier-leaning result — worth balancing with a touch more cottage cheese if you go this route. Whey concentrate carries a bit more fat and lactose, which softens the final texture and makes it more forgiving of small ratio mistakes, making it the easier starting point if this is your first attempt at the recipe.
| Protein Powder | Texture | Beginner Friendly |
|---|---|---|
| Whey Concentrate | ⭐⭐⭐⭐⭐ Creamy | ✅ Best Choice |
| Whey Isolate | ⭐⭐⭐⭐ Firm | ✔ Good |
| Micellar Casein | ⭐⭐⭐ Dense | Moderate |
| Plant Protein | ⭐⭐ Dry | Not Recommended |
Whey concentrate is usually the easiest choice because its slightly higher fat and lactose content produces a creamier, more forgiving cheesecake. Whey isolate works well too but creates a firmer texture, while most plant-based proteins absorb moisture differently and often require recipe adjustments.
Why This Actually Sets (And Why Some Batches Don’t)
The real issue behind a rubbery or dry batch almost always comes back to one thing: protein that’s been pushed past the point where it’s still holding moisture.
As cottage cheese heats, its casein proteins denature — meaning they unfold from their natural coiled shape — and then link together into a three-dimensional network, a process called protein coagulation. That network is what gives this cheesecake its sliceable body. Pushed past the point where the network first forms, the same proteins keep tightening and start squeezing out the moisture they were holding onto, which is exactly what turns a creamy slice into a dry, rubbery one. This is the core idea behind what we call the Looksyumy Cream Balance Method: keep the protein-to-moisture ratio close enough to the edge that the batter sets firmly, but pull it from the oven before that same reaction tightens past the point of no return. In practice, that means baking low and slow, watching for a slight center jiggle rather than a fully firm top, and trusting that the cheesecake keeps finishing on its own after the oven turns off.
“A creamy protein cheesecake is built by controlling heat — not adding more ingredients.”
That carryover cooking is worth understanding on its own. A cheesecake this size holds real heat in its center, and that heat keeps the coagulation reaction going for several minutes after the pan leaves the oven — which is exactly why pulling it at a slight jiggle, not a fully firm set, gives you the correct final texture instead of an overcooked one. Bake it until it looks completely done in the oven, and residual heat will overcook it before it even finishes cooling.
Moisture retention is the other half of this equation. Cottage cheese naturally carries a good amount of water inside its curds, and a gentle, low bake gives that moisture time to redistribute evenly through the batter as the proteins set around it. A hot, fast bake does the opposite — it drives moisture out toward the surface faster than the structure can hold onto it, which is a major reason high-heat batches trend dry even when the ingredient ratio was correct.
“Every protein dessert has a point where more heat stops improving it and starts drying it out.”
Overmixing plays a smaller but real role too. Blending far longer than needed, or on a high setting the whole time, whips extra air into the batter. That air has nowhere to go but up and out as the cheesecake bakes, and small surface cracks in a protein cheesecake are frequently an air problem more than a heat problem — blend just until smooth, then stop.
Chilling isn’t just about serving temperature — it’s doing real structural work. As the fully baked cheesecake cools and rests in the refrigerator, the protein network that formed in the oven continues to tighten and settle, which firms up the slice and lets the flavors round out. This is why a same-day cheesecake, sliced too early, always feels softer and less finished than the same batch eaten the next day.
“Chilling is part of the cooking process, not just the waiting period before dessert.”
Ingredient → Function
| Ingredient | Function in the Batter |
|---|---|
| Cottage cheese | Provides moisture and the casein protein structure that sets the cheesecake |
| Protein powder | Thickens the batter, adds concentrated protein, and absorbs excess moisture |
Problem → Cause → Fix
| Problem | Root Cause | Fix |
|---|---|---|
| Dry, rubbery texture | Overbaked past the point of a slight center jiggle, or too much protein powder relative to cottage cheese | Pull it earlier; slightly reduce protein powder next batch |
| Grainy texture | Cottage cheese wasn’t fully blended smooth before baking | Blend longer, or let cottage cheese sit at room temperature first |
| Never fully sets, stays watery | Not enough bake time, or oven temperature too low to trigger coagulation | Extend bake time in small increments; confirm oven temperature with a thermometer |
| Cracked top | Overmixing trapped air into the batter | Blend just until smooth, stop as soon as no lumps remain |
| Weak, weepy texture (especially with yogurt) | Greek yogurt substituted for cottage cheese, releasing liquid under heat | Use full-fat cottage cheese, or accept a softer, spoonable texture with yogurt |
| Bland or flat flavor | Unflavored protein powder used without additional flavoring | Add vanilla extract or a pinch of sweetener to the blend |
Protein Type Comparison
| Protein Type | Fat & Lactose Content | Texture Result |
|---|---|---|
| Whey isolate | Low | Firmer, slightly drier-leaning |
| Whey concentrate | Moderate | Softer, more forgiving of ratio mistakes |
Cooling Guide
| Stage | Time | What’s Happening |
|---|---|---|
| Oven rest (door cracked) | 20 minutes | Slows temperature drop, reduces cracking risk |
| Counter cooling | 30–45 minutes | Brings cheesecake to near room temperature before refrigeration |
| Refrigeration | Minimum 3 hours, ideally overnight | Protein network continues to firm; texture and flavor round out |
What My First Batches Taught Me
In my first batches, I kept ending up with a cheesecake that looked perfect coming out of the oven and then turned rubbery by the time it cooled. I was baking at a higher temperature to save time, and pulling the pan only once the center looked completely set on top. What I didn’t understand yet was that the center was still finishing on its own heat even after I’d turned the oven off — so by the time it fully cooled, the proteins had tightened well past where I wanted them.
Dropping the oven temperature and pulling the cheesecake at a visible jiggle, rather than waiting for a fully firm top, fixed it within one more batch. It felt wrong the first time — the center genuinely looks underdone — but that’s exactly the point where residual heat is supposed to take over. If your batches keep turning rubbery despite following the ratio correctly, check your pull point before you touch anything else.
Related Recipes You May Also Enjoy
If you enjoy simple, high-protein desserts, you might also like our Carnivore Cheesecake, which uses eggs and cream cheese for a richer texture and a more traditional baked cheesecake experience.
For something lighter and spoonable, Carnivore Custard relies on gentle heat to create a silky texture using many of the same protein-setting principles explained in this recipe.
Print
2 Ingredient Protein Cheesecake: Creamy, High-Protein, and Actually Sliceable
- Prep Time: 5 Minutes
- Cook Time: 40 Minutes
- Total Time: 45 Minutes
- Yield: 8 slices 1x
- Category: Dessert
- Method: Baking
- Cuisine: American
- Diet: Gluten-Free
Description
This 2 Ingredient Protein Cheesecake is creamy, high in protein, and incredibly easy to make with just cottage cheese and protein powder. It bakes into a smooth, sliceable dessert that’s perfect for meal prep, healthy snacking, or satisfying a sweet craving with minimal ingredients.
Ingredients
- 2 cups (450 g) full-fat cottage cheese
- 1 cup (100 g) vanilla whey protein powder
Instructions
- Preheat the oven to 325°F (163°C).
- Line a 6-inch springform pan or loaf pan with parchment paper.
- Add the cottage cheese and protein powder to a blender or food processor.
- Blend until completely smooth.
- Pour the batter into the prepared pan and smooth the top.
- Bake for 35–40 minutes, until the edges are set and the center still jiggles slightly.
- Turn off the oven and leave the cheesecake inside with the door slightly open for 20 minutes.
- Remove from the oven and cool completely.
- Refrigerate for at least 3 hours, preferably overnight.
- Slice and serve chilled.
Notes
- Blend until completely smooth for the creamiest texture.
- Avoid overbaking—a slight center jiggle is the sign it’s ready.
- Chill overnight for the cleanest slices.
- Full-fat cottage cheese produces the best texture.
- Whey concentrate creates a creamier cheesecake than whey isolate.
Nutrition
- Serving Size: 1 Slice
- Calories: 115 kcal
- Sugar: 1 g
- Sodium: 290 mg
- Fat: 4 g
- Saturated Fat: 2.3 g
- Unsaturated Fat: 1.4 g
- Trans Fat: 0 g
- Carbohydrates: 2.5 g
- Fiber: 0 g
- Protein: 13 g
- Cholesterol: 15 mg
Common Questions
Can I use a different protein powder flavor besides vanilla?
Yes — chocolate, cinnamon, and other flavored protein powders work the same way structurally. Just keep an eye on added sugar content in flavored powders, since it can shift the macros noticeably compared to a plain vanilla or unflavored option.
Why did my cheesecake sink slightly in the middle after cooling?
A small amount of sinking is normal, since the center of a protein cheesecake is the last part to fully firm up during cooling. A more noticeable sink usually points to overmixing before baking, which traps air that later escapes as the structure sets.
Can I double the recipe for a larger batch?
Yes — just use a larger pan so the batter depth stays roughly the same, and add 10–15 minutes to the bake time. A deeper batter in the same pan size will need meaningfully longer to set through the center without overbaking the edges.
Is this recipe safe to eat before it’s fully chilled?
Yes — once baked through to a proper set, it’s fully cooked and safe to eat warm. The chilling period is about texture and slicing quality, not food safety.
Two ingredients may sound simple, but the secret isn’t using fewer ingredients—it’s understanding how those ingredients behave together. Once you learn how protein, moisture, and gentle heat work as a system, you’ll be able to make a creamy, sliceable protein cheesecake consistently instead of relying on luck.