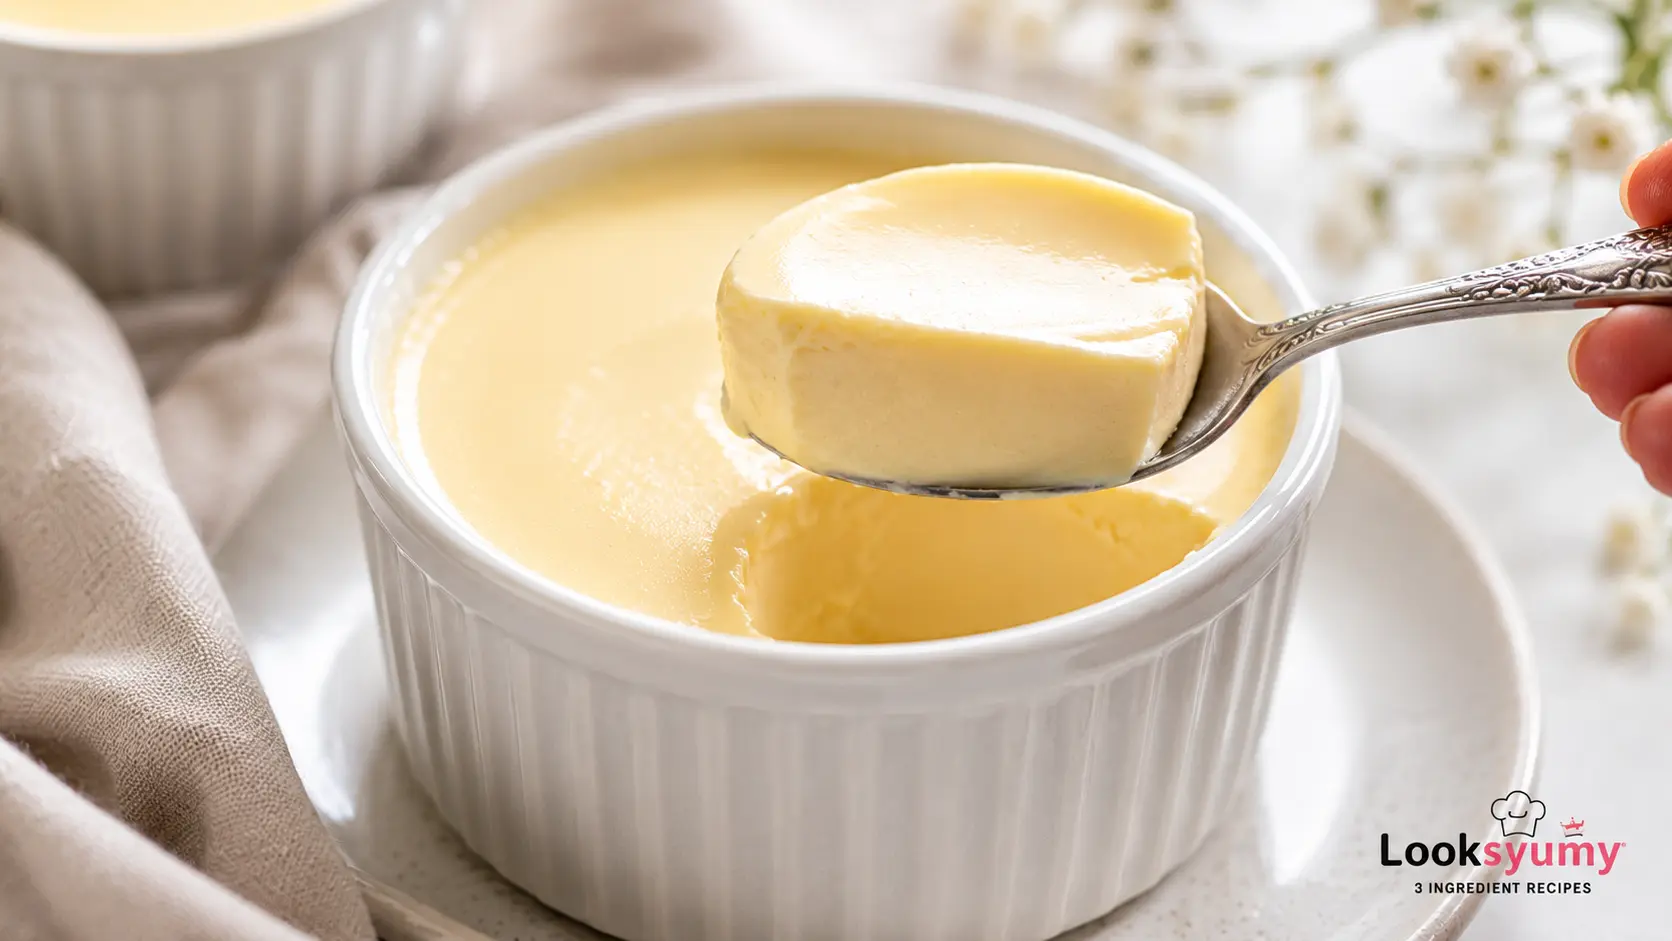
Four ingredients, one gentle heat rule — and a custard that comes out silky every time, not scrambled.
Carnivore custard should be one of the easiest desserts you make. It’s also one of the easiest to ruin, because the margin between “silky” and “scrambled” is smaller than most beginners expect. A few extra minutes in the oven, dairy that’s too hot when it meets the eggs, or a temperature that’s just slightly too high — any one of those turns a smooth custard into something grainy, watery, or full of little curdled flecks.
This guide walks through the Looksyumy Gentle Custard Method, built specifically to remove the guesswork for beginners. You’ll get the full recipe, the reasons behind every step, a troubleshooting map, and the decision points that matter most — so the next batch comes out right the first time, not after three tries.
If you’ve had a custard curdle on you before, it wasn’t bad luck. It was heat, timing, or both. Both are fully covered below.
If you enjoy rich baked dairy desserts, carnivore cheesecake uses many of the same ingredients but creates a firmer, sliceable custard texture.
How to make carnivore custard that stays silky and never turns lumpy, watery, curdled, or grainy: Warm the dairy gently and temper it slowly into the eggs so the proteins heat gradually instead of shocking, bake low (300–325°F / 149–163°C) in a water bath so heat reaches the custard evenly, and pull it while the center still has a gentle jiggle, since it keeps setting as it cools.
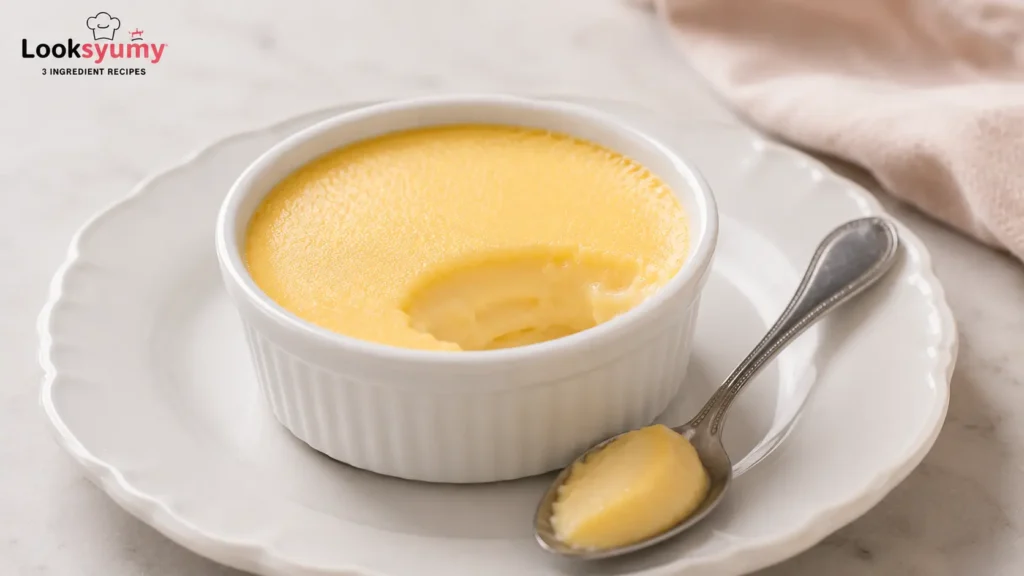
Table of Contents
Table of Contents
| Detail | Info |
|---|---|
| Prep time | 10 minutes |
| Bake time | 35–45 minutes |
| Cooling time | 2 hours minimum |
| Total time | About 3 hours, mostly hands-off |
| Yield | Four 6 oz ramekins |
| Method | Looksyumy Gentle Custard Method, water bath |
| Texture | Silky, smooth, spoon-soft |
| Skill level | Beginner-friendly |
What You’ll Need
- 4 large egg yolks
- 2 whole eggs
- 1½ cups (355ml) heavy cream
- 1 tablespoon (14g) unsalted butter
- Pinch of salt
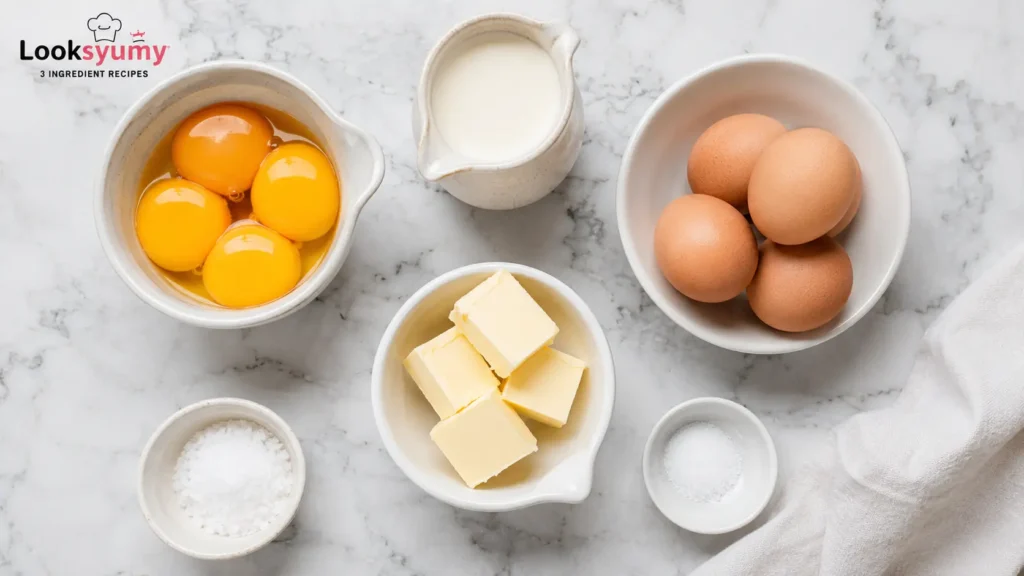
Five ingredients, no sweetener needed for the carnivore version — the richness comes entirely from the yolks, cream, and butter, which is why getting the ratio and the heat right matters more here than in almost any other dessert.
How to Make It
1. Warm the cream gently — don’t boil it. Heat the cream in a small saucepan over medium-low until it’s steaming and small bubbles form at the edges, but well before a rolling boil. Add the butter and let it melt in. Boiling dairy scalds the proteins and sets you up for a grainy custard before the eggs even enter the picture.
2. Whisk the eggs and yolks together with the salt. Whisk just until combined — you’re blending, not whipping air in. A custard doesn’t need volume the way a cake does; extra air here just means more bubbles on the surface after baking.
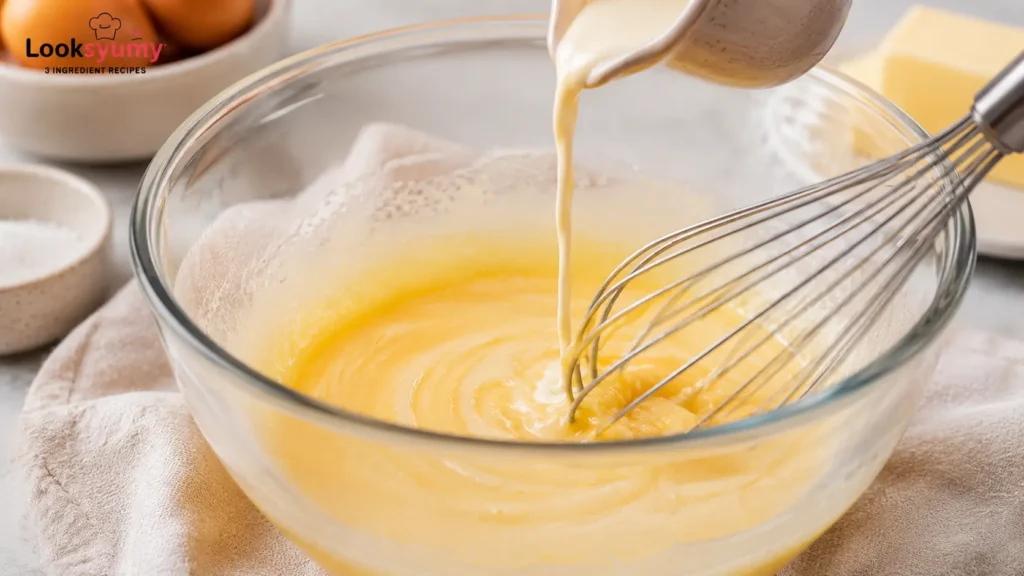
3. Temper the eggs slowly. This is the step most beginners rush. Add the warm cream to the eggs a few tablespoons at a time, whisking constantly, until about half the cream is incorporated. Only then pour in the rest. Tempering raises the egg temperature gradually so the proteins warm evenly instead of seizing on contact with hot liquid.
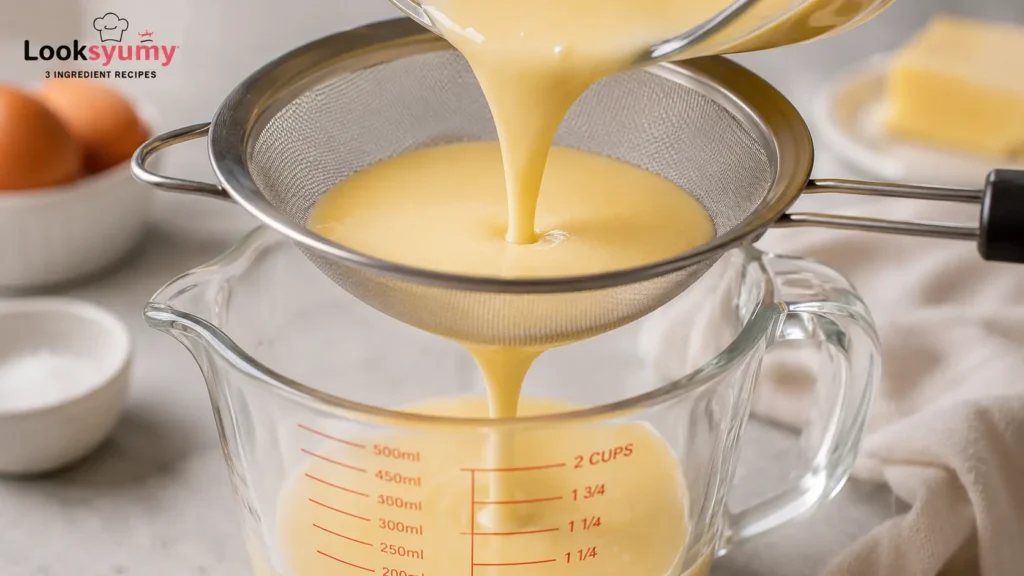
4. Strain the mixture. Pour it through a fine mesh strainer into a pitcher or bowl. This catches any small bits of cooked egg from the tempering step and is the single easiest thing you can do to guarantee a silky, lump-free result.
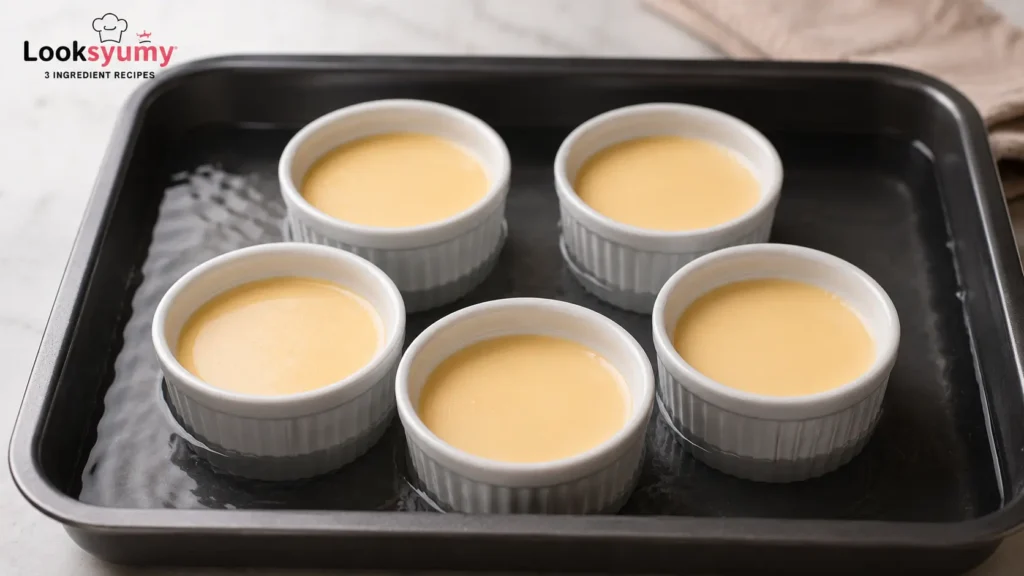
5. Pour into ramekins and set them in a water bath. Fill a roasting pan with hot water reaching halfway up the sides of the ramekins. The water bath is what keeps the custard’s edges from overcooking before the center sets.
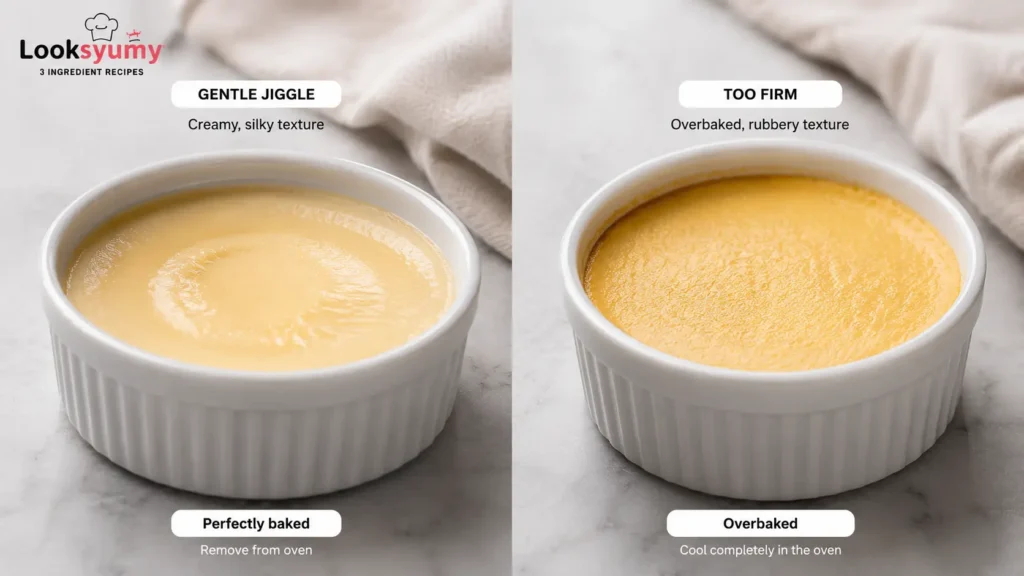
6. Bake at 325°F (163°C) for 35–45 minutes. The custard is done when the edges look set but the center still jiggles gently, like firm gelatin — not liquid, not solid. It will look slightly underdone. That’s exactly right.
7. Cool before serving. Remove from the water bath and let the ramekins cool at room temperature for 20–30 minutes, then refrigerate at least 2 hours. The custard firms up further as residual heat continues cooking it gently even after it leaves the oven.Perfect Jiggle Test
Why Gentle Heat Is the Whole Secret
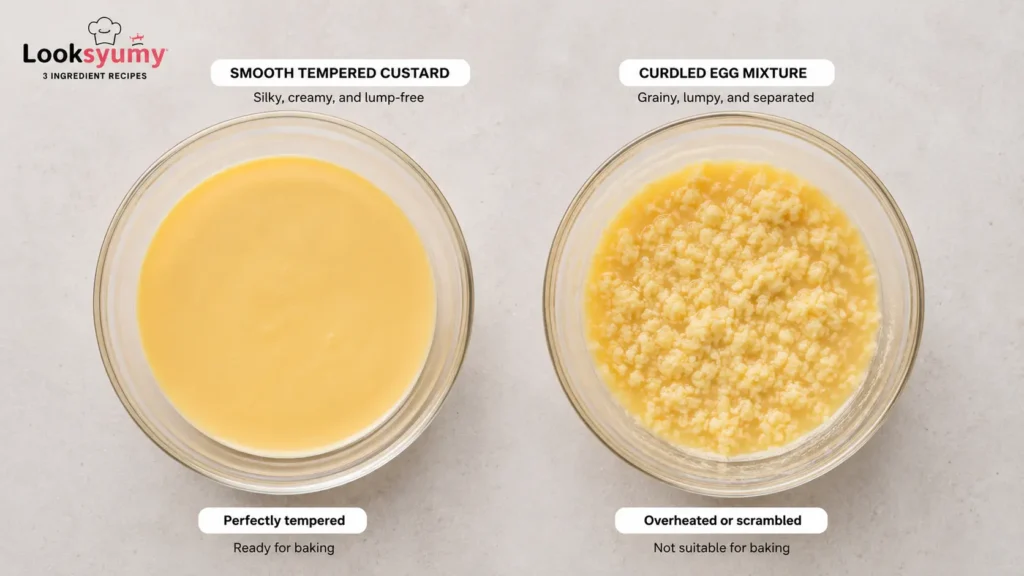
Custard has almost no room for error because it’s stabilized entirely by egg proteins, and egg proteins are sensitive to a narrow temperature range. Go too hot, too fast, and the proteins clump together and squeeze out moisture instead of setting into a smooth gel — that’s curdling, and once it happens, there’s no fixing that batch.
The Gentle Custard Method exists to keep the entire process inside that narrow safe zone from start to finish. It combines three things: warming the dairy without boiling it, tempering the eggs gradually instead of dumping hot liquid straight in, and baking at a lower temperature inside a water bath so the custard never experiences a heat spike. Each step buys you a wider margin for error, which is exactly what a beginner-focused recipe needs.
Use this approach any time you’re making an egg-and-dairy custard base with no starch to fall back on — that includes this recipe, a carnivore cheesecake filling, or any crème-style dessert where the eggs are doing all the structural work. If a recipe skips tempering or bakes hot and fast, it’s cutting corners this method is specifically built to avoid.
Choosing Your Ingredients
Egg yolks alone give you a richer, silkier custard because they’re almost pure fat and emulsifiers with less of the tougher white protein that can add a slightly firmer, more “set” texture. Here’s what most people miss — using only whole eggs isn’t wrong, it’s just a different texture goal, closer to a flan than a rich pot de crème, so this recipe blends both for balance.
| Option | Texture | Best For |
|---|---|---|
| Egg yolks only | Richest, silkiest, softest set | Special occasion, pot de crème style |
| Whole eggs only | Firmer, more sliceable set | Custard you want to hold its shape |
| Blend (recommended) | Balanced richness and structure | Most bakers, most occasions |
The primary factor for your dairy choice is fat content — heavy cream (36%+ fat) gives you the silkiest, most stable custard, while half-and-half (about 10–12% fat) is lighter but more prone to a slightly looser set. If you use half-and-half, expect a softer custard and consider adding an extra yolk to compensate for the lost fat.
| Dairy | Fat % | Texture Result |
|---|---|---|
| Heavy cream | 36%+ | Silkiest, most stable, recommended |
| Half-and-half | ~10-12% | Lighter, softer set, needs adjustment |
| Whole milk | ~3.5% | Too thin alone; not recommended without added fat |
A water bath surrounds the ramekins with gentle, even heat so the custard never gets hit with direct oven heat, which is the single biggest cause of curdling and a rubbery skin on top. Direct baking is faster but leaves almost no margin for error — not recommended if you’re still getting a feel for this dessert.
Oven-baked custard, especially in a water bath, gives you the most even and forgiving heat, which is exactly why it’s the easier route for beginners. Stovetop custard, like a stirred crème anglaise, cooks faster and rewards experience — it’s easy to overshoot the setting point in seconds if you’re not watching closely.
Custard actually holds up beautifully made a day ahead, since the texture stays stable in the fridge and the flavor has time to settle. Make it fresh only if you specifically want it slightly warm; for the smoothest cold texture, a full overnight chill is the better call.
Ramekins bake more evenly because the custard is shallower and heat reaches the center faster and more uniformly, which is exactly why this recipe uses them. A single large baking dish takes longer to set in the middle while the edges risk overcooking — doable, but it removes some of the built-in margin for error this method is designed to give you.
If you’re new to this, stick to the exact ratio and water bath method above — it’s the most forgiving version of this dessert you can make. For special occasions, the same base scales up beautifully with a torched sugar-free top or a dusting of cinnamon, without changing the underlying technique at all.
What’s Actually Happening in the Bowl
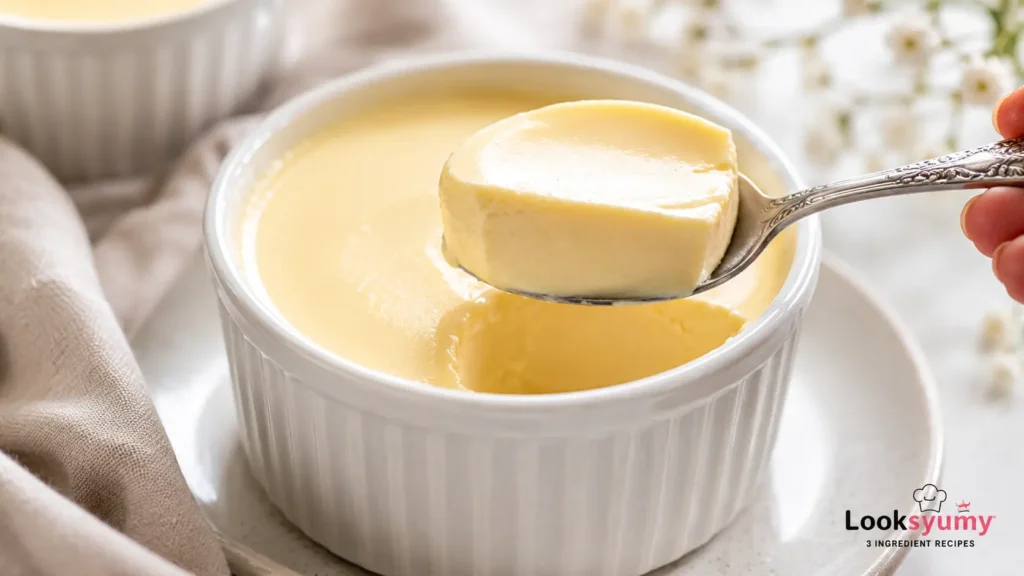
Eggs and egg yolks are the entire structure of this dessert. Yolks are mostly fat and emulsifiers, which is why they contribute richness and smoothness, while the whites in whole eggs contain more of the protein that firms up and holds a shape. Understanding that split is the key to adjusting texture on purpose instead of by accident.
Heavy cream is high-fat dairy that carries flavor and contributes to fat emulsification — the process where fat droplets stay evenly suspended through the custard instead of separating out into a greasy layer. This is part of what makes a well-made custard feel silky on the tongue rather than heavy or oily.
Butter adds a small amount of extra fat and a rounder flavor, and because it’s mostly fat with very little water, it doesn’t interfere with the egg-protein setting process the way an ingredient with more water content could.
Protein coagulation is the science behind the entire dessert: as the custard heats, egg proteins unfold and link together into a gel-like network that traps the cream and fat. According to the American Egg Board’s data on egg protein coagulation, egg yolk proteins begin setting around 149°F and fully coagulate near 158°F — a narrow eight-degree window, which is exactly why a slow, gentle bake gives you so much more control than high heat.
Curdling happens when that protein network tightens too fast and squeezes moisture out instead of holding it in — the same mechanism as scrambled eggs, just happening more slowly inside a custard. Tempering exists specifically to prevent this: by warming the eggs gradually with small additions of hot cream, you avoid the temperature shock that causes proteins to seize all at once.
Residual heat and carryover cooking matter just as much after the custard leaves the oven as while it’s baking — the ramekin and the custard itself hold stored heat that keeps gently cooking the center for several minutes. Pulling the custard while it still jiggles isn’t underbaking; it’s accounting for the cooking that’s about to happen off the heat. USDA food safety guidance notes that a fully cooked egg dish should reach an internal temperature of 160°F, which lines up closely with the coagulation range above — you’re aiming for “just past done,” not “obviously done,” because temperature, not appearance, is the real marker.
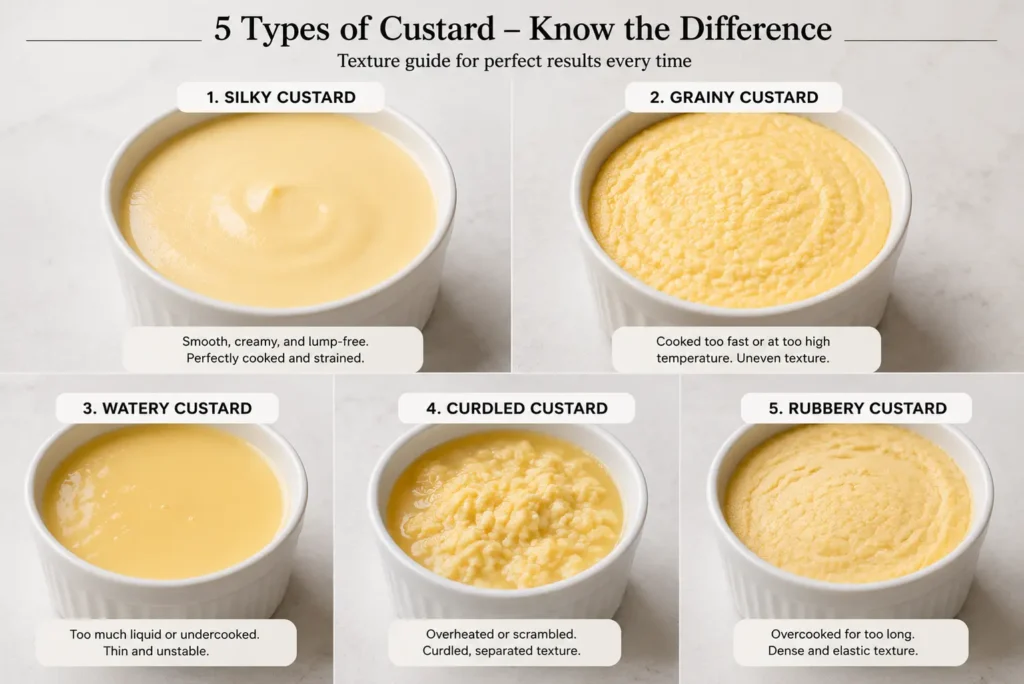
| Problem | Cause | Fix |
|---|---|---|
| Lumpy or scrambled bits | Eggs shocked by hot cream added too fast | Temper slowly, a few tablespoons at a time |
| Watery custard | Overbaked, or baked without a water bath | Lower temp, use water bath, pull at gentle jiggle |
| Grainy texture | Dairy boiled before mixing with eggs | Warm cream only until steaming, never boiling |
| Rubbery skin on top | Direct dry heat, no water bath | Always use a water bath for oven-baked custard |
| Custard never sets | Underbaked, or too much liquid dairy relative to eggs | Bake a bit longer; check ratio if it happens repeatedly |
| Small curdled flecks throughout | No straining after tempering | Always strain the mixture before baking |
| You Want | Adjust This |
|---|---|
| Richer, silkier custard | Use more yolks, fewer whole eggs |
| Firmer, more sliceable custard | Use more whole eggs relative to yolks |
| Lighter texture | Substitute part of the cream with half-and-half, add one extra yolk |
| Deeper flavor | Add an extra tablespoon of butter |
| Oven Temp | Result |
|---|---|
| 300°F (149°C) | Gentlest set, longest bake, lowest curdling risk |
| 325°F (163°C) | Recommended — balanced timing and smooth texture |
| 350°F (177°C) | Faster but noticeably higher curdling risk |
| 375°F+ (191°C+) | Not recommended — too fast for even protein coagulation |
If Something Goes Wrong
The real issue behind most curdled custard is speed, not skill — heat added too quickly, either from unfiltered hot cream or an oven set too high. Slowing down at both of those points solves the majority of failed batches.
If your custard has small curdled bits throughout, the cream was likely added too fast during tempering. Straining the mixture before baking catches this, but preventing it in the first place means adding the hot cream in smaller increments while whisking constantly.
If the custard came out watery after chilling, it was almost certainly overbaked. A custard that looks fully firm and jiggle-free straight out of the oven has usually gone slightly too far — residual heat will finish the job if you pull it a few minutes earlier than feels comfortable.
If the top developed a tough, rubbery skin, check whether you used a water bath. Direct oven heat on an uncovered custard dries and toughens the surface well before the center is even set.
What I Learned Making This the Hard Way
In my early kitchen trials with carnivore custard, I skipped tempering because it felt like an unnecessary extra step for a “simple” four-ingredient dessert. I poured warm cream straight into the eggs, whisked it together, and baked it as usual.
The result was a custard with a faint graininess throughout, plus a few small curdled flecks near the edges of the ramekin where the batter had touched the hottest part of the water bath first. At the time, I assumed the oven temperature was the problem, so I lowered it — and the grainy texture barely improved.
The actual issue was that the eggs had already partially cooked from the temperature shock before they ever went in the oven. Once I started tempering properly — adding the warm cream in small increments while whisking — the graininess disappeared completely, even at the same oven temperature I’d been using all along. That one change did more for texture than any oven adjustment.
Where This Fits in the Carnivore Dessert World
Carnivore custard sits at the center of a lot of other carnivore desserts, and once you understand its science, several other recipes start making a lot more sense.
Carnivore cheesecake is built on the exact same protein-coagulation logic, just with cream cheese added to the base for more structure. If you understand why this custard curdles, you already understand why cheesecake cracks — both come down to heat moving too fast through egg protein.
Carnivore cheesecake bites use a firmer version of this same custard science baked in a muffin tin, which is worth trying once you’re comfortable with the ramekin version here.
Carnivore ice cream actually starts as a custard base very similar to this one, cooked gently on the stovetop, then chilled and churned instead of baked — the tempering step matters just as much there as it does here.
Carnivore mousse and carnivore cream puffs lean more on air incorporation and choux pastry structure respectively, which is a different set of skills, but both still rely on the same egg-behavior fundamentals covered in this guide.
For a deeper look at ingredient behavior on its own, our ingredient guides and dessert science pages break down egg proteins and dairy fat individually, and our troubleshooting guides cover curdling and graininess patterns across multiple recipes, not just this one.
A few things worth remembering:
- A silky custard is created by gentle heat, not extra cream.
- Curdling doesn’t start in the oven — it usually starts the moment hot cream hits cold eggs too fast.
- Tempering isn’t an optional step. It’s the step that decides whether your custard is silky or grainy.
- The jiggle you’re afraid of is the custard telling you it’s almost, not not, done.
- A water bath doesn’t slow your custard down — it protects it from overcooking exactly where it’s most vulnerable.
For a frozen dessert instead of a baked custard, carnivore ice cream uses many of the same dairy ingredients while developing a completely different texture.
Print
Description
A silky carnivore custard made with eggs, egg yolks, heavy cream, and butter. This beginner-friendly recipe uses the Looksyumy Gentle Custard Method to create a smooth, creamy texture without lumps, curdling, or plant-based ingredients.
Ingredients
- 4 large eggs
- 2 large egg yolks
- 2 cups (480 ml) heavy cream
- 2 tbsp unsalted butter, melted
- 1/4 tsp fine sea salt
- Optional: 1-2 tbsp melted beef tallow for a richer carnivore version
Instructions
- Preheat the oven to 300°F (149°C).
- Heat the heavy cream and butter until warm but not boiling.
- In a separate bowl, whisk together the eggs, egg yolks, and salt until smooth.
- Slowly pour the warm cream into the eggs while whisking continuously to temper the mixture.
- Strain the custard through a fine-mesh sieve into a measuring jug.
- Divide evenly between ramekins.
- Place the ramekins in a deep baking dish and fill halfway with hot water.
- Bake for 35–40 minutes, until the edges are set and the center jiggles slightly.
- Remove from the water bath and cool to room temperature.
- Refrigerate for at least 4 hours, preferably overnight, before serving.
Notes
- Use room-temperature eggs for a smoother custard.
- Never allow the cream to boil before tempering.
- Straining the mixture removes tiny cooked egg particles for an ultra-silky texture.
- Bake gently in a water bath to prevent curdling or cracking.
- Chill overnight for the best texture and flavor.
- Store refrigerated for up to 4 days.
Nutrition
- Serving Size: 1 Ramekin
- Calories: 325 kcal
- Sugar: 2 g
- Sodium: 145 mg
- Fat: 30 g
- Saturated Fat: 18 g
- Unsaturated Fat: 10 g
- Trans Fat: 0 g
- Carbohydrates: 3 g
- Fiber: 0 g
- Protein: 10 g
- Cholesterol: 255 mg
Common Questions
Why did my carnivore custard turn out grainy?
The dairy was likely boiled before mixing, or the eggs were shocked by hot liquid added too quickly. Warm the cream gently and temper slowly to avoid both.
Can I make carnivore custard without a water bath?
You can, but it’s not recommended if you’re still learning the recipe, since direct heat removes most of your margin for error and increases the risk of curdling.
How do I know when carnivore custard is done?
The edges should look set while the center still has a gentle jiggle. It will continue firming up as it cools from residual heat.
Why does my custard have small lumps even after whisking well?
This usually means the eggs partially cooked during tempering. Straining the mixture before baking removes these lumps even if a few form.
Can I make carnivore custard ahead of time?
Yes — it holds up well in the fridge for at least a day or two, and the texture is just as smooth, if not better, after a full overnight chill.
Do I need to strain the custard mixture?
It’s strongly recommended. Straining catches any small cooked egg bits from tempering and is the easiest way to guarantee a completely silky result.
Carnivore custard rewards patience more than any other dessert in this hub. There’s no flour, no crust, and no room to hide a rushed step — just eggs, cream, and heat, and how carefully you handle all three.
Warm the dairy gently, temper slowly, bake low in a water bath, and pull it while it still jiggles. Follow those four things in order, and the silky texture takes care of itself.