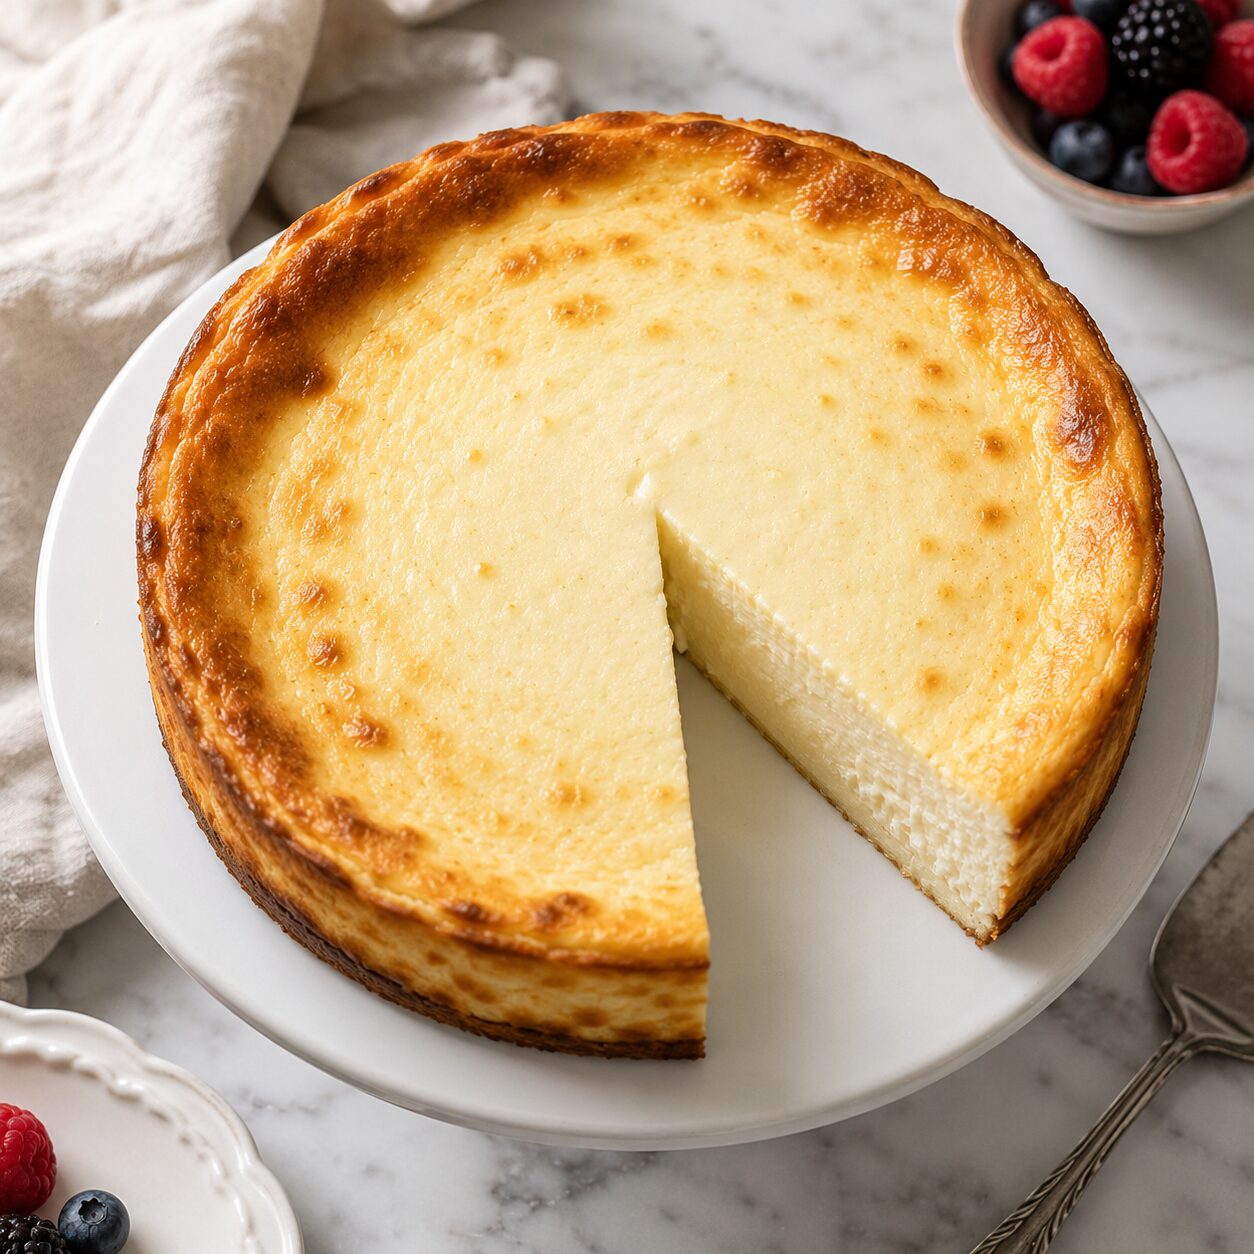
Cheesecake usually means a full block of cream cheese, a stick of butter, and a crust you have to press into a pan before the real baking even starts. This version skips all of that. Two ingredients — Greek yogurt and eggs — blended together and baked low and slow, and you end up with something genuinely creamy, tangy, and sliceable.
I’ve made this cheesecake more times than any other recipe on this site, mostly because it’s become my go-to when I want something that tastes like dessert but fits into a high-protein day without much thought. The version in this guide is the one I’ve landed on after a lot of batches that came out too eggy, too watery, or cracked right down the middle. This article walks through exactly why those problems happen, how to avoid them, and how to adjust the recipe once you’ve got the base version down.
If you’re looking for an even richer version with a more traditional texture, you’ll also enjoy our High Protein Cheesecake, which uses additional protein-rich ingredients while keeping the dessert light and satisfying.
Table of Contents
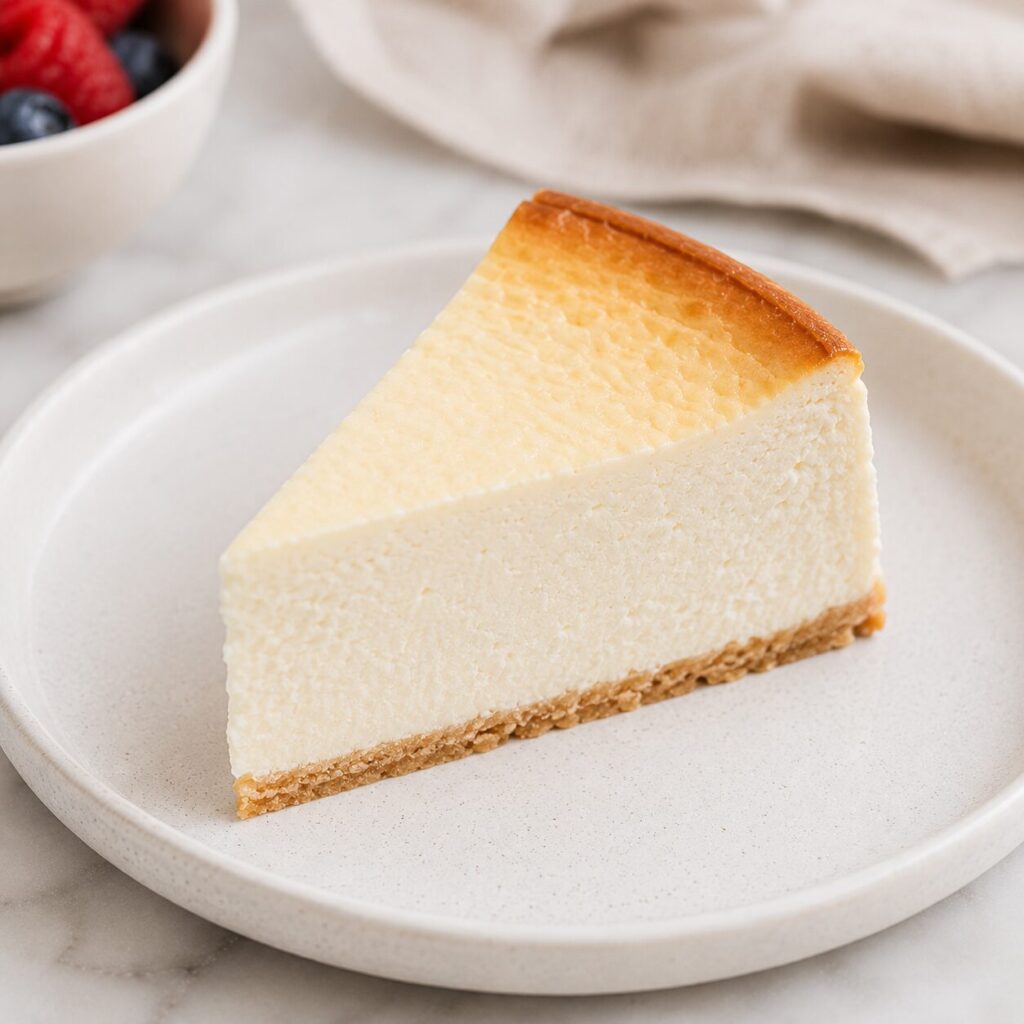
A 2 ingredient Greek yogurt cheesecake is made by whisking full-fat plain Greek yogurt and eggs together until completely smooth, then baking the mixture low and slow until the center just barely jiggles. The two ingredients set through the same basic reaction — protein coagulation — with the yogurt providing tang, creaminess, and protein, and the eggs providing the structure that turns a soft mixture into something sliceable. Pull it from the oven before it looks fully firm, then chill it fully before slicing; that combination is what keeps the texture creamy instead of dry, rubbery, or watery.
At a Glance
| Metric | Full Cheesecake (8 Slices) | Per Slice |
|---|---|---|
| Prep Time | 5 minutes | — |
| Bake Time | 40–45 minutes | — |
| Chill Time | Minimum 4 hours, ideally overnight | — |
| Calories | 760 kcal | 95 kcal |
| Protein | 66 g | 8.3 g |
| Fat | 34 g | 4.3 g |
| Carbs | 30 g | 3.8 g |
Macros are estimated from standard values for full-fat plain Greek yogurt and large eggs; your exact numbers will shift a little depending on your brand.
Why You’ll Love This Recipe
This cheesecake exists for exactly one reason: to give you the actual experience of eating cheesecake — that dense, tangy, creamy bite — without a long ingredient list or a springform pan full of butter and crushed cookies. During testing, what surprised me most wasn’t that it worked at all, but how close the texture landed to a real cheesecake once I got the bake time right. It’s not a “healthy substitute that tastes fine, I guess.” Sliced cold from the fridge, it genuinely reads as cheesecake.
It also happens to be one of the most convenient desserts I make regularly. There’s no crust to press, no springform pan required if you don’t own one, and the ingredient list is short enough that you can make it on a whim without a grocery run. For anyone tracking protein, it’s also just a genuinely useful dessert — a slice carries more protein than most cheesecake alternatives twice its ingredient count.
| Feature | 2 Ingredient Greek Yogurt Cheesecake | Traditional Cheesecake |
|---|---|---|
| Main Dairy | Greek yogurt | Cream cheese |
| Protein | Higher | Moderate |
| Crust Required | No | Usually |
| Ingredients | Just 2 | 8–12 |
| Prep Time | About 5 minutes | 20–30 minutes |
| Texture | Light and creamy | Dense and rich |
LooksYumy Tip: If you’re looking for a lighter dessert that still satisfies a cheesecake craving, this version is one of the easiest swaps you can make.
Why This Cheesecake Is Different
Traditional cheesecake relies on cream cheese for its dense, rich structure, with eggs playing a supporting role. This recipe flips that relationship. Greek yogurt is doing the job cream cheese usually does — providing body, tang, and the bulk of the final texture — while eggs provide nearly all of the setting structure, since Greek yogurt alone won’t firm up in the oven the way cream cheese does.
That difference changes how the whole recipe behaves. Cream cheese cheesecake is fairly forgiving of a slightly-too-hot oven, since the cream cheese’s own fat buffers the eggs somewhat. This version has less of that buffer, so it’s more sensitive to overbaking — a detail that shows up repeatedly throughout this guide, because it’s the single biggest factor separating a creamy result from a rubbery one.
Curious how another two-ingredient version compares? Our 2 Ingredient Cottage Cheese Cheesecake uses cottage cheese instead of Greek yogurt, creating a slightly firmer texture with a milder flavor.
Ingredients Explained
- 2 cups (about 480 g) full-fat plain Greek yogurt
- 3 large eggs, room temperature
- Optional: 2–3 tbsp honey or a low-carb sweetener, and 1 tsp vanilla extract, if you want it sweeter (these don’t count against the “2 ingredient” core, since the recipe works without them)
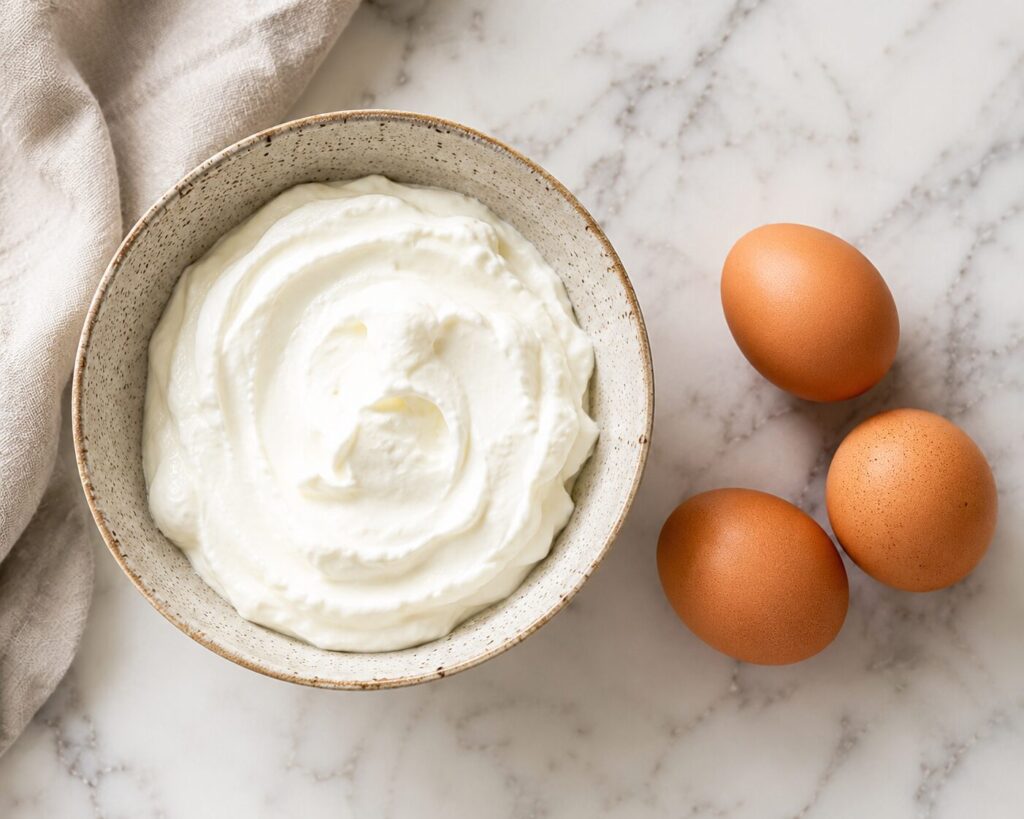
Greek yogurt is the entire body of this cheesecake. Unlike regular yogurt, it’s been strained to remove much of its liquid whey, which concentrates its protein and fat and gives it a thick, spoonable texture before it ever goes in the oven. That thickness is part of why this recipe can skip a crust and a long ingredient list — Greek yogurt is already doing structural and textural work that a lot of other recipes need multiple ingredients to achieve.
Eggs provide the setting structure. As they heat, egg proteins denature — unfolding from their natural coiled shape — and then link together into a firm network, a reaction called protein coagulation. That network is the entire reason this mixture goes from a pourable batter to a sliceable cheesecake. Without eggs, Greek yogurt alone would stay a soft, chilled dip no matter how long you baked it.
Ingredient Science: Why These 2 Ingredients Work
The real issue behind most failed versions of this recipe isn’t the ingredient list — it’s a misunderstanding of what each ingredient is actually contributing, and what happens when you push either one too far.
Greek yogurt brings meaningful moisture into the mixture, and that moisture matters more here than in a traditional cheesecake, since there’s no significant fat buffer from cream cheese to protect the eggs from overcooking. Eggs, meanwhile, coagulate gradually across a range of temperatures rather than at one single point — food science coursework on egg cookery explains that this gradual firming is what gives a custard-style bake a workable window for doneness rather than a hard cutoff, and the same gradual coagulation process governs how quickly a mixture like this one moves from properly set to overcooked. That’s genuinely useful information here, because it means there’s a real window to catch this cheesecake at the right moment — it doesn’t flip from underdone to ruined in the space of a minute, but it does move steadily in that direction the longer it bakes past the point it first sets.
Why Greek Yogurt Matters More Than Fat Percentage
Here’s what most people miss: choosing between full-fat and nonfat Greek yogurt affects richness, but the protein content — which stays fairly consistent across fat levels — is what’s actually doing the structural work. Full-fat yogurt gives you a noticeably creamier mouthfeel because of its fat content, while nonfat yogurt sets similarly in terms of structure but tastes leaner and slightly tangier without that fat to round it out.
Full-Fat vs. Nonfat Greek Yogurt
| Full-Fat Greek Yogurt | Nonfat Greek Yogurt | |
|---|---|---|
| Texture result | Creamier, richer mouthfeel | Slightly firmer, leaner texture |
| Flavor | Rounder, less sharp tang | More pronounced tang |
| Best for | Classic, indulgent-tasting cheesecake | Lower-fat version without sacrificing protein |
Choosing the Right Greek Yogurt
The primary factor in choosing a Greek yogurt for this recipe is straining level, not brand loyalty. Greek yogurt gets its thick, protein-dense character specifically from being strained to remove much of its whey — a process that concentrates protein and reduces the water content compared to regular yogurt. According to an overview from Harvard Health, the straining process that defines Greek yogurt condenses its protein and fat while draining off some of the lactose along with the whey, which is exactly why Greek yogurt behaves so differently in a recipe like this compared to regular, unstrained yogurt — a swap that will leave you with a noticeably wetter, less structured cheesecake.
Choose thick, well-strained plain Greek yogurt if you want the closest texture to traditional cheesecake. Avoid regular yogurt or very loose, watery Greek yogurt — it doesn’t carry enough concentrated protein and will leave your cheesecake undersupported and prone to weeping liquid as it bakes.
Choosing the Right Eggs
Room-temperature eggs blend into the yogurt far more smoothly than cold eggs straight from the refrigerator, which matters more in a two-ingredient recipe than it would in a longer one — there’s simply nothing else in the batter to mask an uneven blend. Cold eggs can cause small pockets of yogurt fat to firm up right as they’re added, leaving behind tiny lumps that show up later as graininess. Let your eggs sit out for about 20–30 minutes before starting, and the batter will come together noticeably smoother.
Equipment
- A mixing bowl and whisk, or a blender for the smoothest possible result
- A 9-inch round cake pan or springform pan
- A larger roasting pan, for a water bath
- Aluminum foil, to wrap the outside of the pan
Before You Start
✓ Greek yogurt is thick and well strained
✓ Eggs are at room temperature
✓ Oven fully preheated
✓ Water bath prepared
✓ Pan lined or greased
✓ Ingredients fully blended
Step-by-Step Instructions
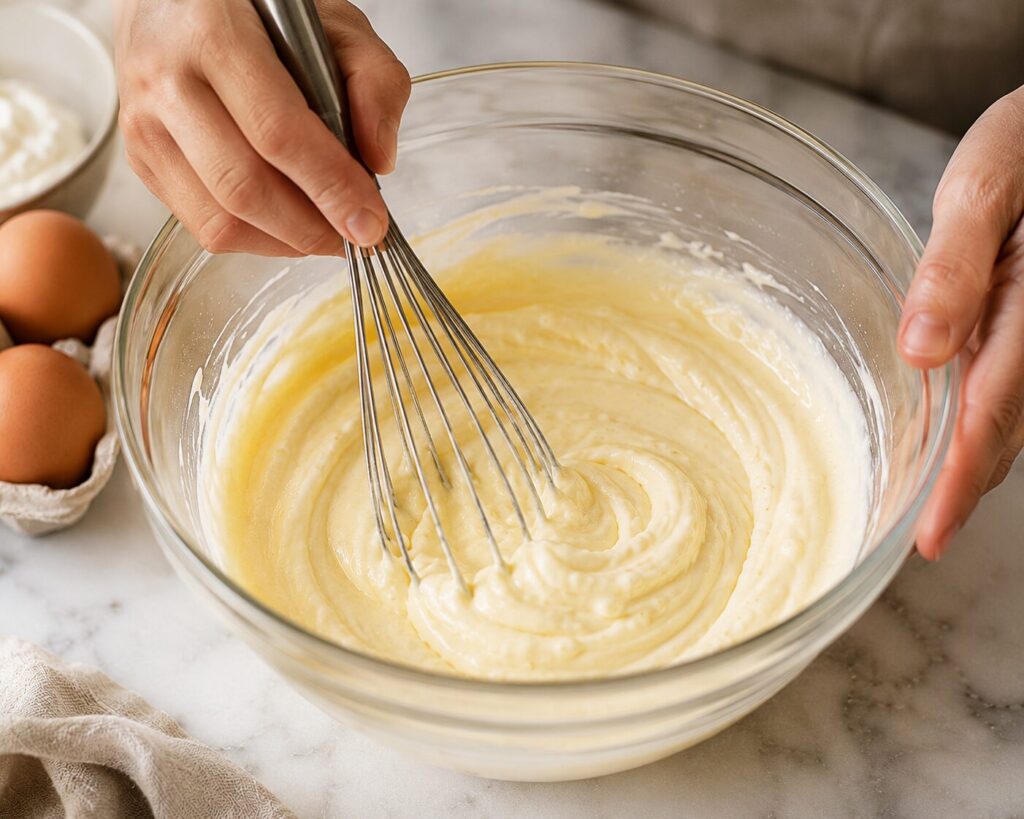
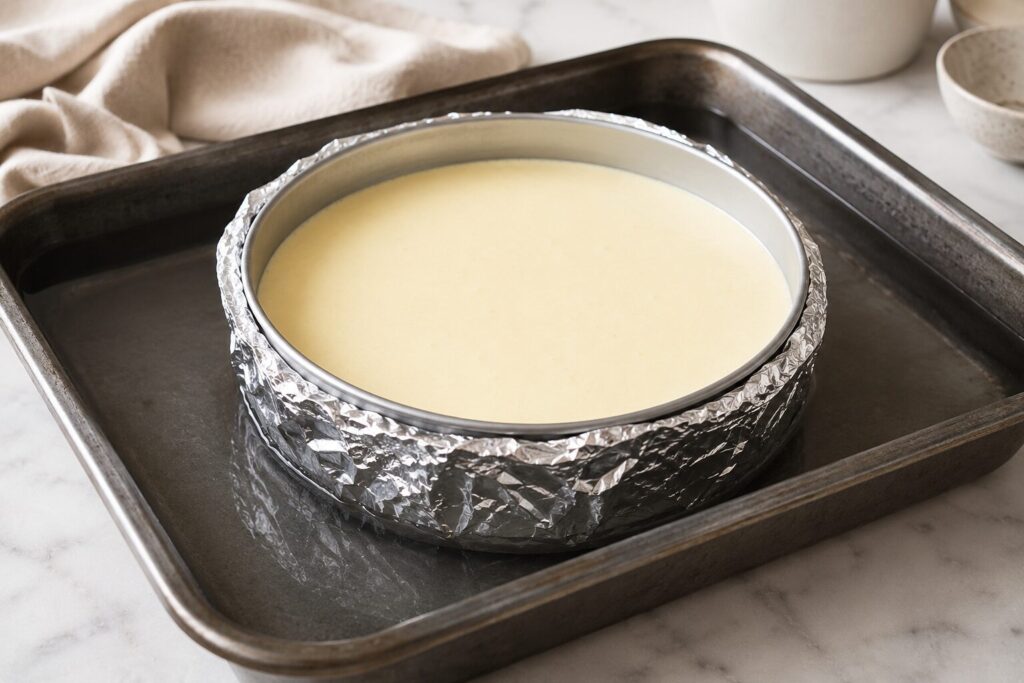
- Preheat the oven to 300°F (149°C). Wrap the outside of your pan tightly in two layers of foil if you’re using a springform pan, to keep water out during the bath.
- In a bowl or blender, combine the Greek yogurt and eggs (plus sweetener and vanilla, if using) and whisk or blend until completely smooth.
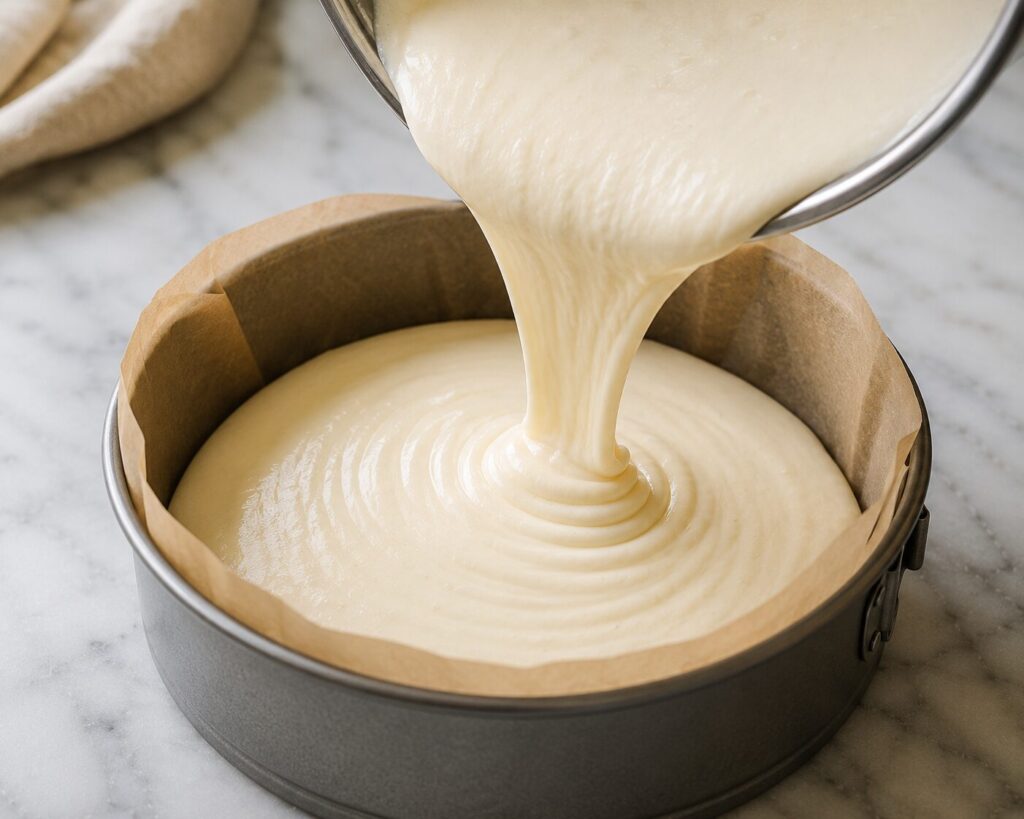
- Pour the batter into the prepared pan and set it inside a larger roasting pan. Fill the roasting pan with hot water about halfway up the sides of the cheesecake pan.
- Bake for 40–45 minutes, until the edges are set and the center still jiggles slightly when the pan is nudged.
- Turn off the oven and let the cheesecake sit inside with the door cracked for 30 minutes.
- Move to the counter to finish cooling to room temperature, then refrigerate for at least 4 hours, ideally overnight, before slicing.
Visual Texture Cues
A properly baked cheesecake at this stage will have set, matte edges with a slight golden tint, while the center few inches still show a gentle wobble when the pan is nudged — not a liquid sloshing motion, but a soft, cohesive jiggle. If the whole surface looks glossy and wet, it needs more time. If there’s no jiggle left anywhere, it’s likely already past the ideal pull point.
What Should the Inside Look Like?
A perfectly baked Greek yogurt cheesecake should have:
- A creamy, smooth center
- No watery pockets
- Tiny, evenly distributed air bubbles
- A clean slice after chilling
- A silky texture that melts on the tongue without feeling rubbery
If the center looks glossy and wet after chilling, it was likely underbaked. If it appears dry or crumbly, it stayed in the oven too long.
Kitchen Observation
The second batch came out much smoother than the first, and the only thing I changed was how long I let the eggs sit out before starting. My first attempt used eggs straight from the fridge, and even though I blended everything thoroughly, the finished cheesecake had a faint graininess I couldn’t quite explain. I assumed it was an oven temperature issue and adjusted that first — it didn’t fix anything. It wasn’t until I let the eggs come fully to room temperature before mixing that the graininess disappeared completely. A small adjustment made all the difference, and it had nothing to do with the oven at all.
Pro Baker Tips
- Blend rather than whisk if you want the smoothest possible texture — a blender breaks down any remaining texture in the yogurt more thoroughly than hand-whisking can.
- Tap the filled pan gently on the counter a few times before baking to release any trapped air bubbles from mixing.
- Don’t skip the water bath. Without it, the exposed sides of the pan heat much faster than the center, which is one of the most common causes of both cracking and an overcooked edge with an undercooked middle.
Common Mistakes
- Using cold eggs. They blend unevenly and can leave a grainy texture, as covered above.
- Overmixing on high speed. This whips extra air into the batter — that air has nowhere to go but out as the cheesecake bakes, and it’s a common, underrated cause of surface cracking.
- Slicing too early. A cheesecake that’s only been in the fridge for an hour hasn’t finished firming up; it needs the full chill time to reach a clean-slicing texture.
- Skipping the water bath to save time. It’s the single most effective step for preventing cracks and uneven baking in this recipe.
Troubleshooting Guide
| Problem | Cause | Fix |
|---|---|---|
| Watery cheesecake | Yogurt wasn’t strained enough, or too much liquid separated during baking | Use a well-strained, thick Greek yogurt; avoid loose or watery brands |
| Cracked top | Overmixing trapped air, or no water bath used | Mix gently; always use a water bath |
| Rubbery texture | Overbaked past the point of a slight center jiggle | Pull it earlier; trust that carryover cooking finishes the job |
| Grainy texture | Cold eggs added to the yogurt, or under-blended batter | Bring eggs to room temperature; blend until fully smooth |
| Never fully sets | Underbaked, or oven running cooler than the display suggests | Extend bake time in small increments; verify oven temperature with a thermometer |
| Sunken center after cooling | Batter had trapped air that escaped after baking | Mix gently and avoid overmixing; tap out air bubbles before baking |
Texture Guide
Creamy vs. Firm
A shorter bake, pulled right at the first sign of a set edge with a generous center jiggle, gives you the creamiest, most custard-like result. A slightly longer bake, pulled once the jiggle is smaller and more contained to the very center, gives you a firmer, more traditional cheesecake slice. Both are valid outcomes — it’s a matter of preference, not a right-or-wrong distinction, as long as you don’t push past that window into fully rigid territory.
Fresh vs. Chilled
| Fresh (Just Cooled) | Fully Chilled | |
|---|---|---|
| Texture | Soft, not yet sliceable cleanly | Firm, clean-cutting slice |
| Flavor | Milder tang | Tang more pronounced once fully cold |
| Best for | Not recommended for slicing yet | Serving and slicing |
How to Know It’s Done
The most reliable check is the jiggle test described above, but if you want a numeric backup, an instant-read thermometer inserted into the center should read around 150–155°F (66–68°C) when you pull it — well below what fully cooked eggs alone would need, since carryover cooking and the residual heat in the pan continue the process after the oven turns off.
Why Cheesecakes Crack
The real issue behind almost every crack isn’t the oven temperature alone — it’s usually a combination of trapped air and uneven heat exposure. Overmixing whips air directly into the batter, and that air has nowhere to go but up and out as the cheesecake bakes, pulling the surface apart as it escapes. Baking without a water bath compounds the problem, since the exposed pan sides heat up much faster than the insulated center, causing uneven expansion that stresses the surface.
How to Prevent Cracks
- Mix just until smooth — stop as soon as no streaks remain.
- Always use a water bath.
- Avoid opening the oven door during baking, which causes a sudden temperature drop that can shock the surface.
- Cool gradually: oven rest first, then counter, then refrigerator — never straight from a hot oven into the fridge.
Water Bath: Do You Really Need One?
| Water Bath | No Water Bath | |
|---|---|---|
| Crack risk | Low | Higher |
| Even baking | Center and edges finish closer together | Edges overbake before center sets |
| Best for | A clean, presentation-ready cheesecake | A rustic version you don’t mind cracking |
Choose a water bath if you want a smooth, crack-free top for serving. Skip it only if you’re making a casual version you plan to serve in scoops rather than clean slices.
Round Pan vs. Loaf Pan
| Round Pan | Loaf Pan | |
|---|---|---|
| Shape | Classic cheesecake wedge slices | Rectangular bar-style slices |
| Bake time | As written | May need slightly less time due to shallower depth |
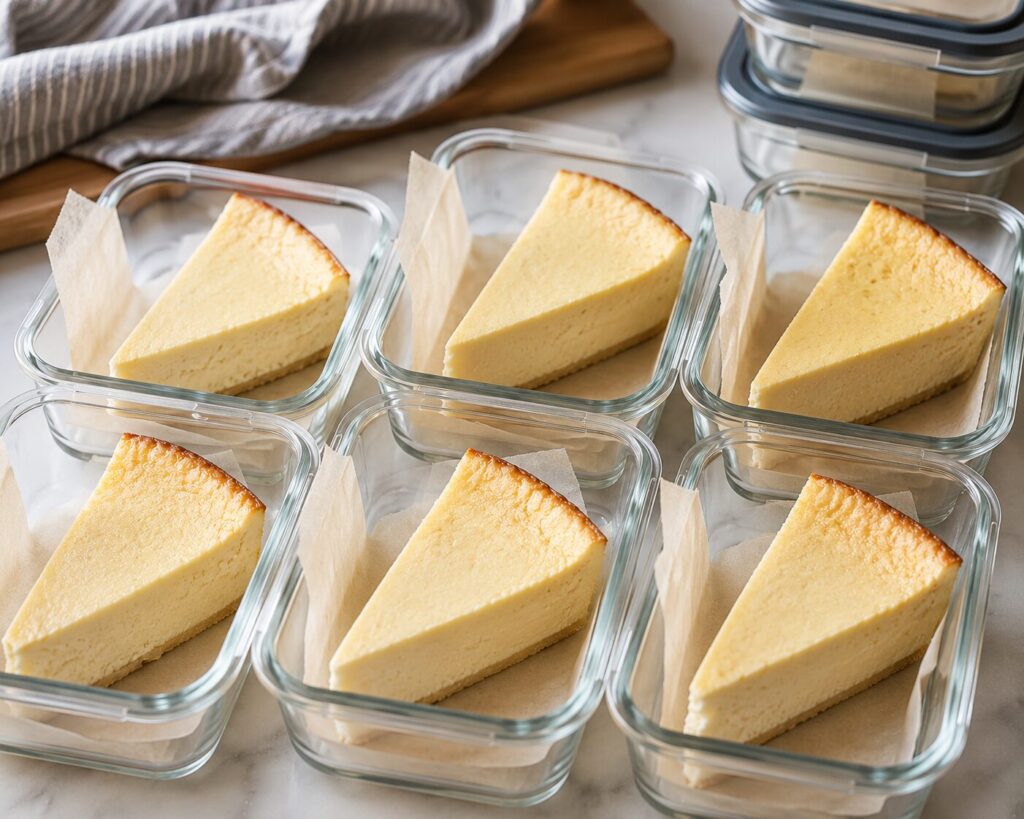
| Best for | Traditional presentation | Cheesecake bars for meal prep |
Springform vs. Cake Pan
| Springform Pan | Regular Cake Pan | |
|---|---|---|
| Removal | Sides release cleanly | Requires inverting or careful lifting |
| Water bath risk | Can leak if not foil-wrapped well | No leak risk |
| Best for | Clean presentation slices | Simpler cleanup, serve straight from the pan |
Cooling Guide
| Stage | Time | What’s Happening |
|---|---|---|
| Oven rest (door cracked) | 30 minutes | Gradual temperature drop reduces crack risk |
| Counter cooling | 30–45 minutes | Brings cheesecake to near room temperature |
| Refrigeration | Minimum 4 hours, ideally overnight | Protein network fully firms; texture and flavor round out |
| Time | What to Expect |
|---|---|
| Just out of the oven | Soft with a noticeable jiggle |
| After 30 minutes | Slightly firmer edges |
| After 4 hours | Fully sliceable |
| Overnight | Creamiest texture with the best flavor |
LooksYumy Tip: I almost always leave mine overnight because the texture becomes noticeably smoother the next day.
Storage
Store the cheesecake, covered, in the refrigerator for up to 5 days. Because there’s no cream cheese or added stabilizer, it’s slightly more delicate than a traditional cheesecake, so keep it tightly covered to prevent it from picking up other flavors in the fridge or drying out at the surface.
LooksYumy Tip: Place a sheet of parchment paper over the cut surface before covering the cheesecake. It helps reduce moisture buildup and keeps the top from becoming sticky.
Freezing
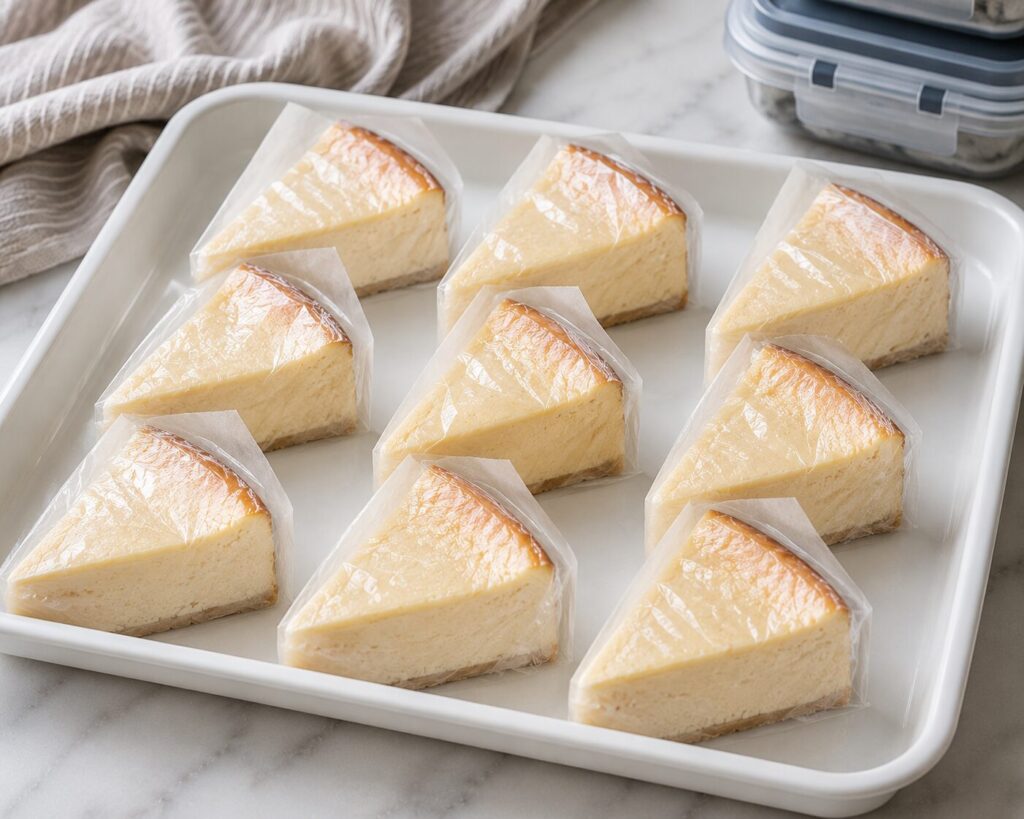
Freeze whole or in individual slices, wrapped tightly in plastic wrap and then foil, for up to 2 months. Thaw overnight in the refrigerator rather than at room temperature, which helps the texture come back closest to its original creaminess.
Reheating
This cheesecake isn’t meant to be reheated — it’s served cold, straight from the refrigerator. If a slice has been frozen and thawed, simply let it sit in the fridge until fully thawed rather than warming it, since heat will soften the structure past the point of clean slicing.
Meal Prep
Bake a full batch on a weekend and slice it into individual portions once fully chilled — this cheesecake holds its texture well across several days in the fridge, making it a genuinely practical make-ahead dessert for the week rather than a one-time treat. For grab-and-go portions, wrap individual slices separately so you’re not exposing the whole cheesecake to air every time you want a piece.
Recipe Variations
- Cheesecake bars: Bake in a lined 8×8-inch pan instead of a round pan, reducing bake time by about 5–10 minutes, and slice into squares once chilled.
- Ramekin cheesecakes: Divide the batter among 6–8 ramekins for individual portions; reduce bake time to about 20–25 minutes, watching for the same slight-jiggle doneness cue.
- Lemon version: Add the zest of one lemon to the batter for a brighter, tangier variation.
- Flavored yogurt version: Using flavored Greek yogurt instead of plain works, but expect a sweeter, less versatile flavor, and check the sugar content, since flavored yogurts vary widely in added sugar — plain yogurt with your own sweetener gives you the most control.
Can You Bake in Ramekins?
Yes — ramekins are one of the most convenient adaptations of this recipe, since they portion themselves and bake significantly faster than a full-size cheesecake. Watch them closely past the 18-minute mark, since smaller portions move through the doneness window faster than a full pan does.
Can You Make Cheesecake Bars?
Yes — a square pan works well for this batter, and bars are genuinely convenient for meal prep, since they’re easy to portion into consistent grab-and-go pieces once chilled.
Serving Ideas
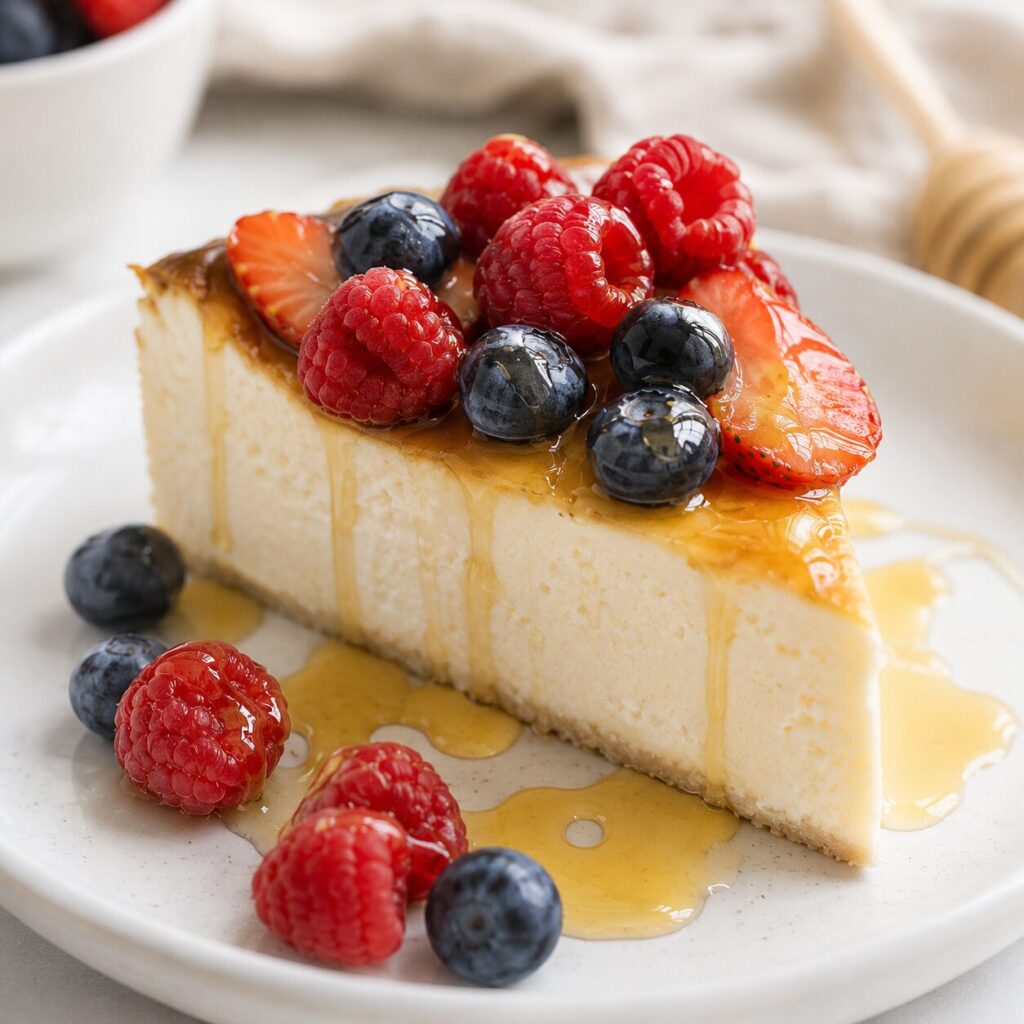
Serve it plain, straight from the fridge, for the cleanest showcase of the tangy, creamy flavor. A drizzle of honey or a spoonful of fresh berries on top turns it into something closer to a restaurant-style dessert with almost no additional effort.
Toppings
Fresh berries, a light honey drizzle, a dusting of cinnamon, or a spoonful of sugar-free jam all work well without overpowering the tang of the yogurt base. Avoid heavy, rich toppings like whipped cream in large amounts if you want the protein-forward nature of the dessert to stay the star of the plate.
Once you’ve mastered this recipe, it’s easy to branch out into other protein-packed desserts. Start with our creamy Protein Cheesecake for a richer option, try the 2 Ingredient Cottage Cheese Cheesecake for a different flavor profile, or browse our complete High Protein Desserts collection for more simple recipes you’ll actually want to make again.

2 Ingredient Greek Yogurt Cheesecake (Creamy, High-Protein & So Easy)
- Prep Time: 5 Minutes
- Cook Time: 45 Minutes
- Total Time: 50 Minutes
- Yield: 8 slices 1x
- Category: Dessert
- Method: Baking
- Cuisine: American
- Diet: Gluten-Free
Description
This 2 Ingredient Greek Yogurt Cheesecake is creamy, tangy, and surprisingly rich using only Greek yogurt and eggs. With no cream cheese or crust required, it’s a simple high-protein dessert that’s easy enough for beginners yet delicious enough to satisfy any cheesecake craving.
Ingredients
- 2 cups (480 g) full-fat plain Greek yogurt
- 3 large eggs, room temperature
Optional
- 2–3 tbsp honey or your preferred sweetener
- 1 tsp vanilla extract
- Fresh berries for serving
Instructions
- Preheat the oven to 300°F (149°C).
- Wrap the outside of a 9-inch springform pan with two layers of aluminum foil.
- Whisk or blend the Greek yogurt and eggs until completely smooth.
- Stir in the optional sweetener and vanilla if using.
- Pour the batter into the prepared pan.
- Place the cheesecake pan inside a larger roasting pan.
- Fill the roasting pan halfway with hot water to create a water bath.
- Bake for 40–45 minutes until the edges are set and the center has a gentle jiggle.
- Turn off the oven and leave the cheesecake inside with the door slightly open for 30 minutes.
- Cool completely at room temperature.
- Refrigerate for at least 4 hours, preferably overnight.
- Slice and serve chilled.
Notes
- Use full-fat Greek yogurt for the creamiest texture.
- Room-temperature eggs blend more smoothly and help prevent graininess.
- Do not overbake—the center should still jiggle slightly.
- A water bath produces the smoothest, crack-free cheesecake.
- Overnight chilling provides the best flavor and texture.
- Store covered in the refrigerator for up to 5 days.
Nutrition
- Serving Size: 1 slice (1/8 cheesecake)
- Calories: 95 kcal
- Sugar: 2.9 g
- Sodium: 85 mg
- Fat: 4.3 g
- Saturated Fat: 2.4 g
- Unsaturated Fat: 1.4 g
- Trans Fat: 0 g
- Carbohydrates: 3.8 g
- Fiber: 0 g
- Protein: 8.3 g
- Cholesterol: 81 mg
FAQ
Can I bake this in a muffin pan?

Absolutely. Divide the batter evenly between lined muffin cups and bake for about 18–22 minutes. The centers should still have a slight wobble when removed from the oven. Mini cheesecakes also chill much faster than a full-sized version.
Why is my cheesecake watery?
This almost always comes down to the yogurt itself — a loosely strained or lower-quality Greek yogurt carries more liquid than a well-strained one, and that extra moisture can separate out during baking. Choose a thick, well-strained plain Greek yogurt for the most reliable result.
Why did my cheesecake crack?
Cracking is usually caused by overmixing (trapped air escaping during the bake) or skipping the water bath (uneven heat causing the surface to stress as it expands). Mix gently and always use a water bath for the cleanest result.
Can I use flavored yogurt?
Yes, though it will affect both sweetness and flavor complexity. Plain yogurt with your own added sweetener gives you more control over the final result.
Why does my cheesecake firm up more in the fridge than it seemed to in the oven?
The protein network that forms during baking continues to tighten and settle as the cheesecake cools and chills, which is a normal part of how this dessert reaches its final texture — that’s why the full chill time genuinely matters, not just for temperature.
What’s the best internal temperature to look for?
Around 150–155°F (66–68°C) at the center, pulled while there’s still a gentle jiggle. Carryover cooking finishes the rest of the setting process as it cools.
Can I make this without a water bath? You can, but expect a higher risk of cracking and slightly uneven baking between the edges and center. If you skip it, lower the oven temperature by another 10°F and watch it closely.
Why do room-temperature ingredients matter so much in a 2-ingredient recipe? With only two ingredients, there’s nothing else in the batter to smooth over an uneven blend. Cold eggs mixed into yogurt can cause small pockets of fat to firm up unevenly, which shows up later as graininess.
Why does overbaking change the texture so much here? Because there’s very little fat buffering the eggs compared to a traditional cream-cheese cheesecake, this version moves from properly set to overcooked more noticeably. Pull it at the first reliable sign of doneness rather than waiting for a fully firm top.
Can I use skyr instead of Greek yogurt?
Yes. Skyr has a similarly thick, high-protein texture and behaves much like Greek yogurt in this recipe. Depending on the brand, the finished cheesecake may be slightly firmer and tangier, so check for doneness using the same gentle jiggle test.
Final Thoughts
This cheesecake comes down to two habits: choosing a properly strained, thick Greek yogurt, and pulling it from the oven at a gentle jiggle rather than waiting for it to look completely firm. Everything else in this guide — the water bath, the room-temperature eggs, the full chill time — exists to support those two decisions. Once you’ve made it a couple of times and know what that jiggle should look like, this becomes one of the fastest, simplest desserts you can put together with almost nothing in the fridge.