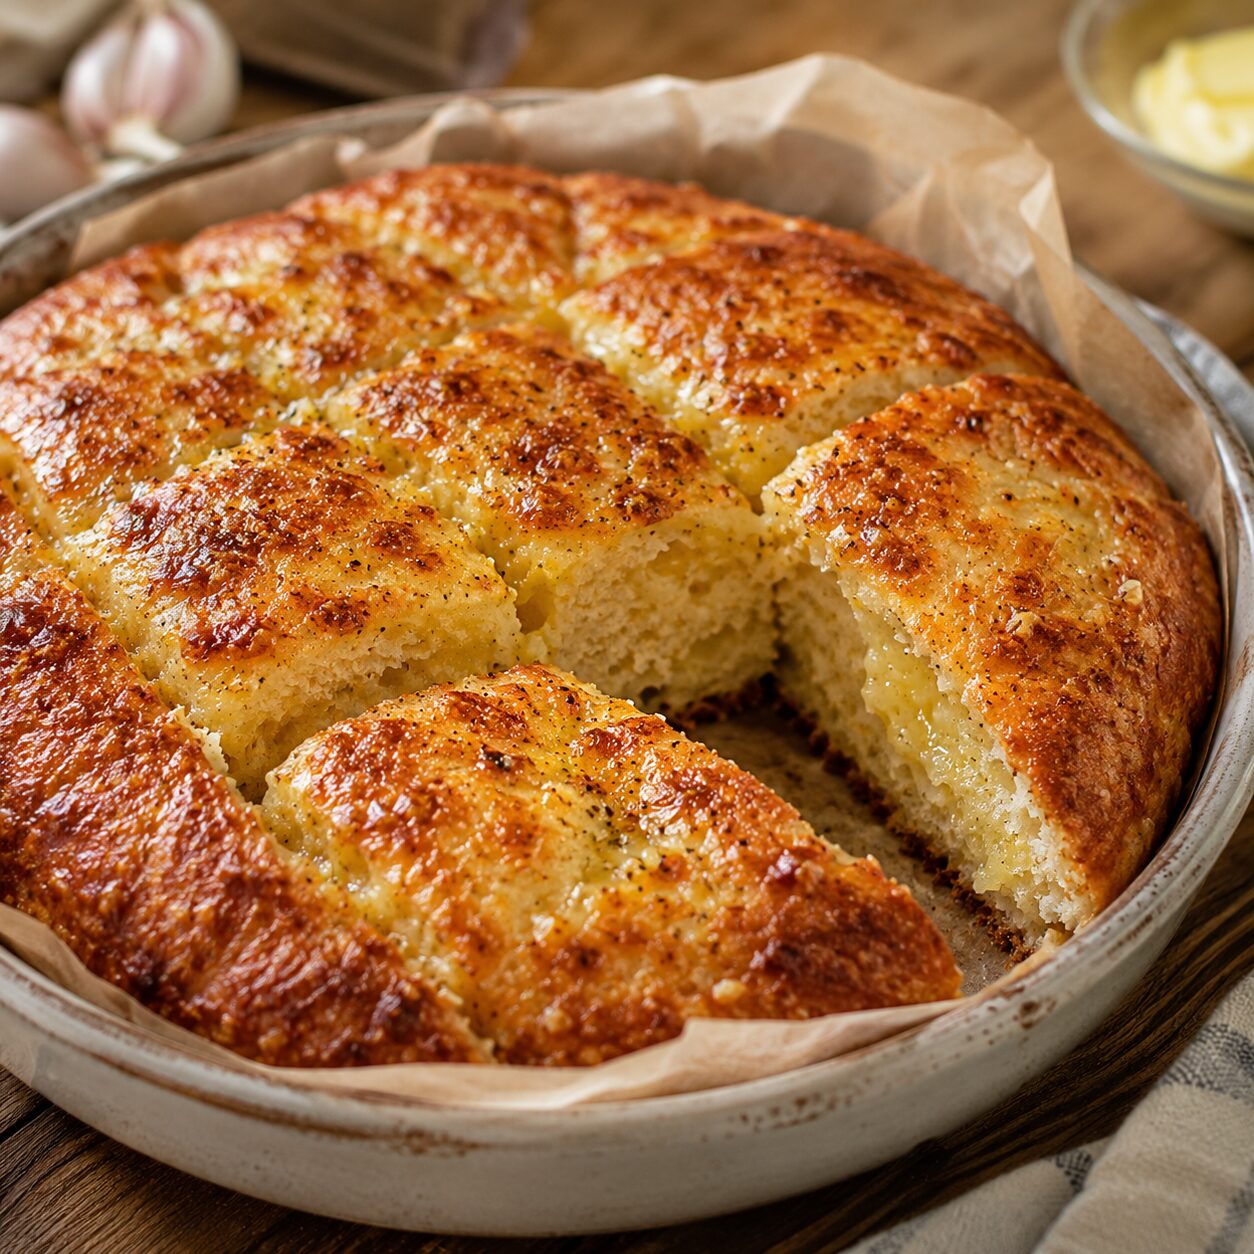
The first time I made carnivore garlic bread, I pulled it out of the oven, brushed on the garlic butter too soon, and watched the whole top turn soggy before it even cooled. The second attempt collapsed in the middle when I sliced into it. It took a handful of adjustments — mostly around thickness and timing — before I landed on a version that actually slices, holds its shape, and doesn’t turn rubbery by the time it hits the table.
This is a flourless, egg-and-cheese based bread with a garlic butter finish, built specifically to solve the problems that come up over and over with carnivore-style baking: wet centers, collapsed middles, and butter that soaks in instead of crisping up.
Carnivore garlic bread is a flourless bread made from eggs and cheese, baked until firm and sliceable, then finished with a garlic butter topping. The eggs and cheese form the structure through protein coagulation and melting, while butter and garlic added after baking create the classic garlic bread flavor without softening the crumb. It takes about 30 minutes start to finish.
“This bread builds on the same base structure as our original Carnivore Bread, adjusted here for a shorter bake and a garlic butter finish.”
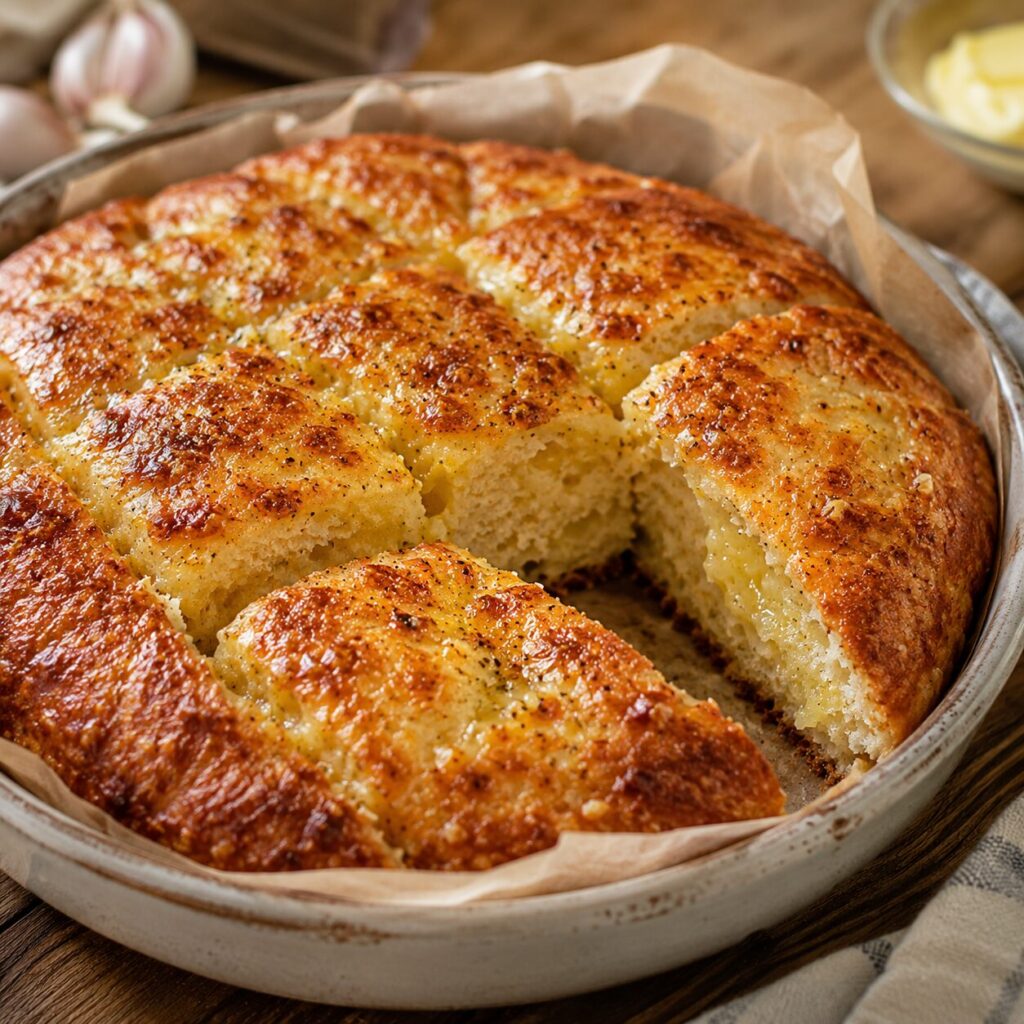
Table of Contents
At a Glance
| Detail | Information |
|---|---|
| Prep Time | 10 minutes |
| Cook Time | 20 minutes |
| Total Time | 30 minutes |
| Yield | 6 slices |
| Texture | Firm, sliceable, soft interior |
| Best For | Side dish, dipping, sandwich base |
| Difficulty | Easy |
| Storage | Refrigerate up to 5 days, freeze up to 2 months |
Why You’ll Love This Garlic Bread
This isn’t a thin, foldable flatbread — it’s built to be thicker, sliceable, and sturdy enough to pick up by hand without folding in half. A few things I think you’ll notice right away:
- It slices cleanly instead of crumbling apart
- The garlic butter crisps the top instead of soaking into it
- No flour, no almond flour, no bread-specific carnivore flour blends
- It reheats without turning into a rubbery disc
- There’s a strict-carnivore version if garlic doesn’t fit your approach
Is Garlic Actually Carnivore?
No — garlic is a plant, and strictly speaking, it doesn’t belong in a zero-carb, animal-only diet. I want to be upfront about that instead of stretching the definition, because it matters for readers who are following carnivore closely.
This recipe is built for people following a flexible or animal-based approach who include garlic and similar low-carb seasonings. If you’re following strict carnivore, skip down to the Strict Carnivore Version section below, where the bread base stays exactly the same and only the topping changes.
Who This Recipe Is Best For
This recipe works well if you want a bread-like side dish that doesn’t rely on flour or nut-based substitutes, and if you’re comfortable including a small amount of garlic in an otherwise animal-based diet. If you need something completely garlic-free, the strict version further down covers that without asking you to skip the recipe entirely.
Ingredients
Bread Base
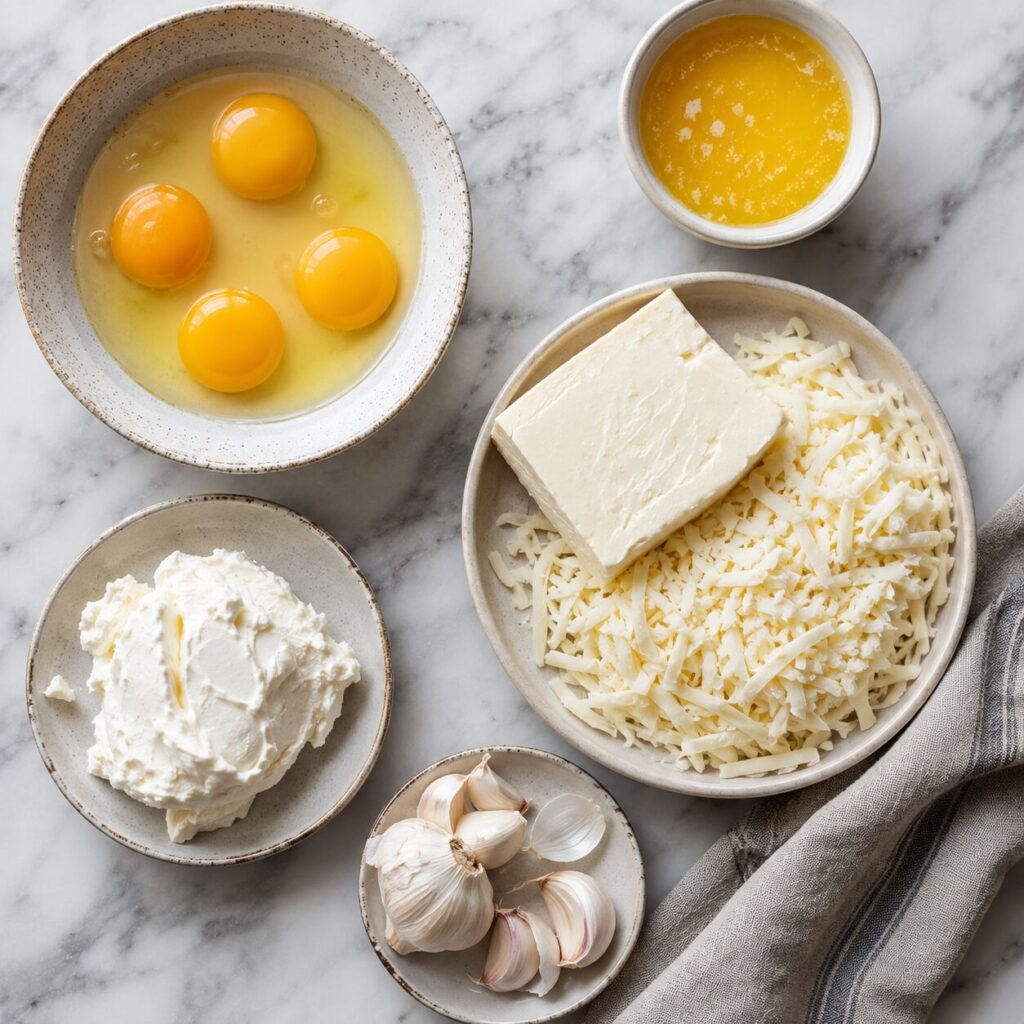
- 4 large eggs
- 4 oz cream cheese, softened
- 2 cups shredded mozzarella cheese
- ¼ tsp salt
Garlic Butter Topping
- 4 tbsp salted butter, melted
- 2 cloves garlic, finely minced (or 1 tsp garlic powder)
- Pinch of salt
Keeping the base and the topping visually separate matters here — the base is what gives you structure, and the topping is entirely about flavor and crisping the surface. Mixing them together at the batter stage is one of the more common mistakes I’ll cover below.
What Each Ingredient Does
Eggs set the structure. As they heat, the proteins unfold and bond into a firm network, which is what keeps the bread from collapsing once it’s out of the oven.
Cream cheese keeps the crumb soft. Without it, the bread firms up more like a baked omelet — structurally fine, but noticeably stiffer.
Mozzarella adds body and a mild, meltable base flavor, and firms up as it cools, giving the bread enough backbone to slice.
Butter in the topping carries the garlic flavor and helps the top brown, but only if it’s added at the right point in the bake — more on that below.
Garlic is the flavor driver. Fresh and powdered versions behave differently in this recipe, covered in its own section.
Choosing the Right Cheese
Whole-milk, block mozzarella that you shred yourself melts the most smoothly and gives the firmest structure once cooled. Pre-shredded cheese works fine for convenience, but the light starch coating most brands use to prevent clumping can make the finished crumb very slightly softer and less cleanly sliceable.
Fresh Garlic vs Garlic Powder
| Feature | Fresh Garlic | Garlic Powder |
|---|---|---|
| Flavor | Sharper, more pungent | Milder, more even |
| Moisture | Adds slight moisture | Essentially dry |
| Burn Risk | Higher, especially under a broiler | Lower |
| Distribution | Uneven unless minced very finely | Very even |
| Best Use | Fresh, bold garlic bread flavor | Milder flavor, lower risk of burning |
Recommendation: fresh garlic gives the better flavor for this recipe, but mince it finely and keep an eye on it under the broiler, since small pieces of fresh garlic burn faster than you’d expect. If you’re new to this recipe, garlic powder is the safer starting point.
Equipment
- Mixing bowl
- Whisk
- 8- or 9-inch round or square baking dish, or a small oven-safe skillet
- Parchment paper
- Pastry brush, for the garlic butter
- Small saucepan or microwave-safe bowl, for melting butter
Before You Start
Bring the cream cheese to room temperature before you begin — cold cream cheese leaves lumps that turn into soft, weak spots in the finished bread. Preheat the oven fully before the batter goes in; an oven that’s still climbing to temperature tends to leave the center underset.
Step-by-Step Instructions
- Preheat the oven to 375°F (190°C). Line a baking dish or oven-safe skillet with parchment paper.
- Whisk the eggs in a bowl until smooth.
- Add the softened cream cheese and whisk until no large lumps remain.
- Stir in the mozzarella and salt until evenly combined.
- Pour the batter into the prepared dish, spreading it into an even layer about ¾ inch thick.
- Bake for 18–20 minutes, until the top is set, lightly golden, and the center no longer jiggles.
- Remove from the oven and let it rest for 5 minutes.
- While it rests, stir together the melted butter, minced garlic, and salt for the topping.
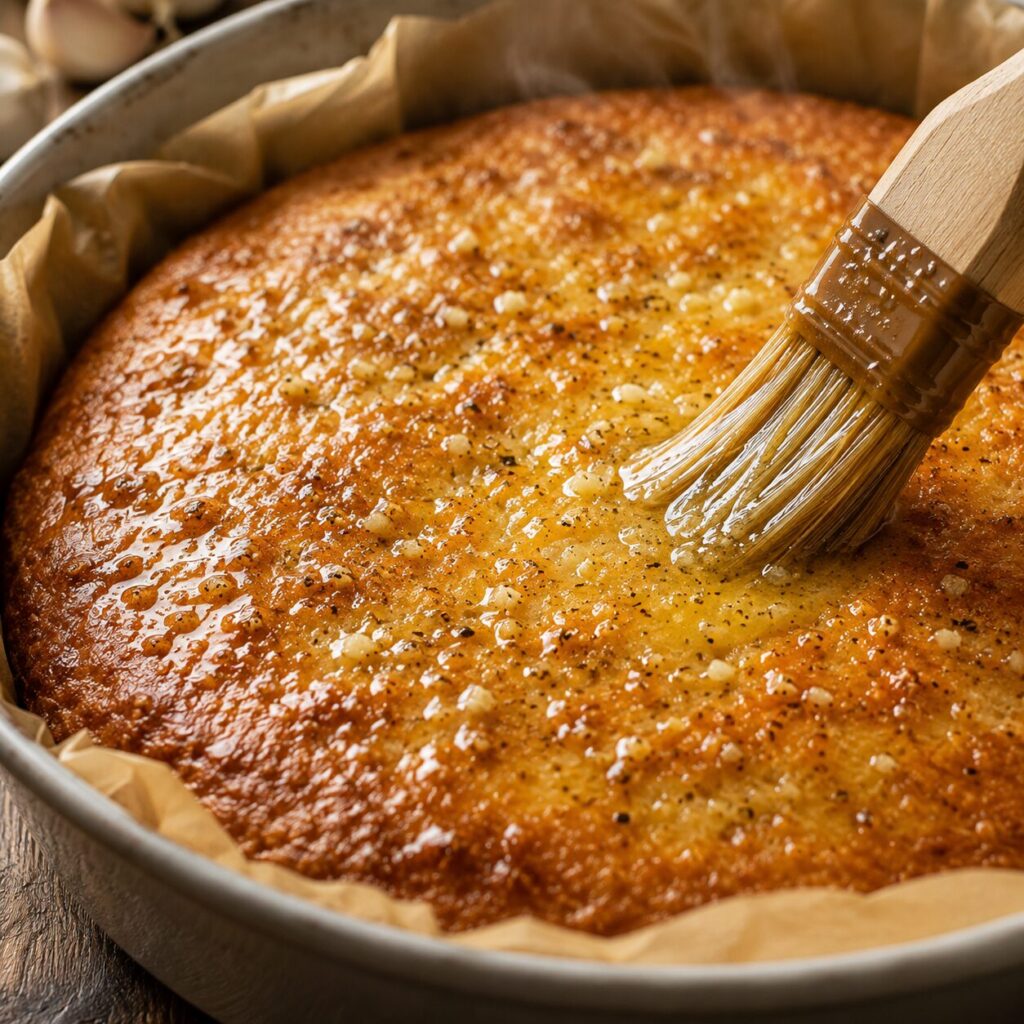
- Brush the garlic butter generously over the top of the warm bread.
- Return the bread to the oven for 3–4 minutes, just until the garlic butter is fragrant and the top looks lightly toasted.
- Rest for 5 more minutes before slicing.
How the Batter Should Look
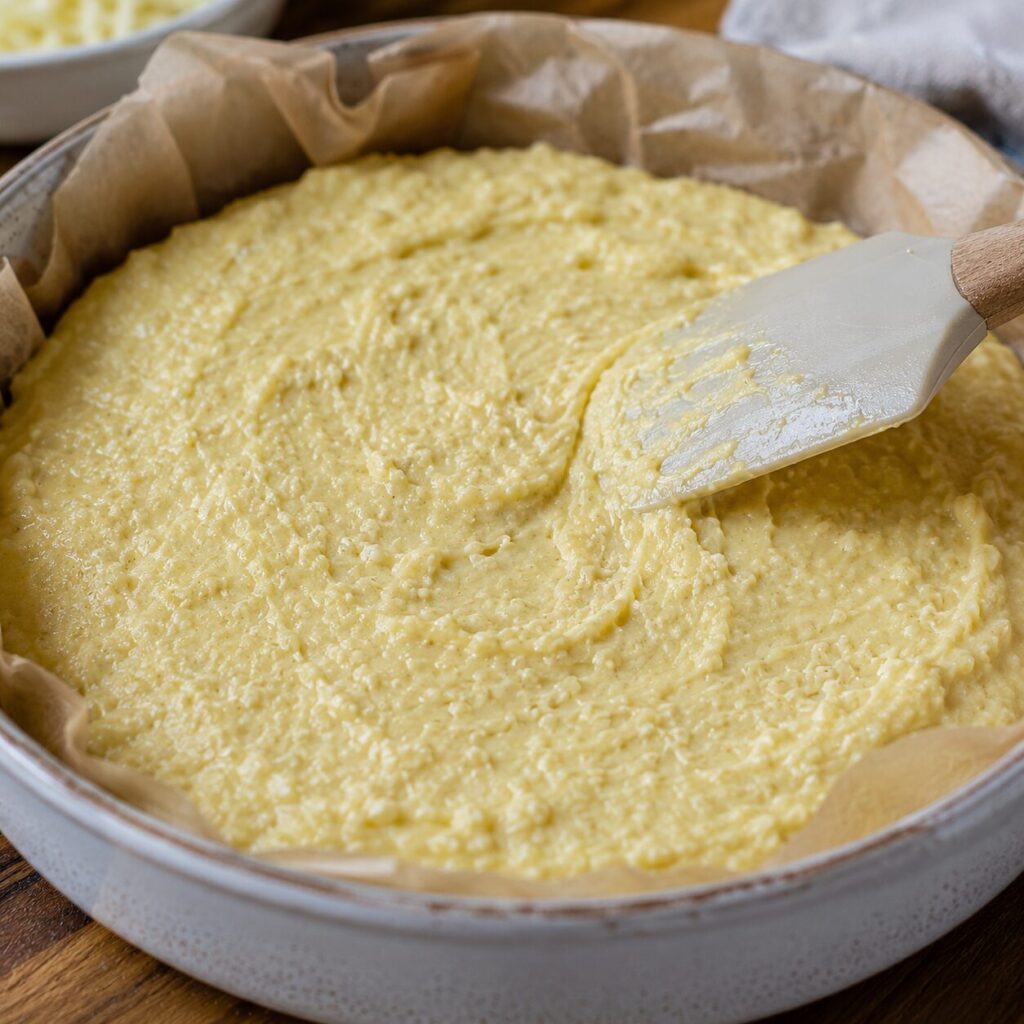
Before baking, the batter should be thick enough to hold a spread shape rather than pour thin and level on its own — closer to a heavy pancake batter than a thin crepe batter. If it runs completely flat within a few seconds of spreading, it’s slightly thin and may need a few extra minutes of bake time.
How to Make the Garlic Butter Topping
Melt the butter first, then stir in the garlic and salt off the heat. Adding raw garlic to butter that’s still actively bubbling on the stove tends to over-brown it before it ever reaches the bread. Letting the butter cool slightly before mixing in the garlic keeps the flavor cleaner.
“If you’d rather work with a thinner, more foldable base, our Carnivore Flatbread uses a similar batter spread much thinner.”
When to Add the Garlic Butter
This is one of the details that made the biggest difference in how the finished bread turned out.
| Timing | Effect on Browning | Effect on Moisture | Effect on Crispiness | Garlic Intensity |
|---|---|---|---|---|
| Before baking | Uneven, often too dark at edges | Softens the top significantly | Poor — top stays soft | Muted, garlic can scorch |
| Halfway through baking | Moderate browning | Slight softening | Fair | Moderate |
| After the base sets (recommended) | Even, controlled browning | Minimal | Best | Strong, fresh |
| Immediately after baking, no return to oven | Little to no browning | Butter sits on the surface | Soft, not crisp | Strong but less toasted |
Recommended method: brush the garlic butter on after the base has fully set, then return it to the oven briefly. This is what gives you a top that’s browned and fragrant instead of soggy.
Visual Doneness Guide
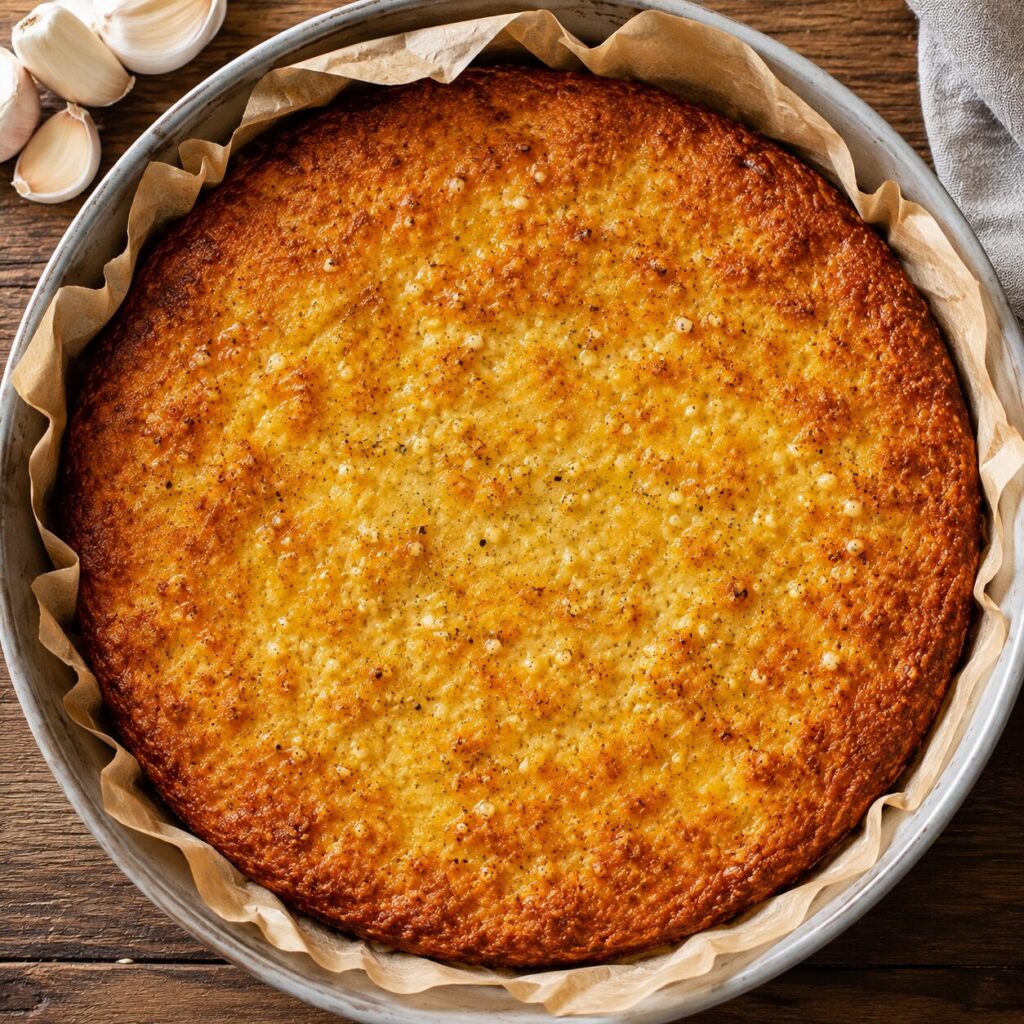
- Top color: pale gold before the garlic butter goes on; deeper gold with light browning after the second bake
- Edge color: slightly darker than the center, but not deep brown
- Center appearance: matte, not glossy or wet-looking
- Bottom structure: firm enough that the parchment lifts away cleanly, not soft or damp
- Touch test: gently pressing the center should spring back slightly rather than leaving a dent
- Slight shrinkage: the edges pulling in slightly from the pan is normal and usually means it’s fully set, not overbaked
How to Get Crispy Golden Edges
Give the dish a few extra minutes in the oven during the initial bake, and make sure the garlic butter step happens as a genuine second bake rather than just brushing it on off-heat. The direct heat after the butter goes on is what actually crisps the surface.
How to Keep the Center Soft
Don’t extend the initial bake much past the point where the center stops jiggling — a minute or two past done is the difference between a soft interior and a noticeably firmer, drier one. Resting before slicing also helps; cutting into it immediately releases steam that would otherwise keep the crumb tender for a few more minutes.
Why Carnivore Garlic Bread Turns Rubbery
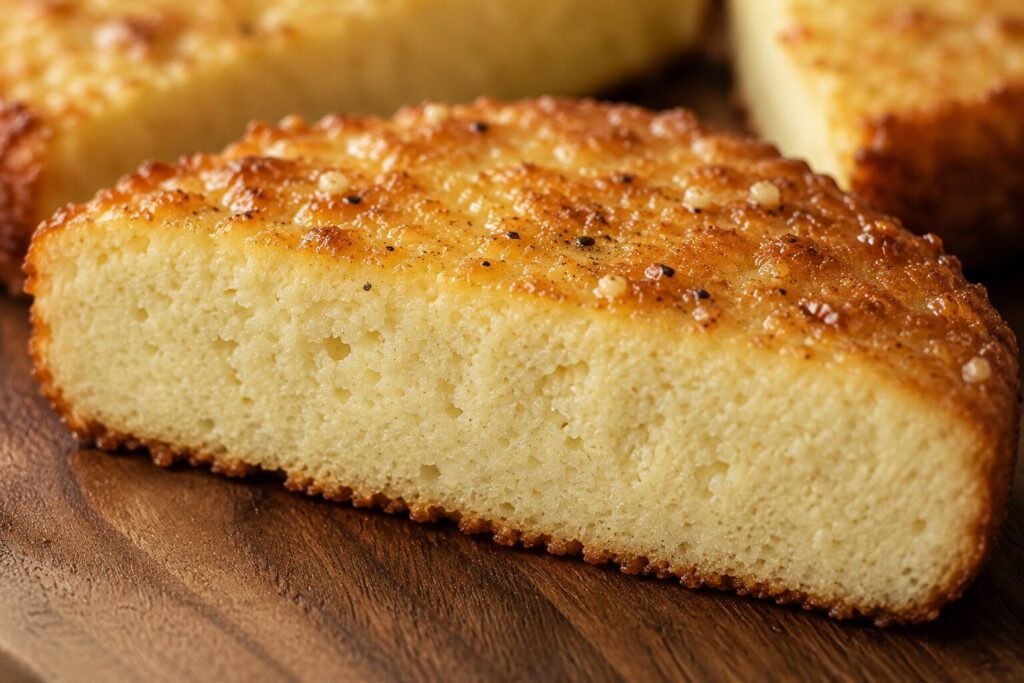
Rubbery texture almost always comes down to one of two things: too much egg relative to cheese, or baking past the point of doneness. Once the protein network is fully set, additional time in the oven just tightens it further, which reads as rubbery rather than firm.
Why the Center Can Stay Wet
A wet center usually means the bread was pulled too early, or it was baked in a dish that’s too small for the batter volume, leaving it thicker than the recipe accounts for. Depth matters as much as time here — a thicker layer needs measurably longer in the oven.
Common Mistakes
- Brushing garlic butter on before the base has set, which softens the whole top
- Using a baking dish that’s too small, leaving the batter thicker than intended
- Slicing immediately out of the oven, before the structure has had a chance to firm up
- Adding raw garlic directly to hot, actively bubbling butter, which can scorch it
- Skipping the rest period entirely
Problem → Cause → Fix
| Problem | Most Likely Cause | Fix |
|---|---|---|
| Rubbery bread | Overbaked past the point the center stopped jiggling | Pull it as soon as the center sets; don’t add extra “just in case” time |
| Wet center | Batter too thick for the bake time, or pulled too early | Use a wider dish for a thinner layer, or extend bake time in 2-minute increments |
| Bread collapses | Cut before it rested, or underbaked | Rest 5 minutes minimum before slicing; confirm center is matte and set |
| Oily surface | Too much butter added before the base set | Brush butter on after baking, not into the batter |
| Garlic burns | Fresh garlic exposed directly to broiler heat | Use garlic powder under the broiler, or watch fresh garlic closely and reduce time |
| Cheese burns | Second bake left in too long, or oven runs hot | Verify oven temperature; shorten the second bake to 2–3 minutes |
| Bread sticks | Pan not fully lined | Line the dish edge to edge with parchment |
| Bottom stays pale | Bake time slightly short, or dish placed too high in the oven | Move to a lower rack; extend bake by a few minutes |
| Bread falls apart | Sliced too soon, or cream cheese not fully incorporated | Rest fully before slicing; whisk cream cheese in until smooth before adding cheese |
| Strong egg flavor | Egg-to-cheese ratio slightly high | Keep to the recipe’s ratio; increasing eggs intensifies the egg flavor |
Texture Guide
Crispy vs Soft Decision Table
| If You Want | Do This |
|---|---|
| Crispier edges | Extend the initial bake by 2–3 minutes and use a slightly wider dish |
| Softer center | Pull it the moment the center stops jiggling, no later |
| Stronger garlic flavor | Use fresh garlic and increase to 3 cloves |
| More cheese pull | Add extra shredded mozzarella on top before the second bake |
| Firmer bread for dipping | Bake in a slightly smaller dish for a thicker result and extend time by 3–4 minutes |
Thickness Guide
| Thickness | Texture | Best Use |
|---|---|---|
| Thin (½ inch) | Softer, slightly more delicate | Quick side dish, smaller portions |
| Medium (¾ inch, as written) | Balanced, sliceable, firm enough to hold | Standard serving, dipping, sandwiches |
| Thick (1 inch+) | Denser, more bread-like chew | Heartier side, larger gatherings |
Thicker batter needs more time — expect to add 4–6 minutes to the initial bake for a full 1-inch depth, and check the center carefully before assuming it’s done.
Strict Carnivore Version
Since garlic isn’t animal-derived, here’s a version built entirely from animal-based ingredients. The bread base stays exactly the same — only the topping changes.
Strict Carnivore Topping: melted salted butter, a spoonful of rendered bacon fat, finely crumbled cooked bacon, and a light dusting of grated parmesan. Brush the butter and bacon fat mixture on after the base sets, exactly as you would the garlic butter, then top with the crumbled bacon and parmesan before the final few minutes in the oven.
This won’t taste like garlic bread, but it gives you the same crisp, savory top finish using only animal-derived ingredients.
Carnivore Garlic Cheese Bread Variation
If you want a more indulgent carnivore garlic cheese bread, this variation adds an extra layer of melted mozzarella over the garlic-butter topping.
Add ½ cup of additional shredded mozzarella on top right after brushing on the garlic butter, then return the bread to the oven for the final 3–4 minutes.
For a more deeply browned cheese crust, broil for the final 1–2 minutes only while watching it closely. The cheese can brown quickly, especially with fresh garlic underneath.
Let the bread rest for a full 5 minutes before slicing. Cutting into it while the cheese is still completely molten can make the topping pull away from the bread instead of setting into a cohesive layer.
Best cheese for this variation: freshly shredded whole-milk mozzarella gives you the best melt and stretch, while a little Parmesan on top adds more browning and savory flavor.
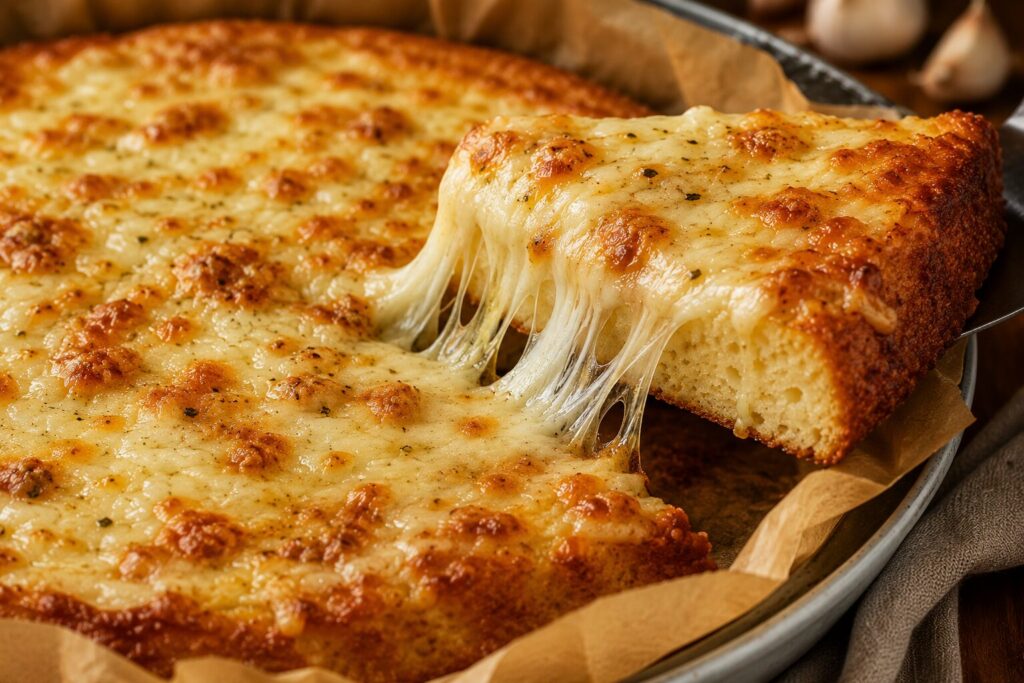
How to Get a Better Cheese Crust
For the best cheesy finish, don’t add the extra mozzarella before the bread base has set. The base needs to be firm enough to support the cheese without becoming greasy or soggy.
Add the cheese only during the final stage, then use short, controlled heat to brown the surface.
If the cheese is browning before the bread is fully heated through, skip the broiler and finish with regular oven heat instead.
“This also holds up well alongside a carnivore pizza night — see our Carnivore Pizza Dough for a sturdier, topping-ready base.”
Air Fryer Version
The air fryer runs hotter and more directly than a conventional oven, so this isn’t a direct swap of the same numbers.
Use a small, oven-safe round dish or a parchment-lined air fryer basket liner that fits your model. Set the air fryer to 325°F (163°C) — noticeably lower than the oven temperature — and bake for 12–14 minutes, checking at the 10-minute mark. Air fryers brown the top faster than a conventional oven cooks the center, so a lower temperature helps the middle catch up. Add the garlic butter only after the base has fully set, then run it for 2 more minutes to finish.
What to Serve With Carnivore Garlic Bread
This holds up well next to a seared steak, alongside ground beef and eggs for breakfast, as a side for meatballs, or torn into pieces for dipping into a bowl of bone broth. It also works well cut into smaller squares alongside a carnivore pizza night, or split and layered like a sandwich base for burger patties.
Storage
Store cooled bread in an airtight container in the refrigerator for up to 5 days.
Freezing
Freeze individual slices separated by parchment paper in a freezer-safe bag or container for up to 2 months.
Best Way to Reheat It
| Method | Result |
|---|---|
| Microwave | Fastest, but edges turn noticeably softer and slightly rubbery |
| Oven | Best overall result — restores firm texture and re-crisps the top |
| Air fryer | Very good for restoring crispy edges quickly |
| Skillet | Good for a single slice, adds light color to the surface |
Recommended method: oven at 325°F for 5–6 minutes, or air fryer at 325°F for 3–4 minutes, both of which do the best job of restoring crisp edges without drying out the center.
Meal Prep
Bake a full batch, portion into slices once fully cooled, and store with parchment between pieces. It holds its texture through at least a few reheats, which makes it genuinely useful for prepping ahead rather than something you only make fresh.
“For a chewier, ring-shaped option, see Carnivore Bagels, and if you want a handheld version for burgers, try our 3 Ingredient Carnivore Burger Buns.”
FAQ
Can I make carnivore garlic bread without flour? Yes — this recipe is entirely flour-free, built from eggs and cheese for structure.
Is garlic allowed on a carnivore diet? Not on a strict carnivore diet, since garlic is plant-derived. It fits a flexible or animal-based approach. See the Strict Carnivore Version above for a garlic-free option.
Can I make it without garlic? Yes, use the strict carnivore topping instead, built from butter, bacon fat, bacon, and parmesan.
Can I use garlic powder instead of fresh garlic? Yes, and it’s actually the safer option if you’re broiling the top, since it’s far less likely to scorch than small pieces of fresh garlic.
Why did my carnivore bread turn rubbery? Most likely it was baked slightly past the point the center set. Pull it as soon as it stops jiggling.
Why is the middle wet? The batter was probably too thick for the bake time, or it was pulled from the oven too early. Check for a matte, set appearance in the center before removing it.
Can I make it in an air fryer? Yes — use a lower temperature than the oven method and check it a few minutes earlier than you’d expect.
Can I freeze carnivore garlic bread? Yes, individual slices freeze well for up to 2 months when separated by parchment paper.
How do I reheat it without making it rubbery? Reheat in the oven or air fryer rather than the microwave; both do a better job of restoring the original texture.
Can I make cheesy carnivore garlic bread? Yes, add extra mozzarella on top before the final few minutes in the oven, and rest before slicing.
Can I make mini garlic bread pieces? Yes, bake the same batter in a muffin tin or divided small dishes, and reduce the initial bake time by about 5 minutes, checking for doneness with the same visual cues.
What cheese works best? Freshly shredded, whole-milk mozzarella gives the firmest, cleanest slice. Pre-shredded works fine for convenience with a very slightly softer result.
Carnivore Garlic Bread
- Prep Time: 10 minutes
- Cook Time: 20 minutes
- Total Time: 30 minutes
- Yield: 6 slices 1x
- Category: Bread
- Method: Baking
- Cuisine: American
- Diet: Gluten-Free
Description
A flourless, egg-and-cheese bread finished with a garlic butter topping. Firm enough to slice and pick up by hand, with a soft interior and a golden, fragrant top.
Ingredients
- 4 large eggs
- 4 oz cream cheese, softened
- 2 cups shredded mozzarella cheese
- 1/4 tsp salt
Garlic Butter Topping- 4 tbsp salted butter, melted
- 2 cloves garlic, finely minced (or 1 tsp garlic powder)
- Pinch of salt
Instructions
- Preheat oven to 375°F (190°C). Line an 8- or 9-inch baking dish with parchment paper.
- Whisk eggs until smooth.
- Add softened cream cheese and whisk until no large lumps remain.
- Stir in mozzarella and salt until evenly combined.
- Pour into the prepared dish and spread to about ¾ inch thick.
- Bake 18–20 minutes, until set, lightly golden, and the center no longer jiggles.
- Rest 5 minutes.
- Stir together melted butter, garlic, and salt.
- Brush generously over the warm bread.
- Return to the oven for 3–4 minutes, until fragrant and lightly toasted.
- Rest 5 more minutes before slicing.
Notes
For a strict carnivore version, replace the garlic butter with melted salted butter, rendered bacon fat, crumbled bacon, and grated parmesan, added after the base sets. For a cheesy variation, add ½ cup extra mozzarella on top before the final bake. Store leftovers refrigerated up to 5 days or frozen up to 2 months, separated by parchment paper. Nutrition values are estimates and will vary by brand.
Nutrition
- Serving Size: 1 slice (1/6 of recipe)
- Calories: 265
- Sugar: 1 g
- Sodium: 380 mg
- Fat: 22 g
- Saturated Fat: 12 g
- Unsaturated Fat: 8 g
- Trans Fat: 0 g
- Carbohydrates: 2 g
- Fiber: 0 g
- Protein: 14 g
- Cholesterol: 175 mg
Final Thoughts
Carnivore garlic bread earns its place at the table because it actually behaves like bread — it slices, it holds up in your hand, and the garlic butter crisps instead of soaking in, as long as it goes on at the right point in the bake. If you’ve had carnivore bread turn rubbery or collapse in the middle before, pay close attention to thickness and to that second, short bake after the garlic butter goes on. Those two details carry most of the difference between an average result and one you’ll actually want to make again.
If you’re building out more of a carnivore baking rotation, this bread pairs naturally with a few other recipes on the site. For something thinner and more foldable for wraps, Carnivore Flatbread is worth a look. If you want something sturdier for pizza night, Carnivore Pizza Dough covers that. For a chewier, ring-shaped option, see Carnivore Bagels, and if you’re after a handheld version for burgers or sandwiches, 3 Ingredient Carnivore Burger Buns is a good next stop. You’ll find the full collection, including the base Carnivore Bread recipe this one builds on, in the Carnivore Baking Hub.